Jason Thomas has always been an automotive and motorcycle enthusiast. Being a helicopter mechanic, it is hard for someone of his nature to keep his hands off classic cars and motorcycles. Back in 2015, Jason was working on a 1965 Ford T-Bird. He had done all the leg work of a basic restoration, including motor rebuild, new interior, fresh chrome, and paint. Then one Friday at a local car show in Arlington, Texas, a gentleman offered Jason too much money to refuse for the car. By the next day, the car was on a trailer and he had a stack of cash in his hands.
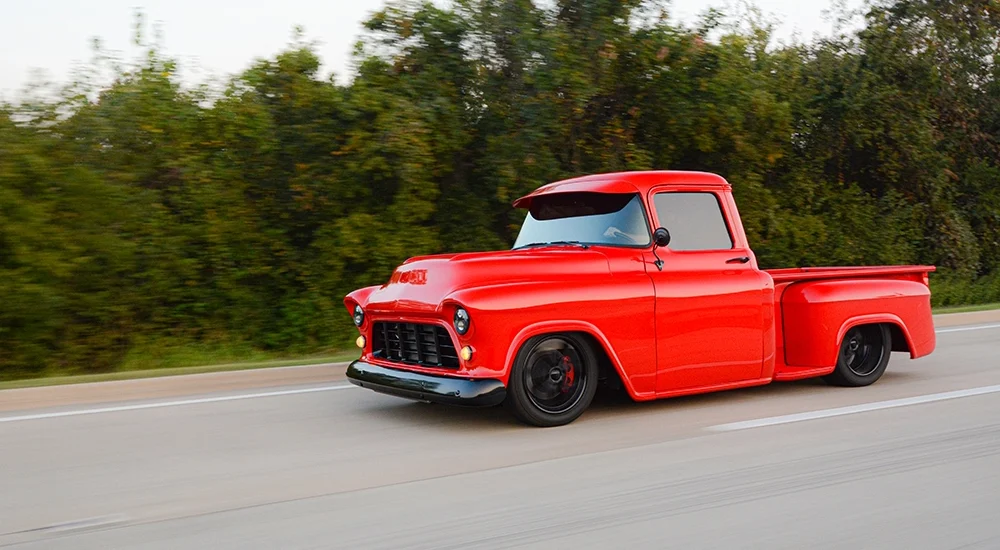
This left Jason with a dilemma: What should he get his hands on next? Jason really had no preference, but in less than one week he found and brought home the 1955 Chevy 3100 you see before your eyes—just a little more on the original, unrestored side. Jason really had no intentions of restoring the truck to what it is now; he just wanted a beater to mess around with. But as we all know, a die-hard car guy combined with an obsession for detail and perfection cannot leave anything alone.
Once the truck was in Jason’s garage and stripped down to the bare elements, the snowball started rolling. Beginning with the stock frame, Jason ordered up a Porterbuilt stage 3 front and rear suspension. Initially, he sourced a local shop to install the suspension but as time went on, he realized they were not up to the task. This is when he enlisted his good friend and former coworker Jerry Sanderlin to take over and help with the build. Jerry installed the Porterbuilt kit after he fully boxed the stock chassis with everything masterfully TIG-welded in.
Once the chassis was beefed up, Jason installed the rest of the Porterbuilt front and rear suspension components as well as the McGaughy’s 13-inch front disc brakes. To get the truck at just the right stance, laying rockers while at all the shows as well as the perfect ride height while cruising, an Air Lift Performance 3P system was installed. RideTech HQ shocks complement the Air Lift kit to smooth out the ride. Of course, all the front and rear suspension components were powdercoated to Jason’s liking.
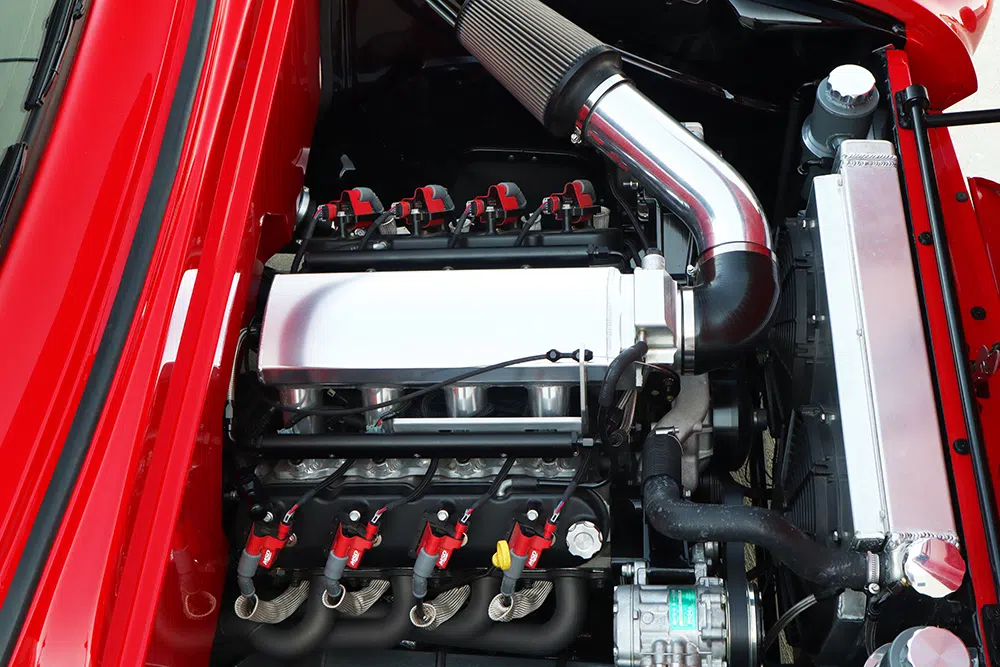
Once the chassis was ironed out, Jason started thinking about what powerplant to use. With all the available options, none other than a Chevy LQ9 was found to fit in the engine bay. Lacking the ability to leave anything alone, Jason called up Pro Touring Texas in Justin, Texas, to make the LQ just a little better. Once the engine was in Pro Touring Texas’ hands, they stuffed a 408 stroker kit in the block with all the goodies, including a Callies crankshaft, Callies connecting rods, and Diamond pistons. Up top, the engine has a set of milled GM 823 heads with a Brian Tooley Racing camshaft opening and closing the valves with .624/.595 lift and 239/254 duration, respectively. Mixing the air and fuel is a Summit Racing intake manifold and 102mm throttle body with MSD coil packs firing the spark plugs. Holley valve covers and accessory brackets sprucing things up. Holding everything together is none other than ARP fasteners and a Griffin radiator to keep everything cool. After the engine was assembled, it was dyno’d with a more than respectable 452 hp and 475 lb-ft of torque.
With the engine complete, Jason went back to Jerry Sanderlin and had him fabricate a full custom mandrel-bent 3-inch exhaust system including the headers. Again, Jerry TIG-welded everything together, and once that was complete the entire exhaust system with Magnaflow race mufflers was ceramic-coated in titanium color. A Boyd’s fuel tank normally used for ’67-’72 C10s fits perfectly between the frame rails to hold the fuel.
For the transmission, Jason chose a GM 4L80E built by Larry’s Speed Shop in Ft. Worth, Texas. Larry’s put all the heavy-duty goodies in the transmission and then installed a new Circle D converter with a 2,600-rpm stall. A Derale heat exchanger cools the transmission and is tucked away behind the front bumper. Transferring all the power from the engine and transmission to the rearend assembly is the original 1955 driveshaft with the necessary yokes to match the transmission and rearend. Speaking of rearends, Jason utilized the common Ford Explorer 8.8. The 8.8 was narrowed but still uses factory Ford 31 spline axles with a Track lock differential and 3.73 gearing. The factory style rear brakes were also used but upgraded to drilled, slotted, and zinc-coated aftermarket rotors with new pads. A E-Stopp electric parking brake holds the truck in place when actuated.
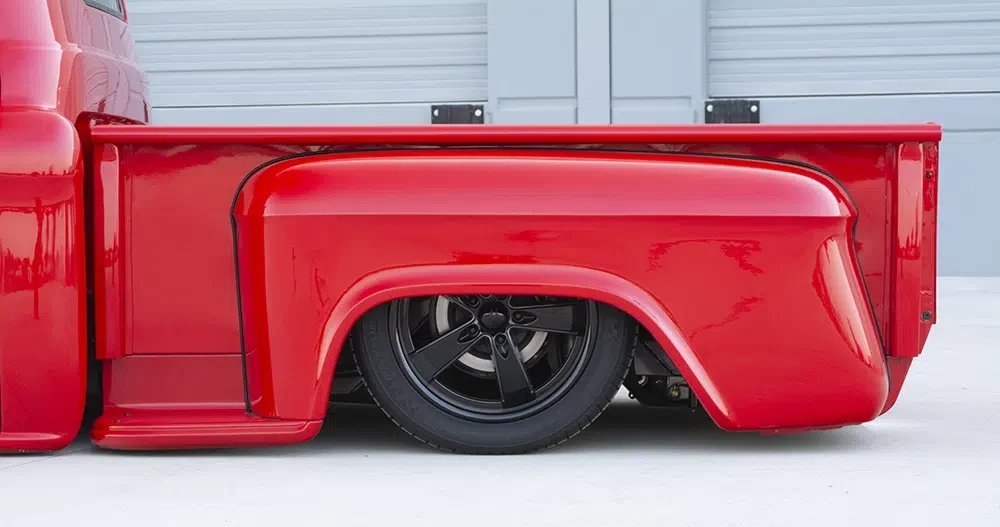
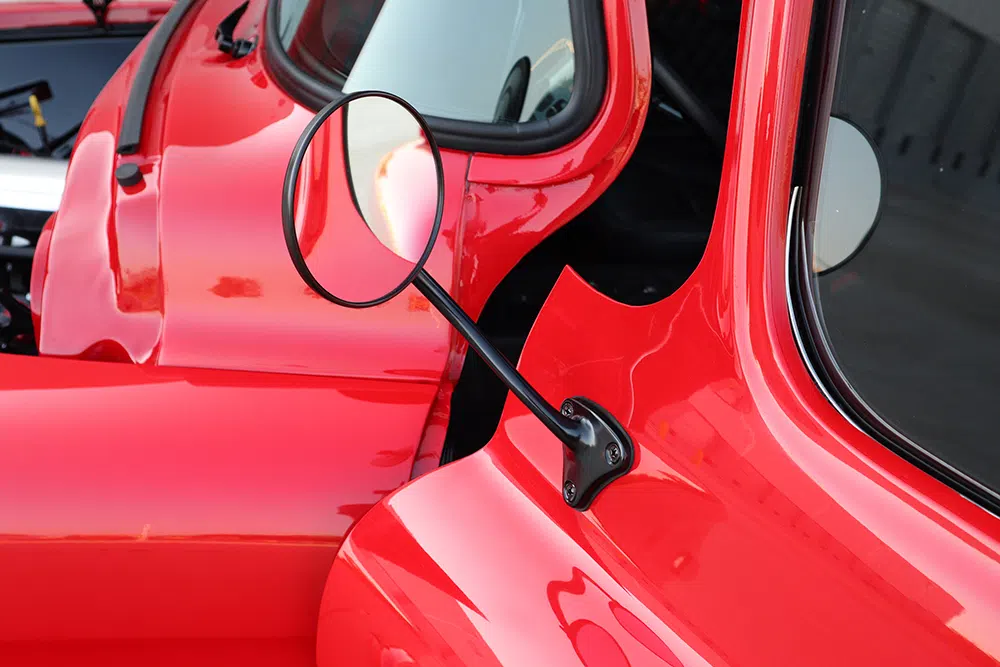
Moving on to the shell of the truck, Jason was looking to clean things up a bit and put the perfect wrapper on the outside. Again, with the help of Mr. Sanderlin, the firewall was smoothed, the cowl was smoothed, all the minor rust repaired, and the framework for the raised bed floor was fabricated. Jason and Jerry also installed the No Limit Engineering hood flip kit as the original hood hinges did not locate the hood in a clean consistent manner to Jason’s liking. In addition, a Brothers one-piece electric window kit was installed to give a cleaner appearance, and Altman bear claw latches were installed for safety and smoother door latching.
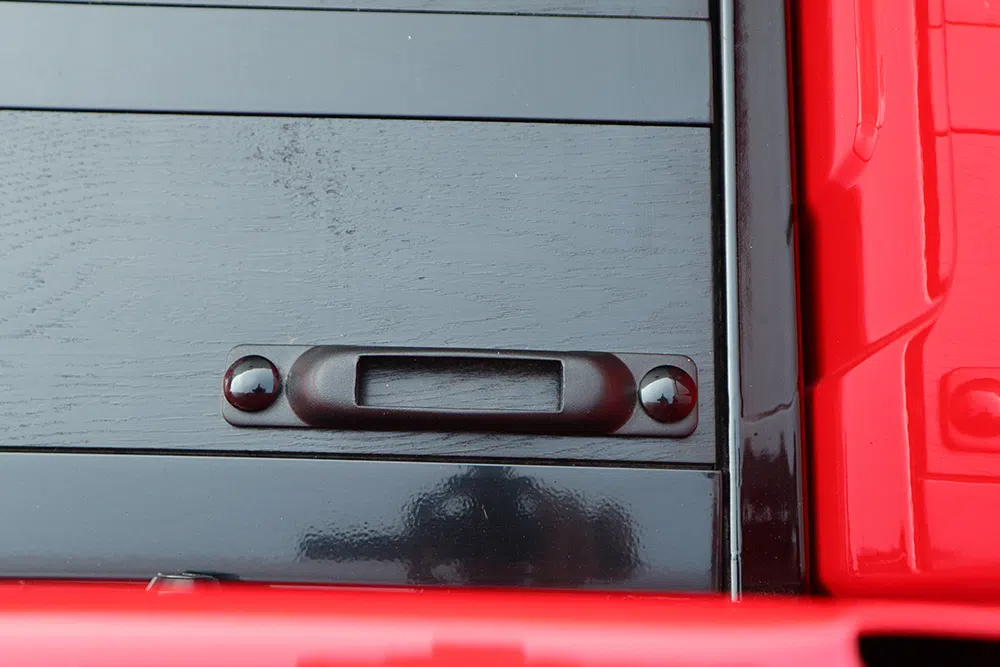
Once all the metalwork was complete, Jason took the truck over to Jag Custom Paint and Body in Alvarado, Texas. At Jag, a custom mix of red from Sherwin Williams was applied with four coats of clear on top. Jag also painted the frame of the truck in a metallic gray, which adds some nice contrast. Once the paint dried, Jason had Nicks Custom Detailing in Bedford, Texas, sand the clear to 3,000 and then buff to a deep mirror finish. Once that was complete, Nick applied a ceramic coating to protect the perfection. With the truck painted, Jason and Jerry fabricated the wood floor in the bed and applied stain and sealer. Jerry also fabricated the pneumatic lift system, which raises the bed floor to expose the detailed chassis and suspension underneath.
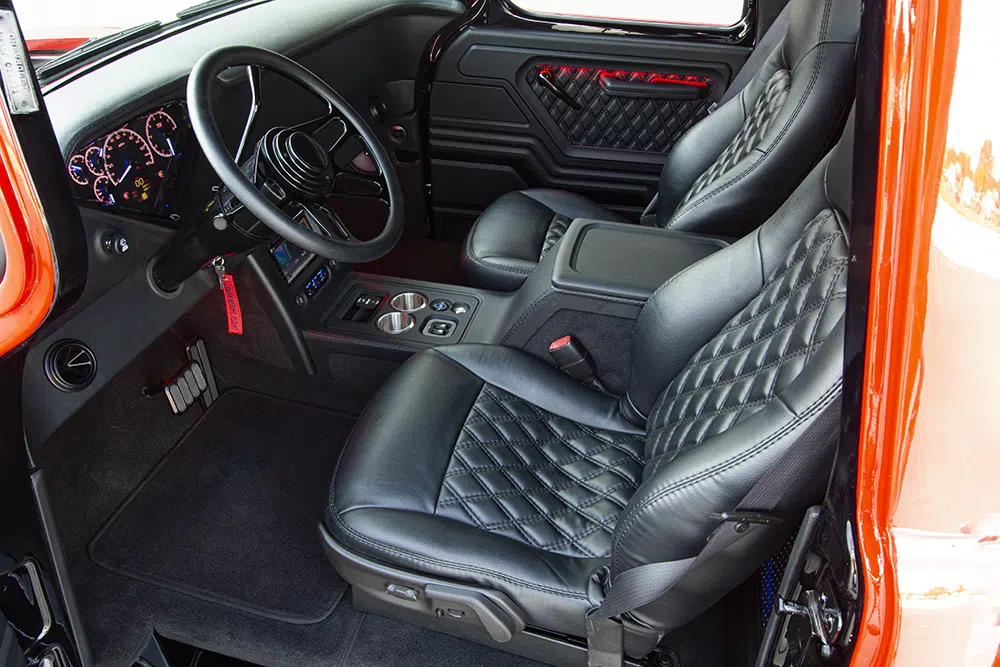
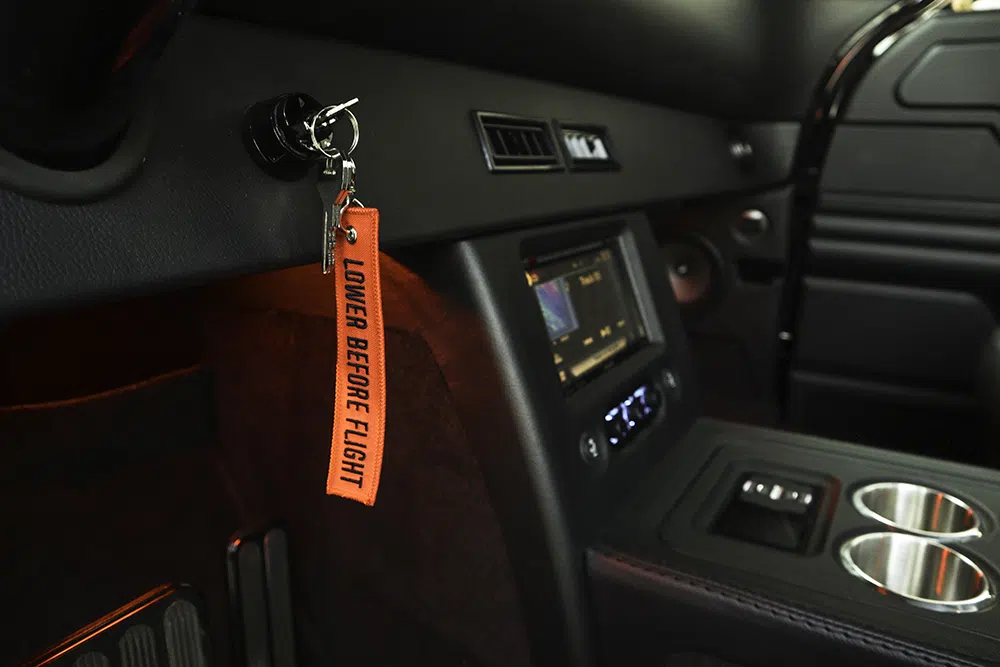
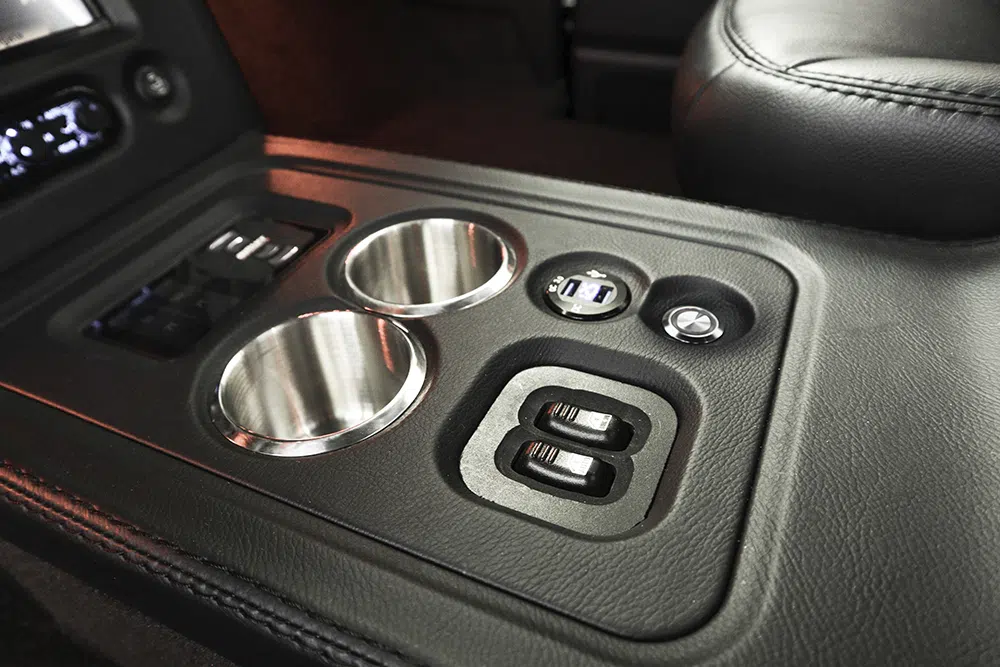
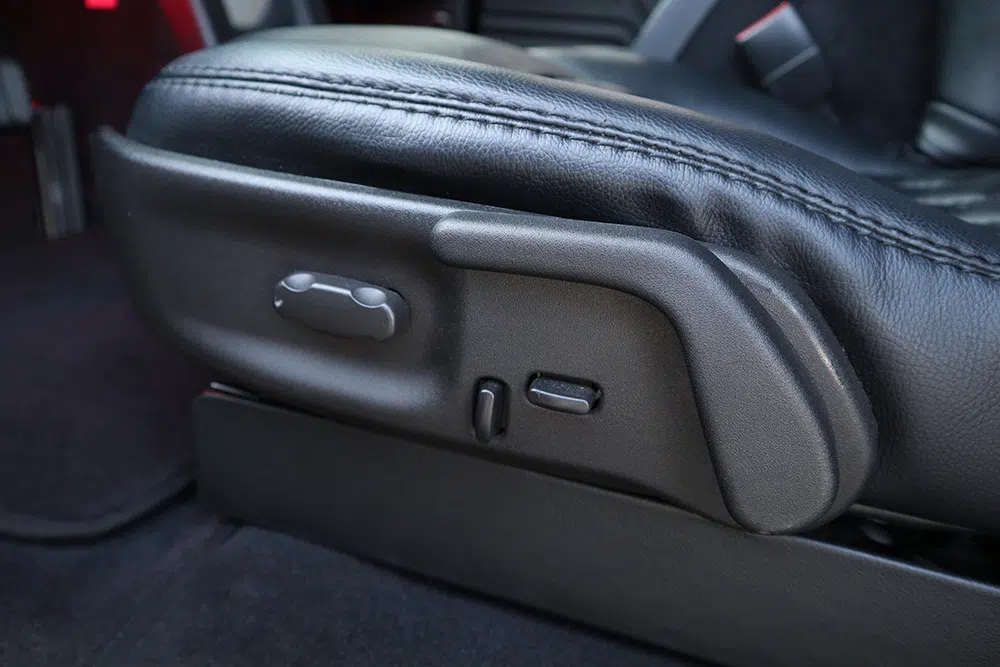
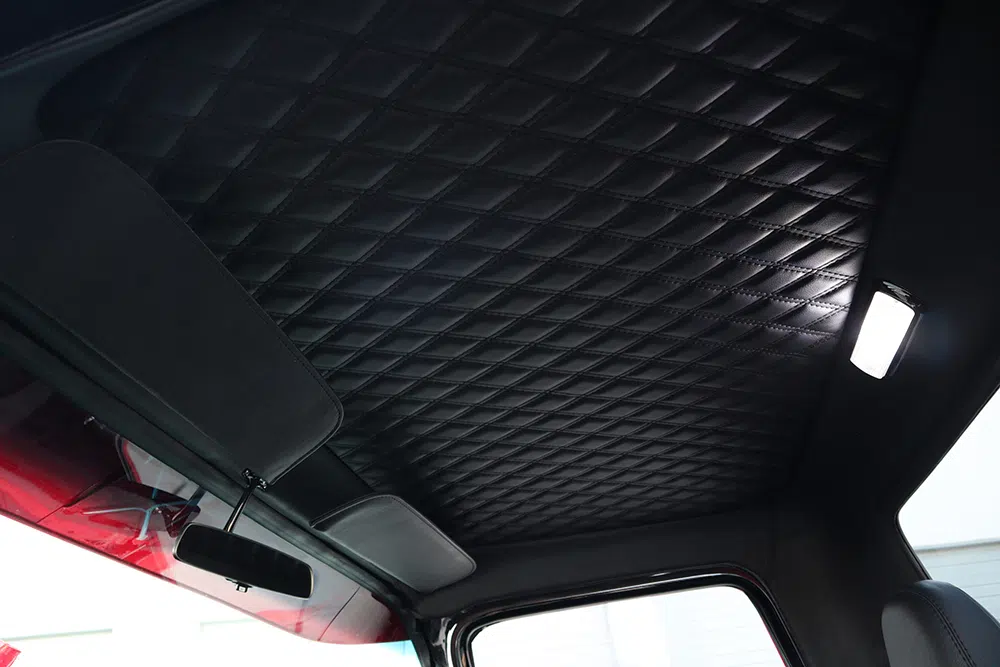
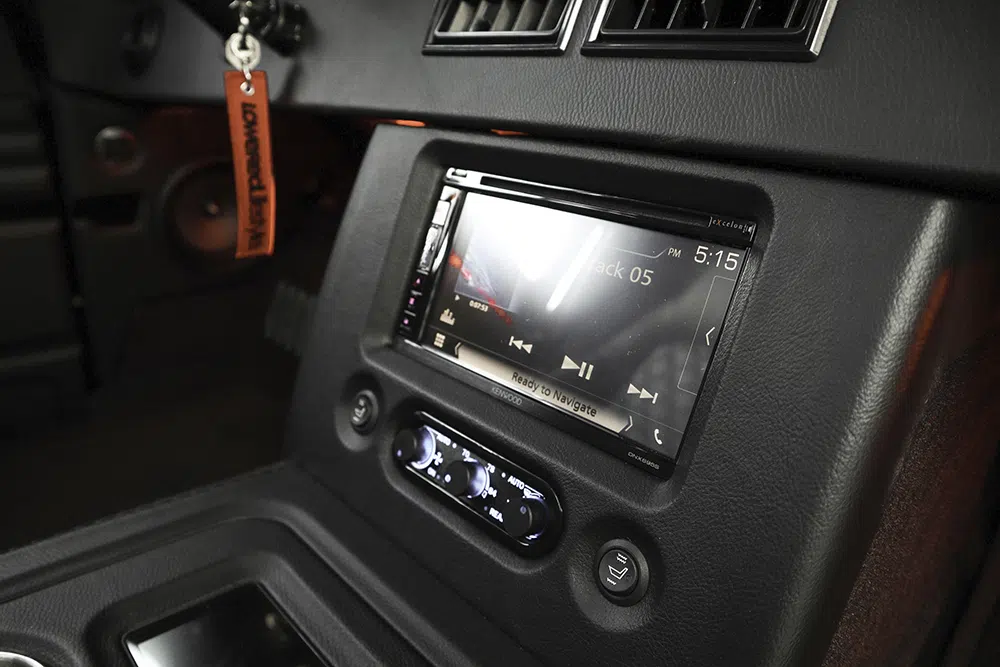
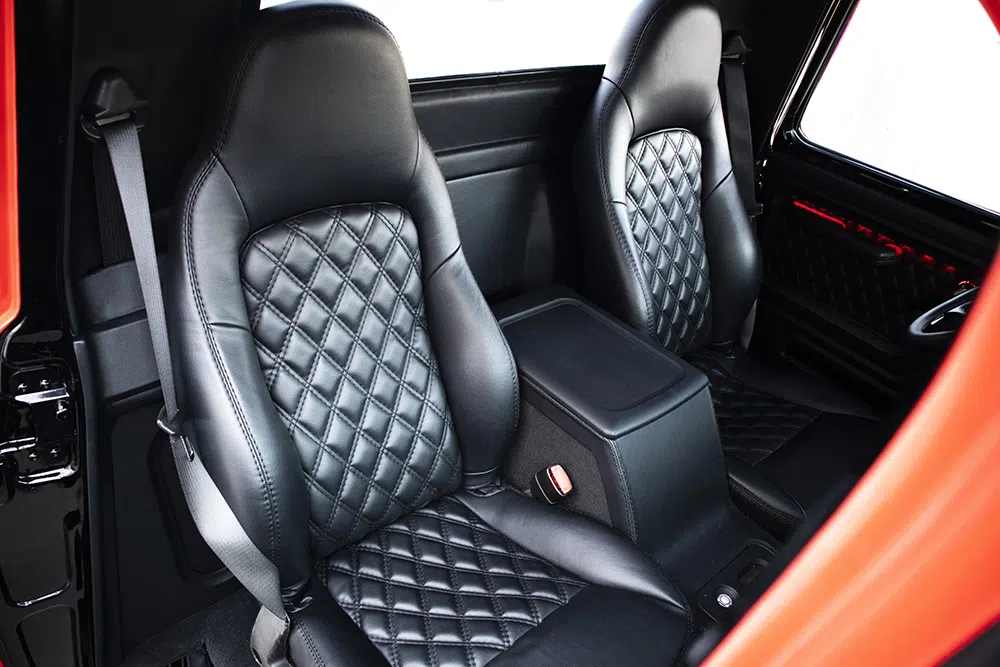
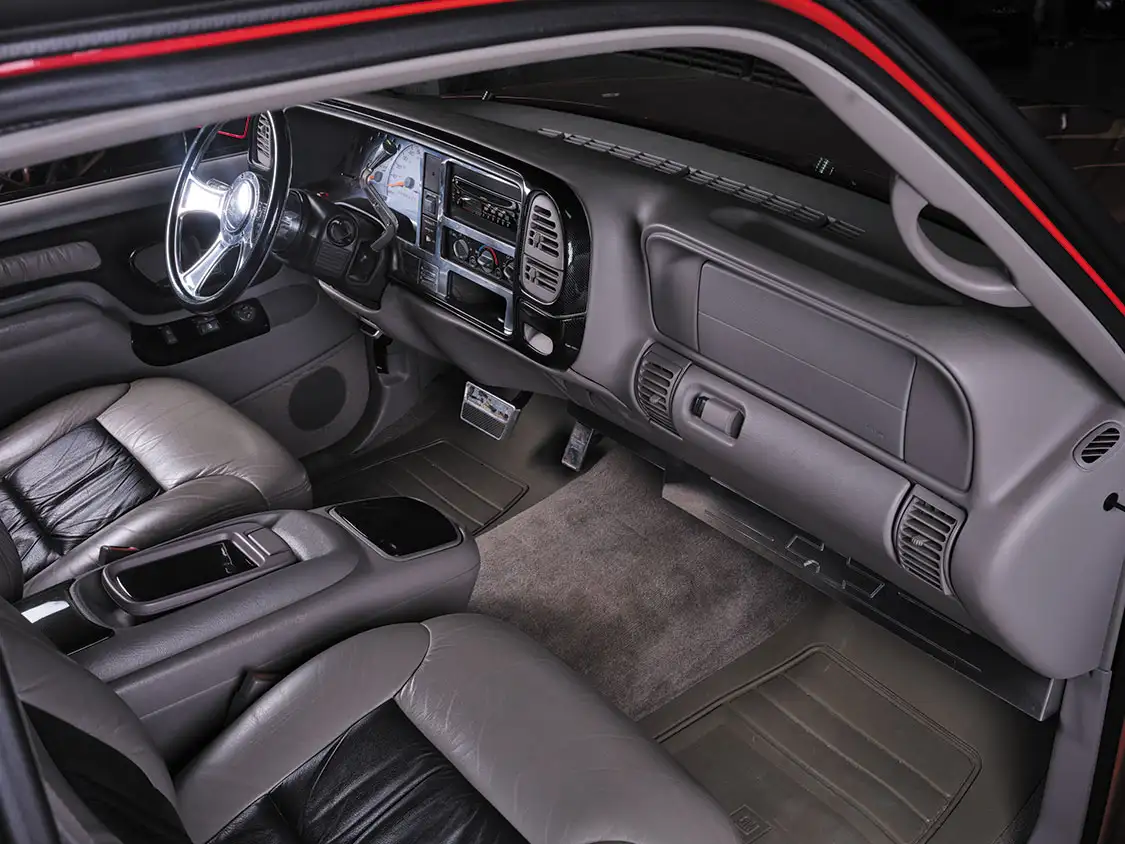
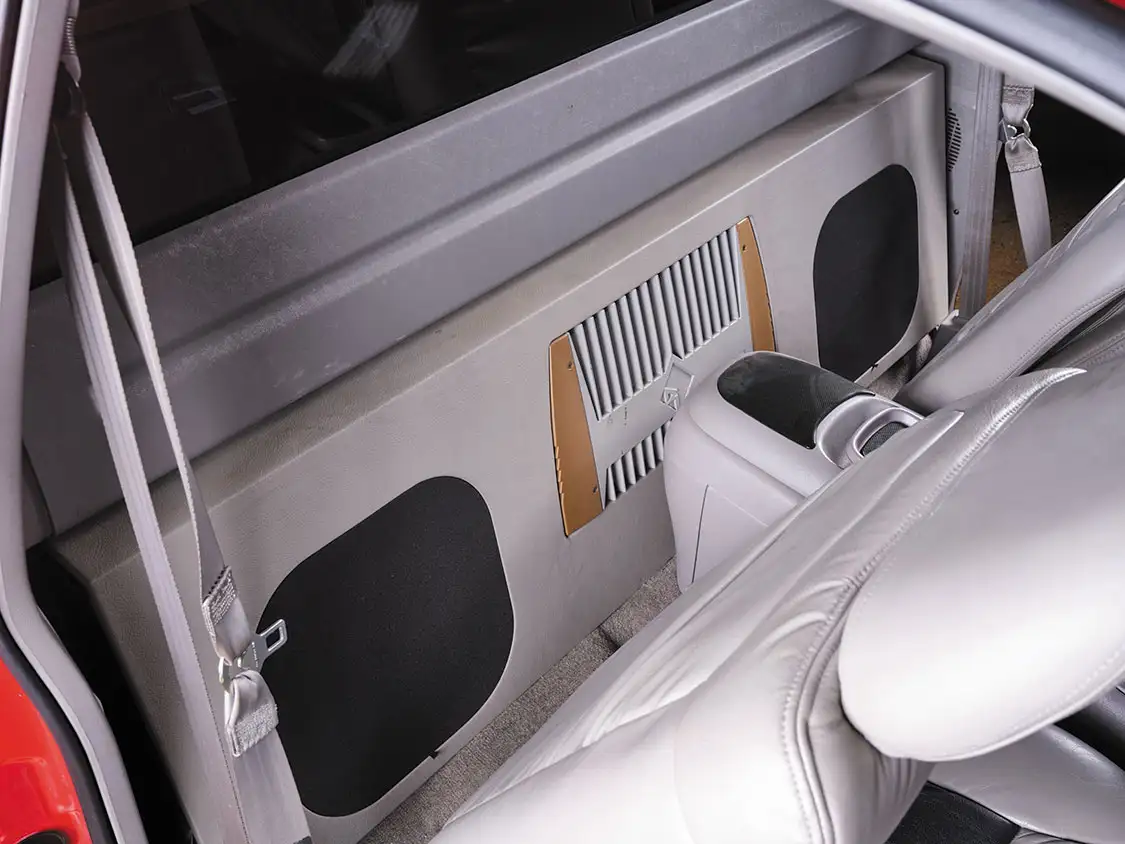
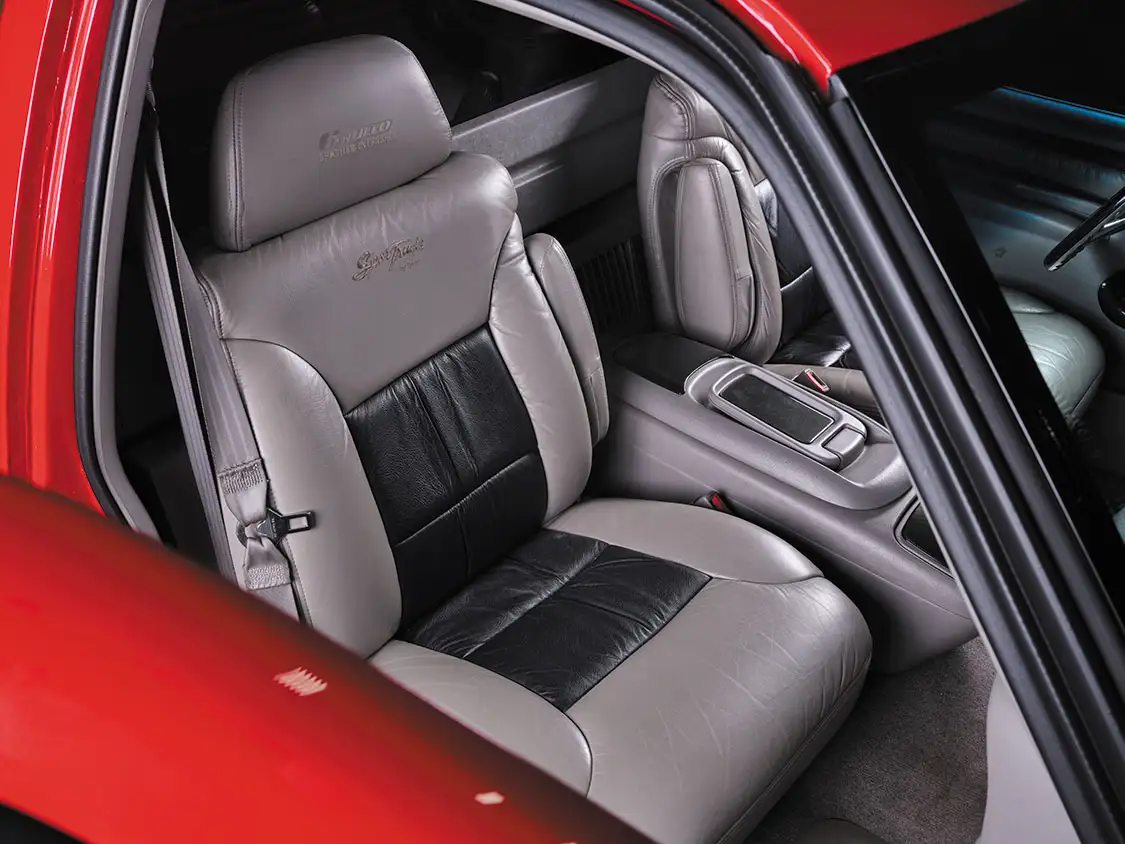
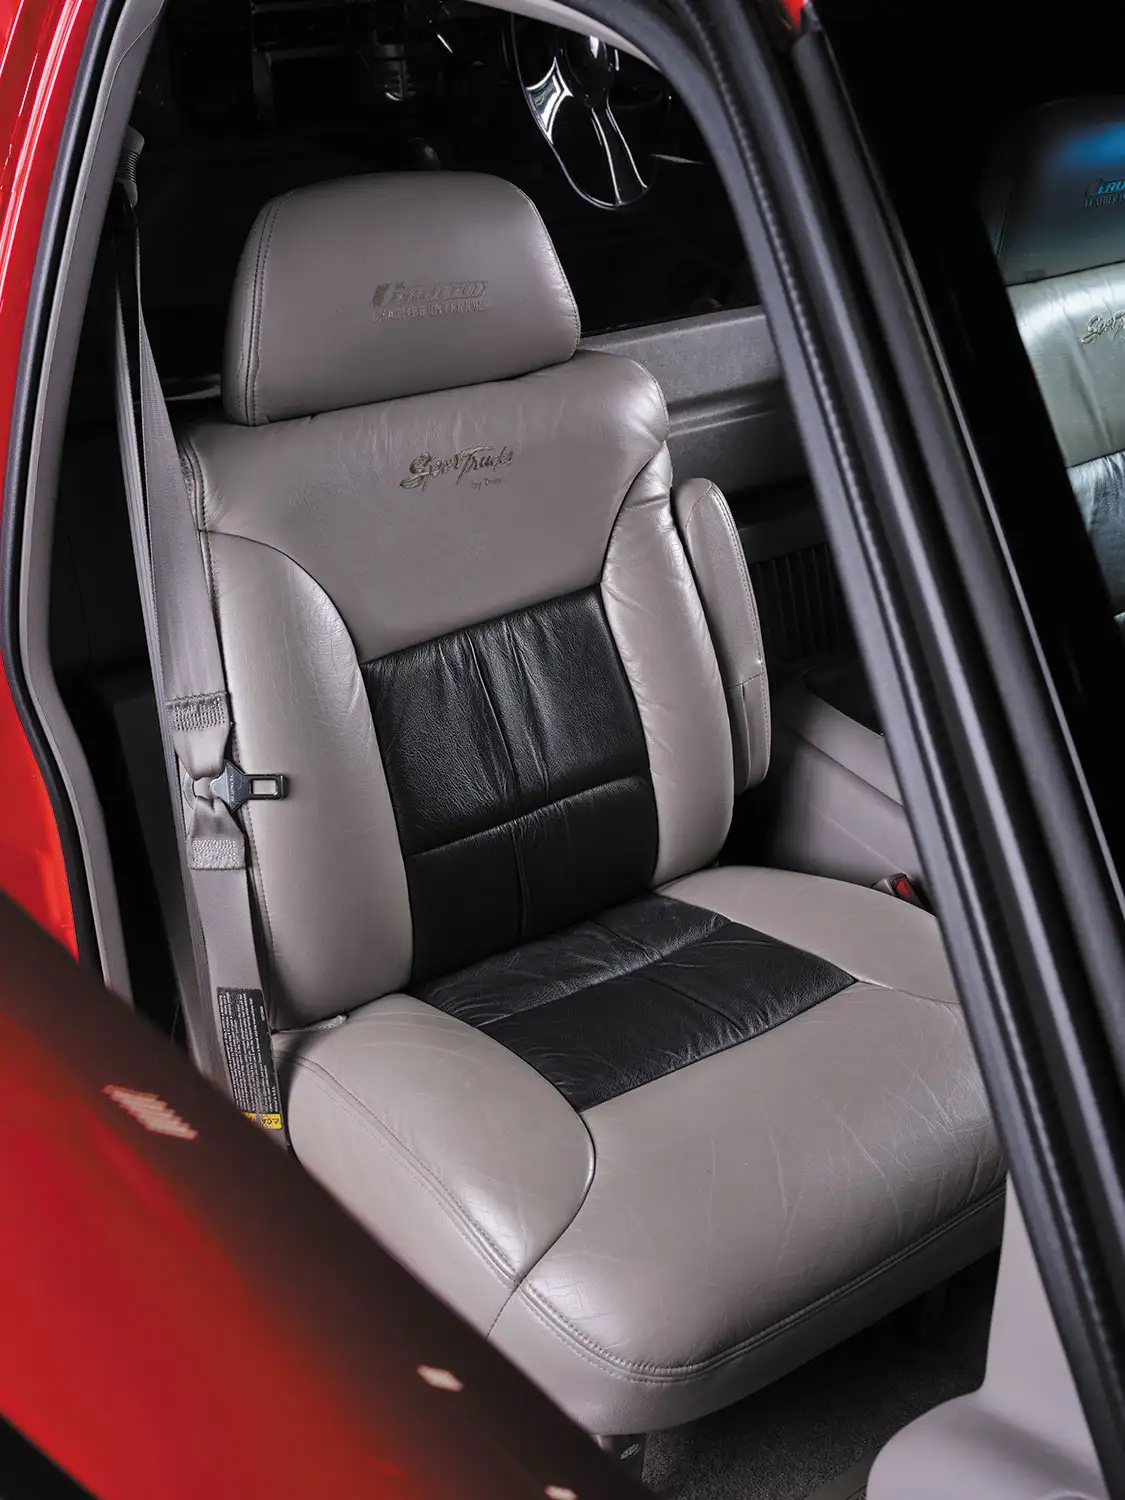
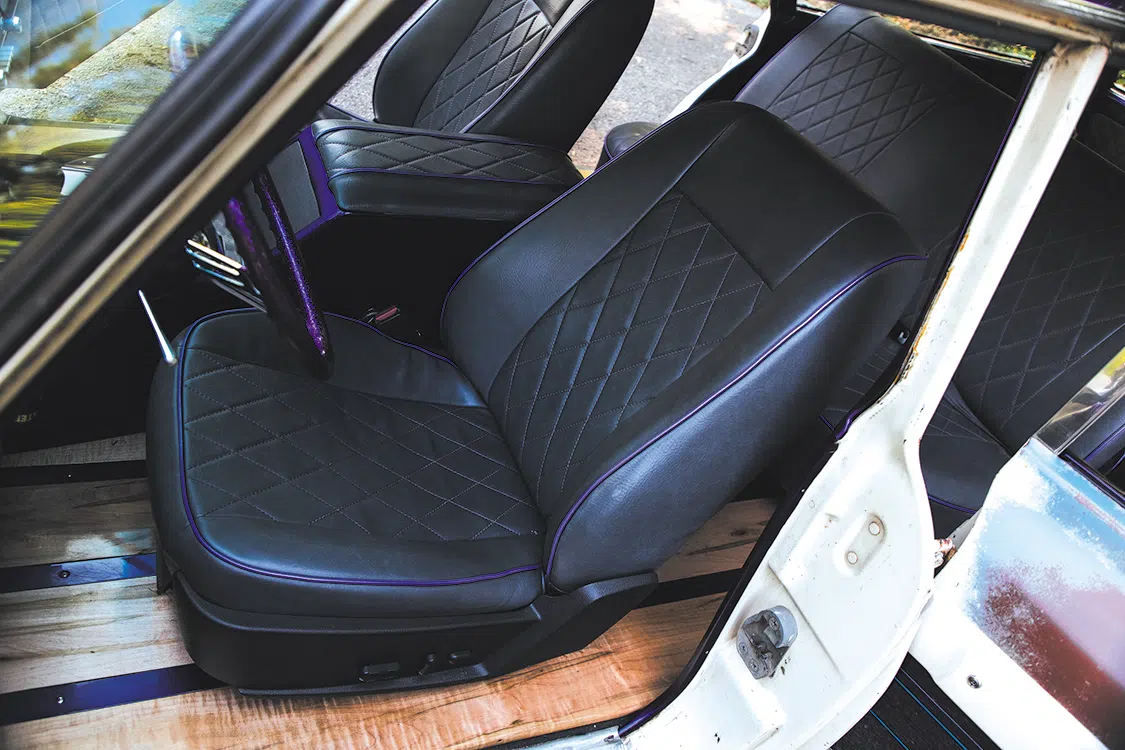
With everything starting to come together, it was time to start thinking about the interior. Jason then sent the truck to PG Upholstery in Haltom City, Texas. At PG, they custom made the door panels, kick panels, center console, lower dash panel, as well as the subwoofer box and panels behind the seats. Speaking of seats, C6 corvette seats were installed with custom brackets and are fully functioning. With everything in the interior ready for upholstery, PG covered it all with a tasteful mix of black leather and vinyl, including the smoothed dash, and then installed the Kenwood double DIN head unit.
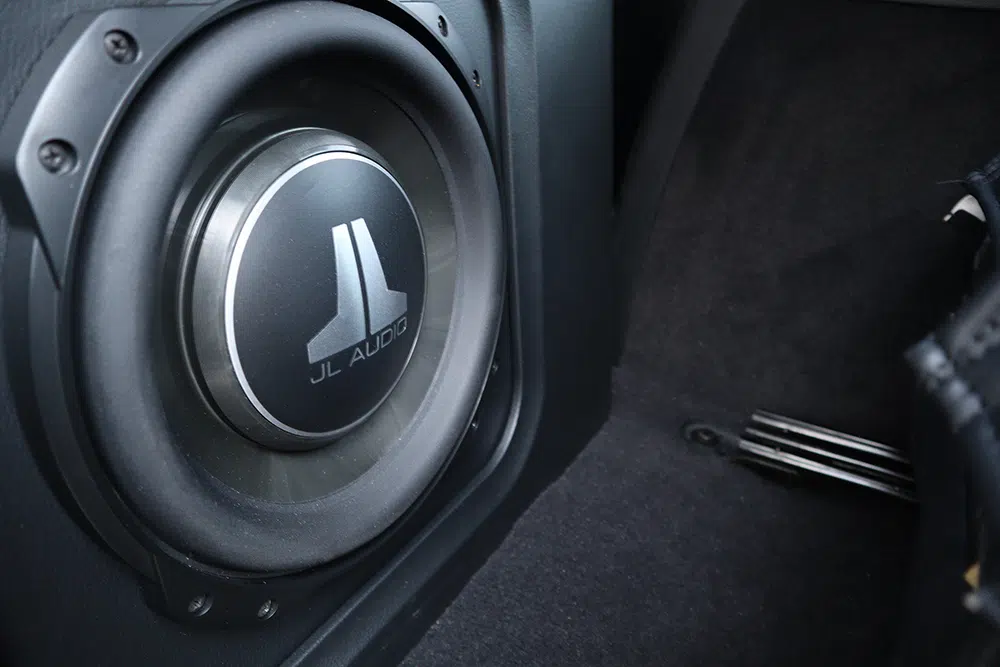
The ear massage comes from Focal Components and a JL Audio 10-inch subwoofer all powered by a JL amplifier. Topping off the beautiful dash is a Dakota Digital HDX instrument cluster with all the necessary information to monitor the systems of the truck. To keep the cabin cool, a Vintage Air A/C system was installed and is operated with a Dakota Digital A/C controller. Restomod Air Membrane was applied to all the interior panels to help control heat and vibration for the added comfort while on the road. Jason fabricated his own A/C lines which were hidden to keep the engine bay tidy.
With the truck complete it was time for Jason to put on the final touch with just the right rolling stock. With thousands of options in the wheel market, 18×7 and 18×9 American Racing Burnouts were chosen. Jason did not stop there though; if you look closely, the “windows” of the insides of the wheels are tastefully painted the same metallic gray as the chassis. Once that touch was added, the wheels were then wrapped in Michelin Pilots with 225/50/18s up front and 285/40/18s out back, filling the wheelwells perfectly.
Since its completion, Jason has cruised the truck around town and attended few truck shows where the 3100 has received multiple awards, including a most recent Builder’s Choice Top 10 pick at the 11th annual Goodguys Spring Lone Star Nationals. We are confident that this truck will be a top award winner at any show and definitely an attention getter while cruising the back roads of Texas, which Jason plans to do a lot. So, what do you think? Divine intervention with the sale of the T-Bird? We would say so.
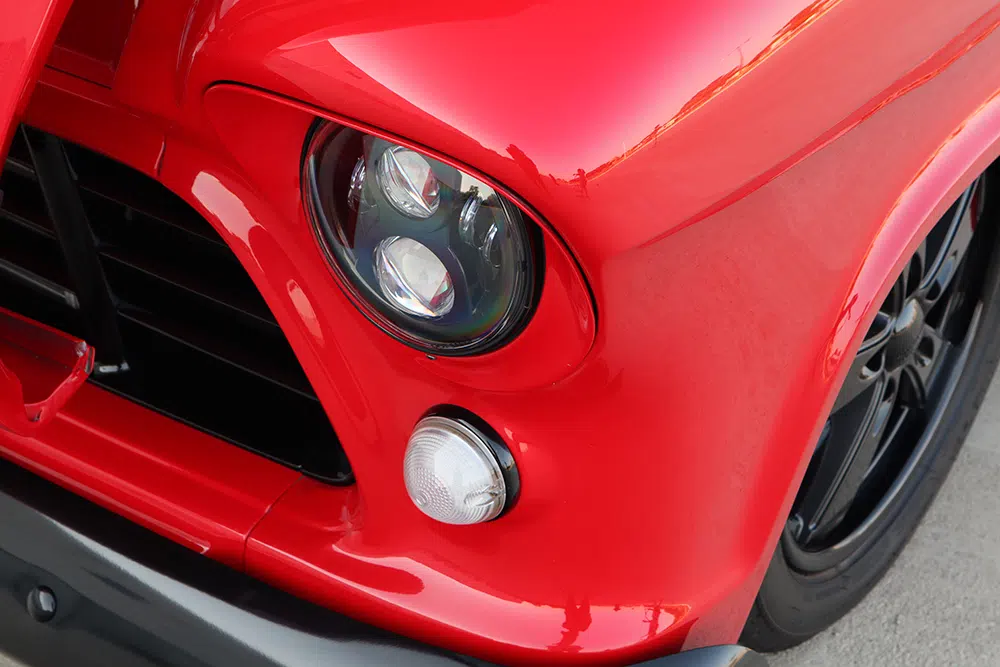

A custom or restored vehicle can stop traffic at a show and still be genuinely dangerous on the way home. Polished paint, a detailed interior, and a bright engine bay give a build the appearance of completion, and yet the mechanical work underneath can fail once the car hits highway speed, encounters rough pavement, or needs to stop hard.
Show-quality finish and road-ready reliability are two separate standards, and not every build meets both.
Cosmetic work gets noticed first. After months or years of work, it’s natural to treat visual completion as the finish line, and mechanical defects don’t announce themselves in a garage at idle.
Show environments and short garage drives never generate the speed, heat, or stress that expose braking, steering, and electrical problems, and a build that hasn’t faced those demands carries risk the owner may not see until it’s too late.
Brakes are the clearest place where a build can look finished and still fall short. New calipers, rotors, and lines read as a complete job, and in a garage they can feel adequate, but several problems only surface once the system is pushed hard on the road.
A brake system assembled from new components can still have serious problems if the installation wasn’t done correctly. Watch for:
A pedal that feels soft, travels too far, or requires pumping to firm up is a signal the system hasn’t been finished properly.
Heat buildup under sustained braking is one of the most reliable ways to expose incomplete brake work, and a short neighborhood drive never generates enough heat to reveal it.
A custom build needs a test that includes hard stops from higher speeds and repeated braking on a grade. Symptoms to watch for:
A build can feel composed at low speed and become unpredictable once speed rises or the road surface changes. Suspension geometry is sensitive to ride height, part selection, and installation order, and errors in any of those areas create handling problems that only appear in motion.
Loose steering feel, whether from worn tie rod ends, an improperly torqued steering box, or a column that wasn’t fully secured, produces a car that requires constant correction at highway speed.
Ride height changes affect suspension geometry in ways that a basic alignment won’t fix. Here are a few key problems to check:
Tire rubbing under full suspension travel can become a handling problem at the worst possible moment. Additional concerns on custom builds:
A build that hasn’t been tested through full suspension travel on rough pavement can hide rubbing that only appears under compression.
Seat mounts need to carry the load of a restrained occupant in a hard stop or a collision, and a mount that passes a visual inspection may not be secured to a structural point in the floor.
Additional restraint concerns on custom and restored builds:
Interior work that moves or replaces factory belt anchor points needs to be verified against the load requirements for that hardware.
A headlight that illuminates the road straight ahead can still be aimed poorly enough to blind oncoming drivers or leave the road dark through curves. Other lighting problems that go undetected until after dark:
Brake lights and turn signals wired through an incomplete or overloaded circuit can fail in ways the owner never catches on a daytime drive.
Lowered and raised vehicles both create sightline changes that affect what a driver can see in mirrors and over the hood.
A small fuel leak near a heat source may produce no smell in a garage at idle. Problems that tend to stay hidden until the car reaches operating temperature under load:
Loose grounds produce voltage drops that create strange electrical behavior, and overloaded circuits, where added accessories pull more current than the wiring and fuse rating can handle, build heat in the harness before anything trips.
Wiring red flags to address before regular driving:
Intermittent electrical faults tend to get worse, and tracing them after a failure is harder than catching them during the build.
Treat the test drive as a diagnostic, not a celebration. Work through each of these before calling a build road-ready:
Build receipts, alignment specs, brake configuration notes, and wiring diagrams create a record that can answer questions if something goes wrong on the road.
Photos taken during the build show the condition of components before they were covered up and can identify who did the work and when.
If a car accident happens and a mechanical failure contributed to it, the ability to reconstruct the vehicle’s condition before the wreck can be the difference between a clear picture and a disputed one. An attorney handling a car accident tied to a mechanical failure will want to know what parts were installed, who installed them, and what condition the vehicle was in, and build records are usually the only way to answer those questions accurately.
A build that earns attention at a show still needs to perform in braking, steering, restraint, visibility, fuel delivery, and electrical reliability before it belongs in traffic.
Skipping that verification doesn’t just put the driver at risk, it puts everyone else on the road at risk too. A finished build and a road-ready build are the same vehicle only after the mechanical work has been tested on the road and confirmed to perform. A build worth showing is a build worth getting right.
Photos by John Jackson
A definitive list of iconic trucks considered legendary titans in our industry exists—and this flamed-out Chevy is one of them.
Built way back in 1999 to be a rolling truck-shaped menu of its latest wares, Billet Specialties’ 1997 Chevy pickup defined what an ideal sport truck looked like. It sat low but had a noticeable rear rake. It had a staggered set of billet wheels with wide rear meats. It featured expertly executed body mods and paint that met the same standards that seasoned hot-rod builders aspired for. This Chevy was the perfect example of what truck fans of the day wanted for their ride. But once the style moved into different directions (as it does), it was displayed less and less until it was covered and packed away in a shady part of the warehouse. The once-fiery truck had become a distant memory of a bygone era.
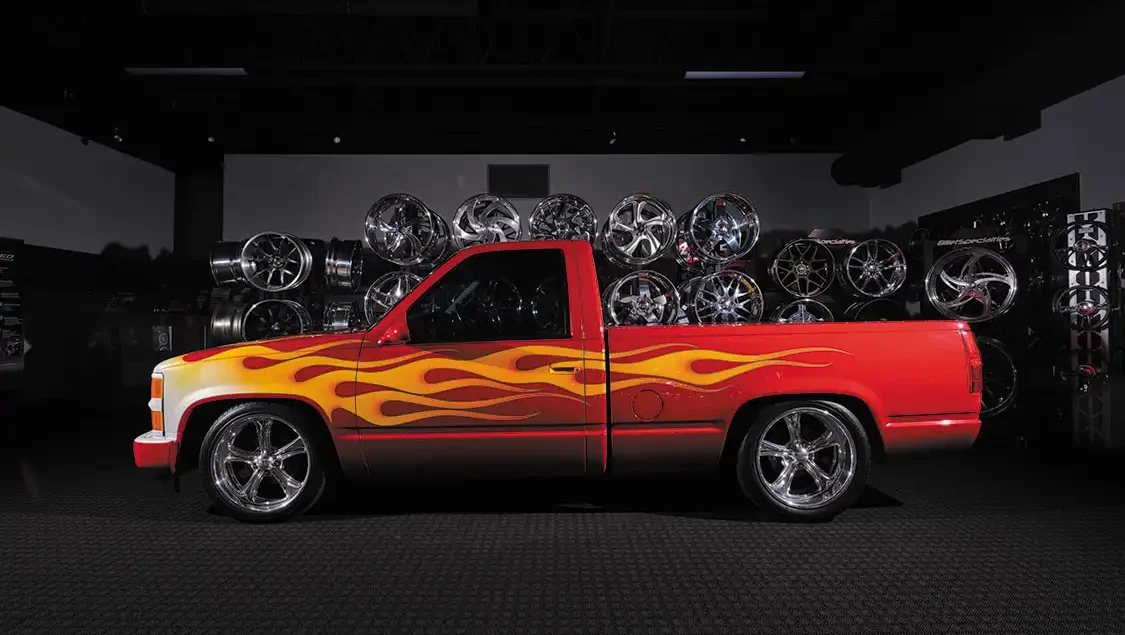
Thankfully, the esthetic of those early sport truck days has come back around full circle. What was once cool then is now cool again, and there’s nothing better to solidify that than revisiting the few surviving relics from the original golden days.
Glenn Grozich of Billet Specialties may have already known that this day would come, because he made no effort throughout the years to sell off the flamed-out OBS pickup that was once a landmark of his brand’s identity. When asked whatever happened to this truck, Glenn not only told us where it has been all this time, but he went one step further by bringing it out, dusting it off, and allowing us to get an up-close inspection of what originally made this truck so damn cool nearly a quarter century ago.
There is a definitive list of iconic trucks that are considered legendary titans in our industry—this flamed-out Chevy is one of them.
When Glenn was originally sourcing out the work to get this truck built back in ’99, he was interested in only one place for having the suspension lowered. Dean Sears of Sport Trucks by Dean, located in Moorpark, California, was recruited to not only lower the truck but to perform a rather radical slam featuring suspension components from another influential brand of the time. A complete 5/7-inch drop was slated to commence utilizing nothing but Belltech products. Front lowering spindles and springs along with a rear flip kit with 2-inch drop shackles and a frame C-notch were piled up and installed. This setup was and still is an industry standard in creating a slammed static stance on just about any full-size pickup.
Built way back in 1999 to be a rolling truck-shaped menu of its latest wares, Billet Specialties’ 1997 Chevy pickup defined what an ideal sport truck looked like.
To add some additional comfort and utility to the rearend of the suspension system, Dean also included Belltech’s AirJack rear assist air bags with an onboard air compressor, which was definitely something revolutionary for that period. Air shocks had been utilized here and there, but having an integrated air source to adjust air pressure on the fly was definitely an up-and-coming trend that was starting to be explored more. This modification would allow the counteraction of a sagging rear end due to hauling a heavy cargo load or a group of ’90s high-waisted bikini babes a la the old Belltech magazine ads.
A complete 5/7-inch drop was slated to commence utilizing nothing but Belltech product.
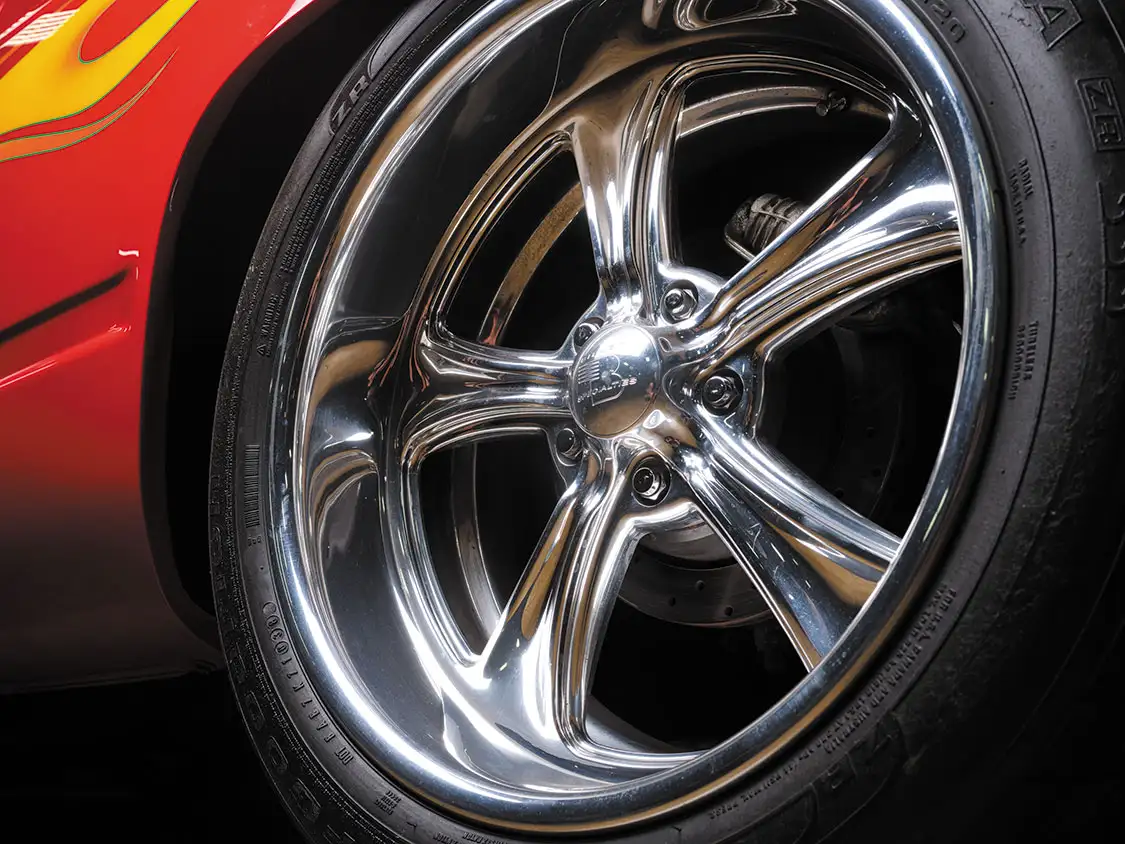
The factory brake system was soon upgraded with Baer parts, and a set of Billet Specialties wheels specifically designed to fit this new and exciting sport truck segment were mounted. Of course, the wheels that were originally put on have been updated to a modern set of 20-inch SLC 62 billets, which is still very reminiscent of the 5-spoke design that was once featured on the truck back in the late ’90s.
…the wheels that were originally put on have been updated to a modern set of 20-inch SLC 62 billets…
When Dean was finished lowering the truck, he sent it on its way to Amarillo, Texas, where Mark Warrick of Soncy Road Body Shop was eagerly awaiting the Chevy’s arrival. To first get the truck smoothed out, Mark and crew began by creating a custom front bumper with a Frenched license plate recess, a one-off rear roll pan that was welded in, as well as an ultra-clean flush-mounted aluminum tonneau bed cover that flows seamlessly with the truck’s natural bodylines.
Since these trucks were being approached as modern day hot rods during that time, nothing less than a red-hot, traditional-style flame job would do.
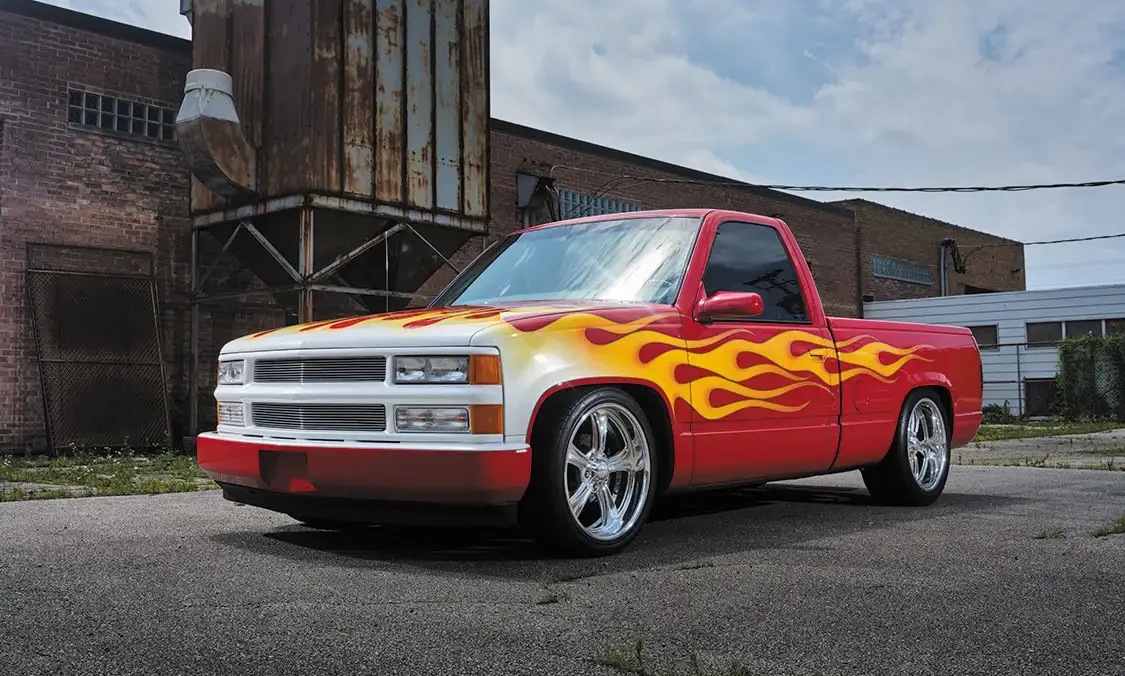
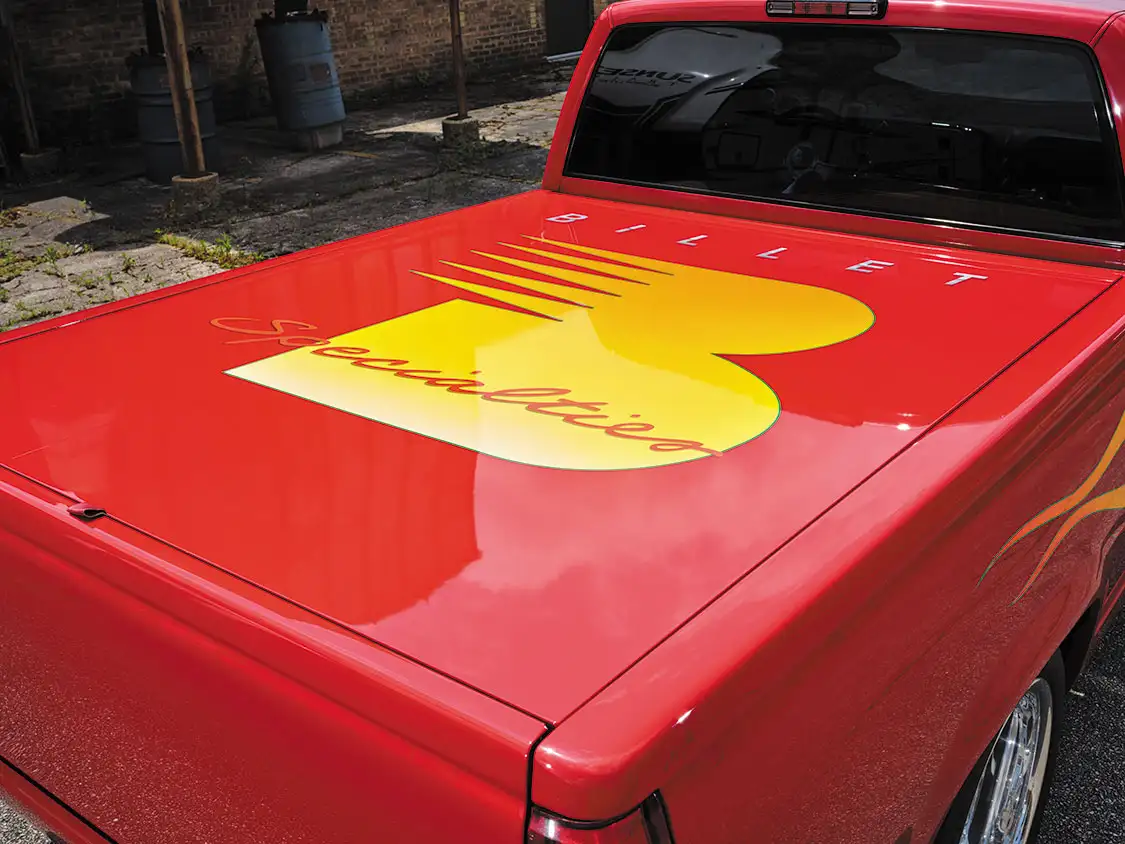
The next phase of the project was to settle on how to create an eye-grabbing paint job. Since these trucks were being approached as modern day hot rods during that time, nothing less than a red-hot, traditional-style flame job would do. Soncy Road Body Shop’s own custom-mixed red served as the base, and once the flames were applied to the surface, Mark then proceeded to add a full-size Billet Specialties logo on the bed cover to fully allow this truck to make its mark once it hit the show scene.
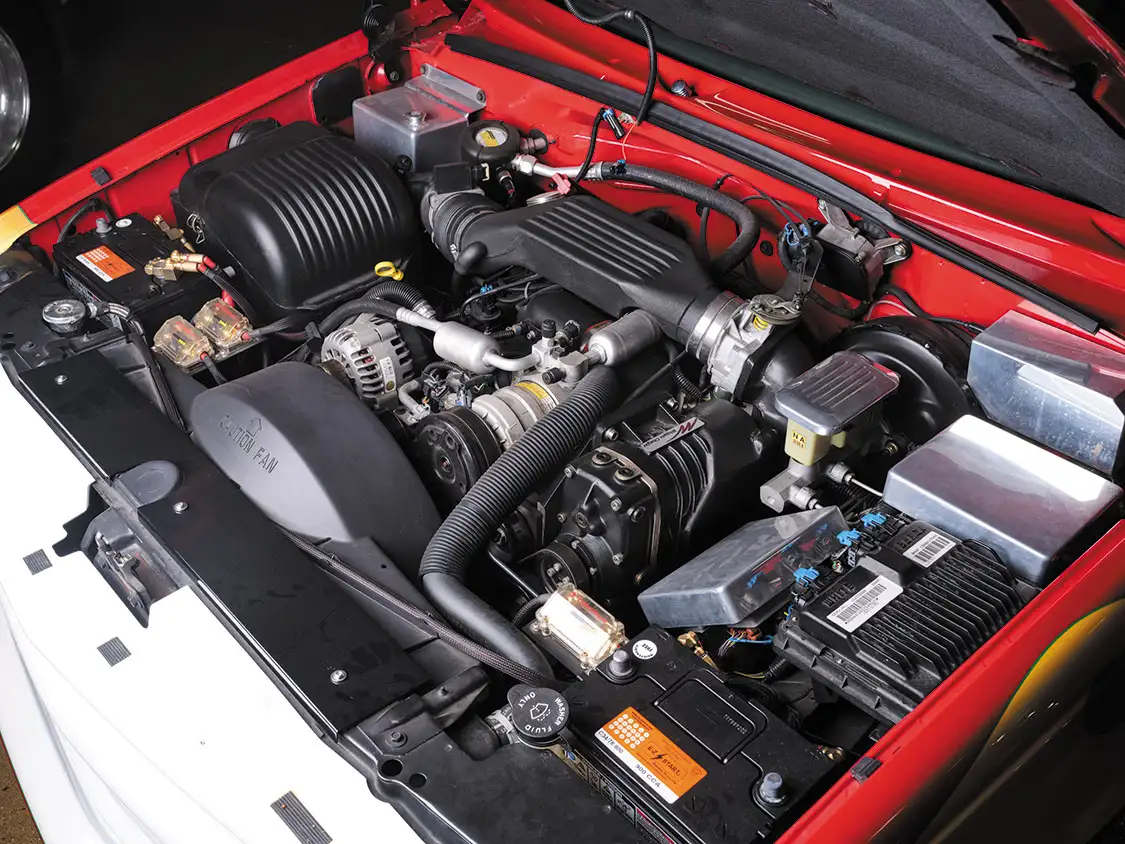
Since Billet Specialties offers much more than wheels, a wide assortment of dress-up hardware was peppered throughout the engine bay.
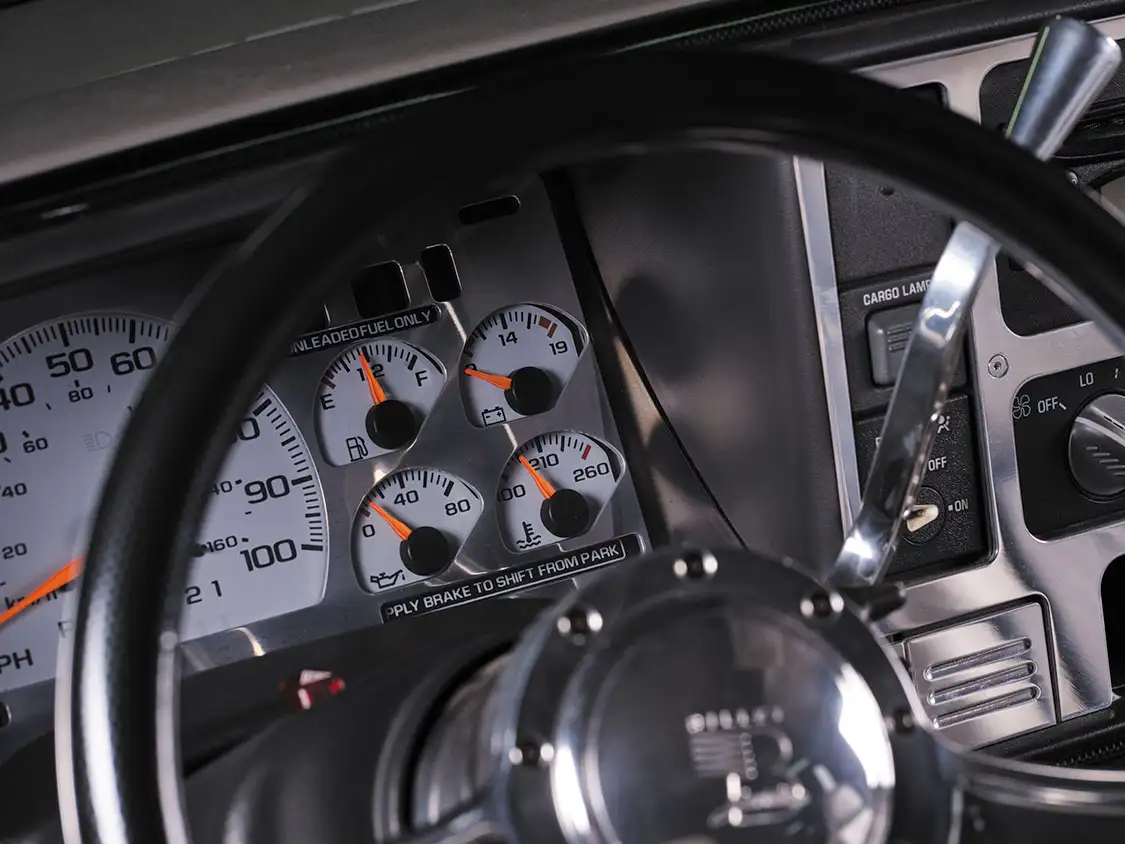
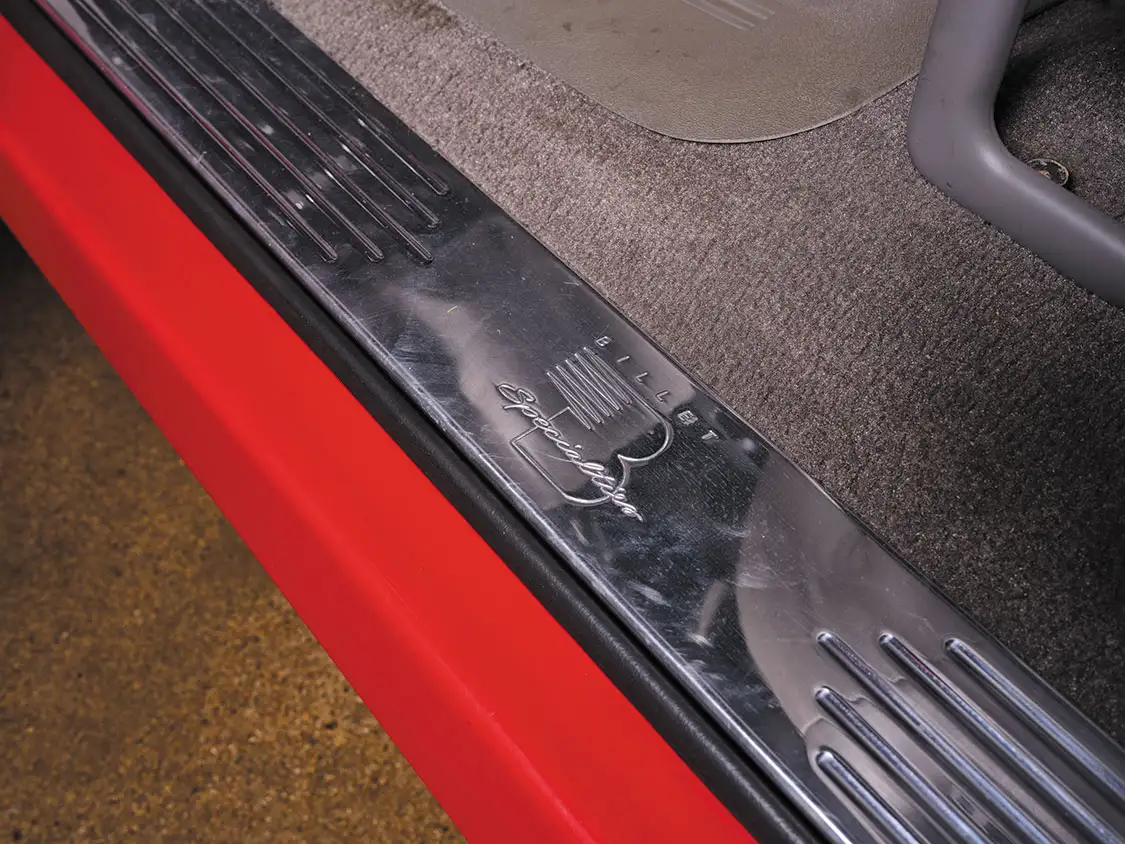
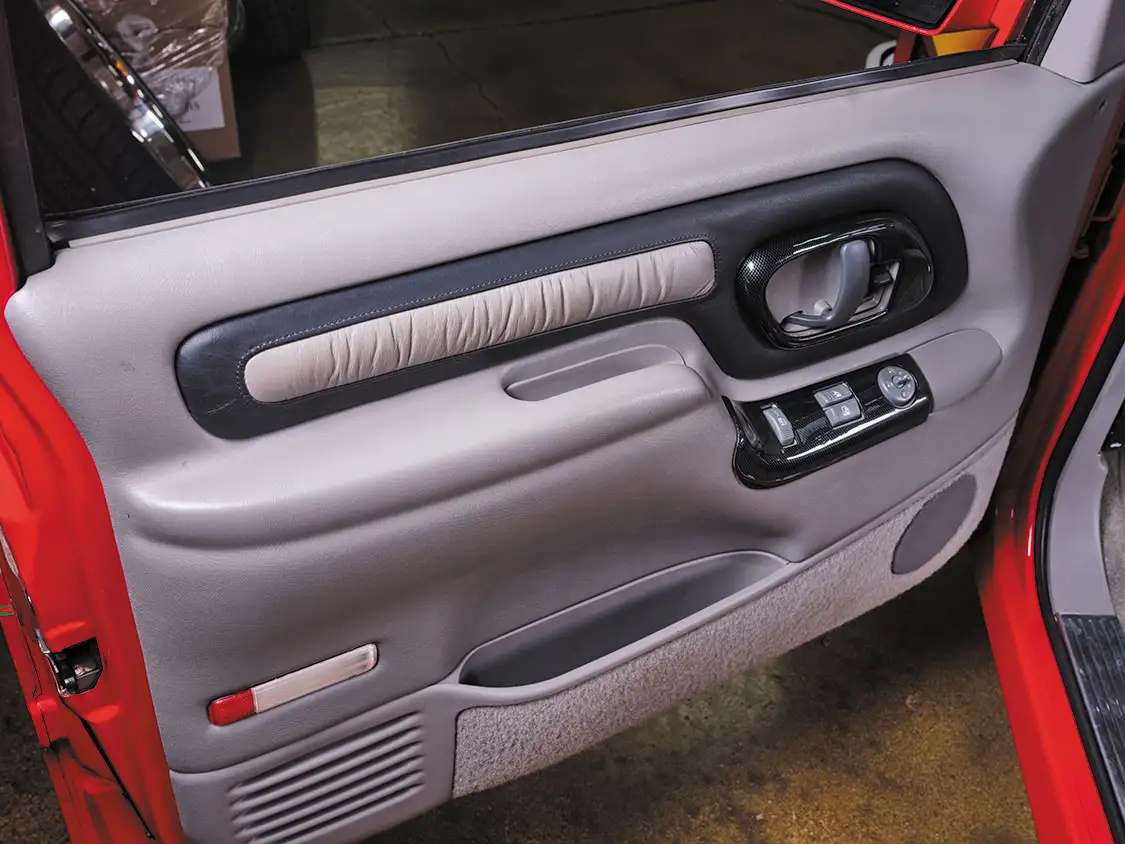
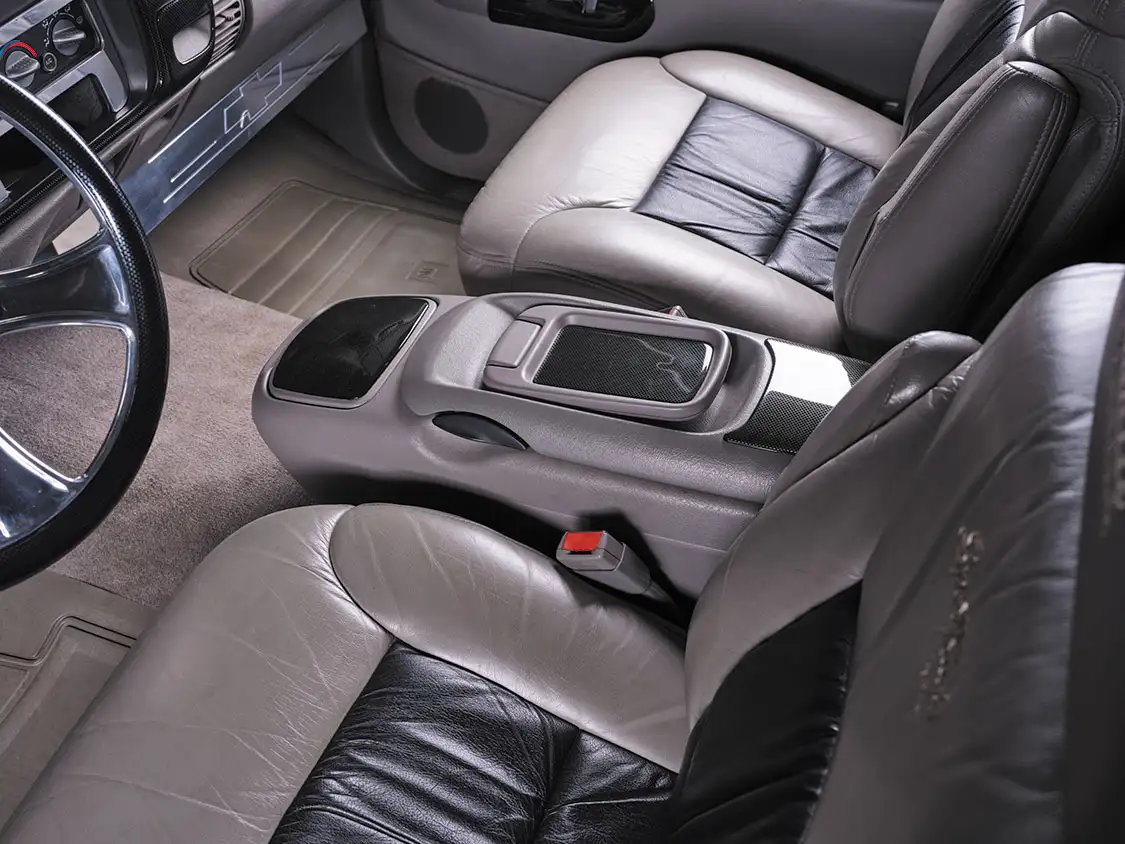
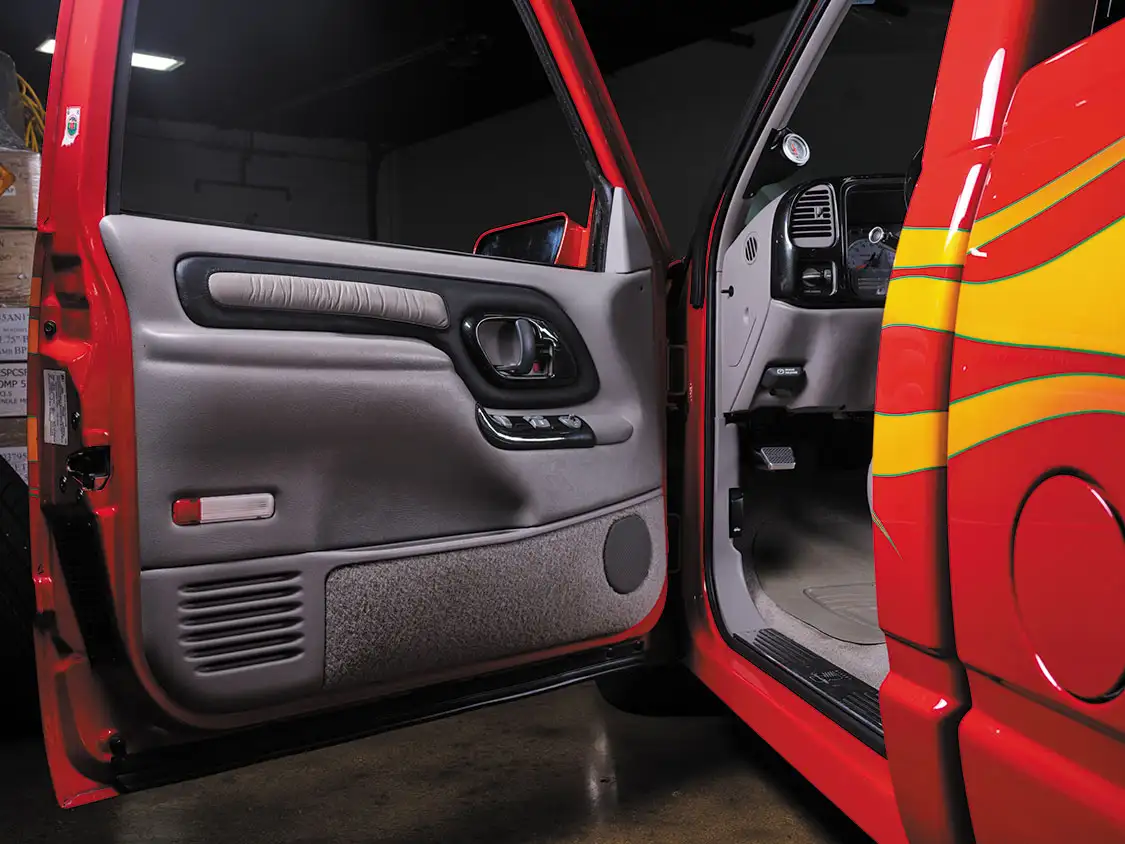
Since Billet Specialties offers much more than wheels, a wide assortment of dress-up hardware was peppered throughout the engine bay. The billet parts that were put into place came very close to outshining the Whipple supercharger that was planted atop the 5.7L engine, but they perfectly complement its presence underneath the hood. The same methodology was used inside the cab as well with the inclusion of a Billet Specialties’ steering wheel, column shifter, gauge and dash bezels, pedals, and other accessories that were designed to take ’88-’98 trucks to elevated levels of customization.
The same methodology was used inside the cab as well with the inclusion of a Billet Specialties’ steering wheel, column shifter, gauge and dash bezels, pedals and other accessories that were designed to take ’88-’98 trucks to elevated levels of customization.
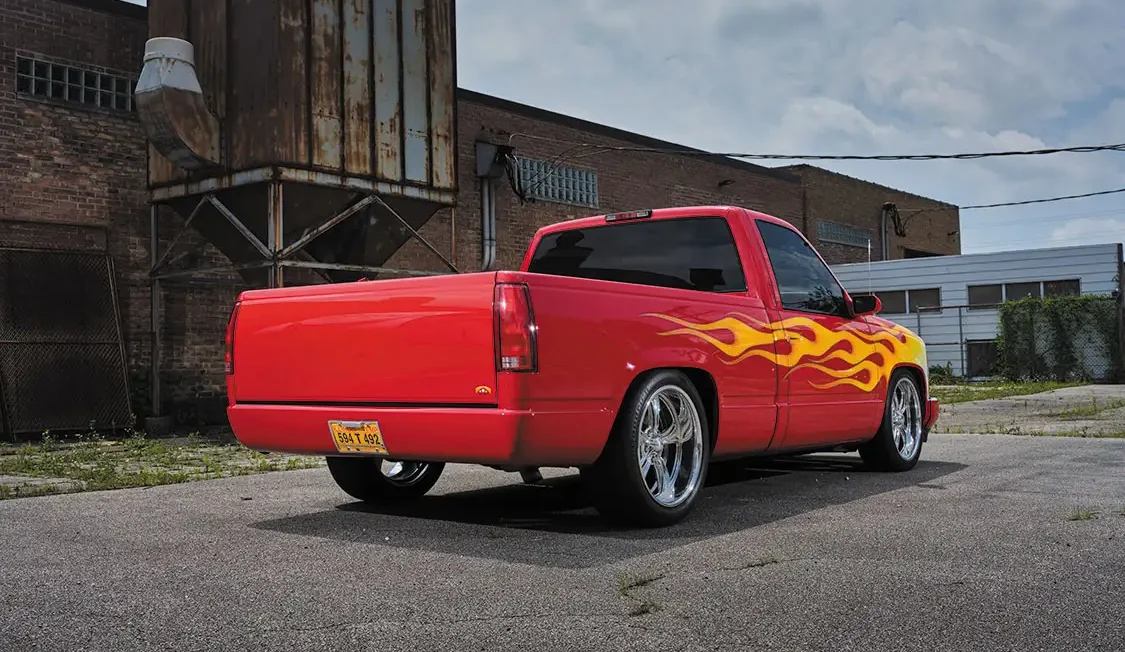
While this truck was out of sight and mind for so long, its return to the surface has been well-received by those who remember it quite fondly. Those who have had the genuine pleasure of geeking out over it for the very first time have seemed to love it equally as much. With the popularity of OBS pickups on the rise, it’s great to have an actual surviving example of one in its original customized state. As per Glenn’s wishes, the truck will be taken to as many shows as possible, so catch it alongside a Billet Specialties display nearest you. Sure, it can be revisited at any time by flipping through this magazine copy, but this is just one of those trucks that should seen in the flesh if and when the opportunity presents itself.
Those who have had the genuine pleasure of geeking out over it for the very first time have seemed to love it equally as much.
Owner
Glenn Grozich/Billet Specialties
1997 Chevy Pickup
La Grange, IL
Engine/Powertrain
Chassis/Suspension
Wheels, Tires & Brakes
Exterior/Paint
Interior/Sound
Image Source: https://images.unsplash.com/photo-1745845979138-be64a85272a5?q=80&w=1171&auto=format&fit=crop&ixlib=rb4.1.0&ixid=M3wxMjA3fDB8MHxwaG90by1wYWdlfHx8fGVufDB8fHx8fA%3D%3D
Getting behind the wheel for the first time feels exciting, but it also comes with real responsibility. Even careful drivers can find themselves in unexpected situations on the road.
Statista reports that nearly 237.7 million licensed drivers were on U.S. roads in 2023. This vast driving population presents significant road safety challenges across the country. Among all age groups, drivers between 21 and 24 years old face the highest risk of being involved in accidents.
The Insurance Information Institute notes that each year, roughly four million new drivers start using American roads. Most of these new motorists are teenagers earning their first licenses. However, about one million young drivers are involved in traffic accidents annually.
Car crashes are stressful, confusing, and sometimes frightening, especially when you are still gaining experience as a new driver. Knowing what to do ahead of time can make a huge difference when emotions are running high. This guide walks you through a few tips that help you think clearly and act responsibly when you’re dealing with a car crash.
The first few moments after a crash can feel overwhelming, especially if you have never experienced one before. Your heart may race, and your thoughts might feel scattered and unclear.
Just breathe and make sure everyone stays safe before you do anything else. Use your hazards because many rookies forget that when things get crazy. It warns other cars so you don’t end up with a huge pileup. Keeping your cool helps you think straight and handle the mess much better.
Once you have a moment to gather yourself, focus on checking everyone involved for injuries. Calling emergency services should be your next step if there is any doubt about safety or health concerns. Staying on the line until help arrives can ensure nothing is missed or misunderstood.
According to the US Department of Transportation, in 2022, US roadway deaths hit 42,514, marking a 10% increase over 2020 levels. Fortunately, fatalities began to decline in 2023 with an estimated 40,990 lives lost. Despite this recent drop, current death rates still remain significantly higher than they were before the pandemic.
More importantly, many accidents happen because another driver was careless, distracted, or simply negligent in their actions. In those spots, sorting things out afterward can get way messier than you’d think.
You might struggle to prove who’s at fault or get paid fairly for your injuries and car damage. Knowing when to call a lawyer protects your rights and cuts out a ton of recovery stress.
Working with car crash lawyers can help you navigate complicated legal matters after car accidents. An experienced car crash lawyer understands how to handle claims and negotiations effectively. Many car accident lawyers assist clients in recovering lost wages and covering medical costs related to injuries.
As TorHoerman Law notes, a knowledgeable car accident lawyer can also deal with insurance companies on your behalf. This support allows you to focus on recovery while professionals handle the legal side of things.
Reporting the accident to the appropriate authorities is often required, depending on local laws and the severity of the crash. Even if it seems minor, having an official record can protect you later. This report can serve as an objective account of what happened and support your version of events.
Contacting your insurance provider should happen as soon as possible after the incident. Provide them with accurate information and any evidence you have collected from the scene. Being real and sharing every detail helps the claim move faster and cuts out the annoying drama. Putting this off creates a bunch of extra headaches that you could have skipped by acting fast.
A car crash can feel discouraging, especially when you are still developing your driving skills and confidence.
Remember that slip-ups and wild moments are just part of the deal when learning a new skill. Instead of letting panic win, treat this whole mess as a super useful lesson for your future. Looking back at what went down helps you spot exactly where you can get even better.
Taking steps to become a more attentive and defensive driver can make a big difference moving forward. This might include practicing more, avoiding distractions, and staying aware of your surroundings at all times. Confidence will return gradually as you gain more experience behind the wheel. The goal is not to drive without fear, but to drive with awareness and control.
If a learner driver crashes, the supervising licensed driver may share responsibility depending on local laws. Insurance typically covers damages if valid. Authorities may investigate, and the learner might face restrictions or additional training requirements before continuing to drive.
The riskiest days to drive are often weekends, especially Friday and Saturday nights. Increased traffic, fatigue, and higher chances of impaired driving raise risks. Holidays and major events can also lead to more accidents due to busy roads and distracted drivers.
Trauma after a crash can stick around for weeks or even months, depending on the person. Some folks bounce back fast, while others deal with heavy emotional weight for a much longer time. Getting support, talking it out, and giving it time helps ease those feelings and heal your mind.
Dealing with a car crash as a new driver can feel overwhelming, but preparation makes everything more manageable. Remember that even experienced drivers face accidents, and it does not define your ability or potential. What truly matters is how you respond and what you learn from the situation.
Fleet priorities become unclear when operational data is available but scattered across separate tools, reports, and workflows, which makes it harder to decide what needs attention first. The problem is usually not a lack of information, but the lack of a shared operational view that connects vehicle status, order progress, driver activity, and route execution in a way that supports everyday decisions.
A properly built dashboard changes this by consolidating real-time inputs from telematics, transport workflows, and mobile field activity into one operational view that reflects what is actually happening.
Priority-setting in fleet management usually weakens when small gaps in visibility begin to accumulate across planning, execution, and reporting. A route may be assigned in one system, vehicle movement tracked in another, and driver status updated through an app, yet without a connected structure those pieces do not form a reliable basis for decisions.
Integrated environments become useful, because they connect vehicle tracking, dispatching, order handling, and driver communication in one structure rather than leaving teams to reconcile them manually. That kind of setup supports a more consistent view of operations and creates the conditions for priorities to be set on the basis of context rather than urgency alone.
From 1 July 2026, fleets using vehicles above 2.5 tonnes and up to 3.5 tonnes for international carriage of goods or cabotage for hire or reward will fall under the EU rules on driving times, breaks, and rest periods, and these vehicles will have to use second-generation smart tachographs (G2V2).This means that many van and light truck operations will start working under the same control logic that has so far applied mainly to heavier trucks: driving time, breaks, rest, border crossings, and location data will all have to be recorded, retained, and made available in line with the rules. For fleet dashboards, this changes the scope of what has to be visible day to day, because route execution, driver availability, tachograph records, and compliance-related events can no longer be treated as separate layers.
A dashboard supports real decisions only when it presents information according to operational relevance, rather than according to the logic of separate systems or technical categories.
That means the most useful dashboard is one that connects several operational layers inside the same view. Based on the available solution scope, these layers may include vehicle location, route history, driver activity, order progress, communication updates, transport planning data, and inputs from mobile workflows.
Once the dashboard is structured around operational decisions, priorities become easier to define because teams can assess issues in context. The purpose is not to display everything, but to make deviations, constraints, and dependencies visible early enough for someone to act before they turn into broader disruption.
This has a direct effect on response time, because users no longer need to compare separate tools or verify whether a piece of information is still current. In connected environments (telematics programmes) like Arealcontrol, where telematics data, dispatching processes, and mobile workflows are synchronized, that shared view supports faster decisions and more consistent coordination across the fleet.
When teams work from the same operational view, coordination becomes more precise because discussions are based on current status. Dispatchers, fleet managers, and drivers can respond to the same signals, which makes communication more focused and reduces the need for repeated clarification.
The main effect is that complexity becomes easier to manage on a daily basis. With a clear dashboard in place, priorities are set faster, interventions happen earlier, and decisions are made with a better understanding of the wider operational context.
Photos by Solomon Lunger
We’ve all daydreamed about how cool it would be to combine the modern comfort, reliability, and performance of a new truck with the timeless, nostalgic look of a true vintage pickup. While this idea isn’t exactly groundbreaking on its own, successfully executing it is the epitome of today’s standard of a customized classic.
What he envisioned is marrying the façade of a classic Ford pickup with the prowess of a Raptor…”
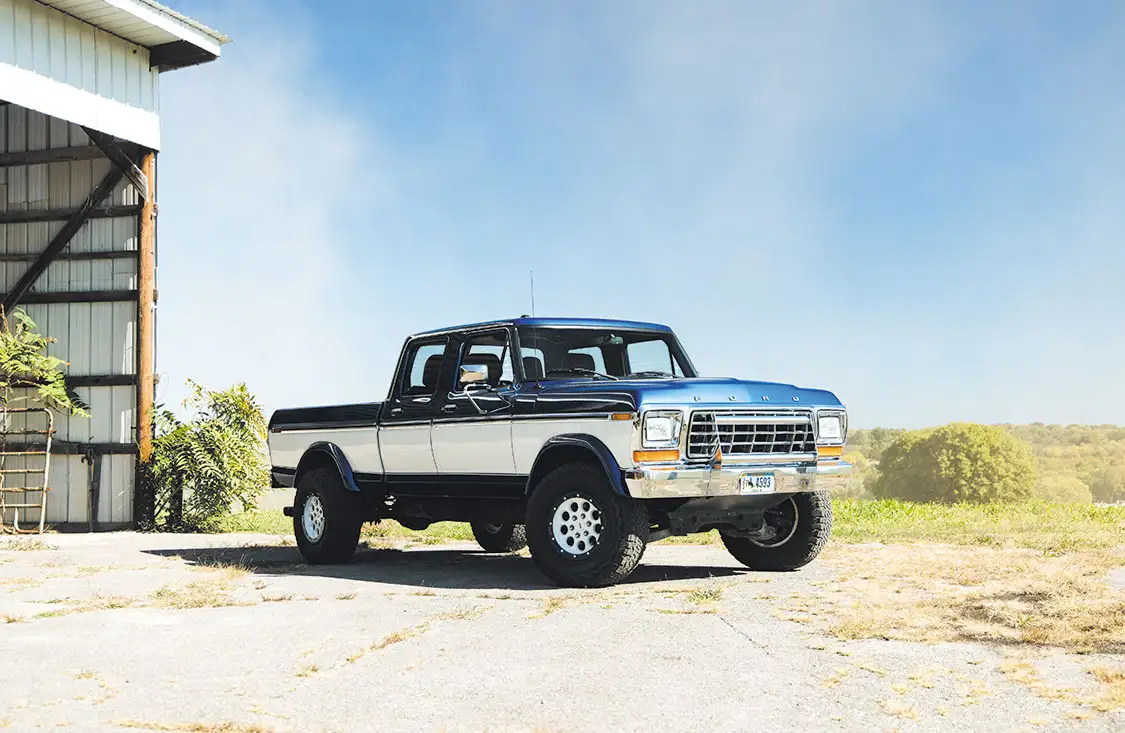
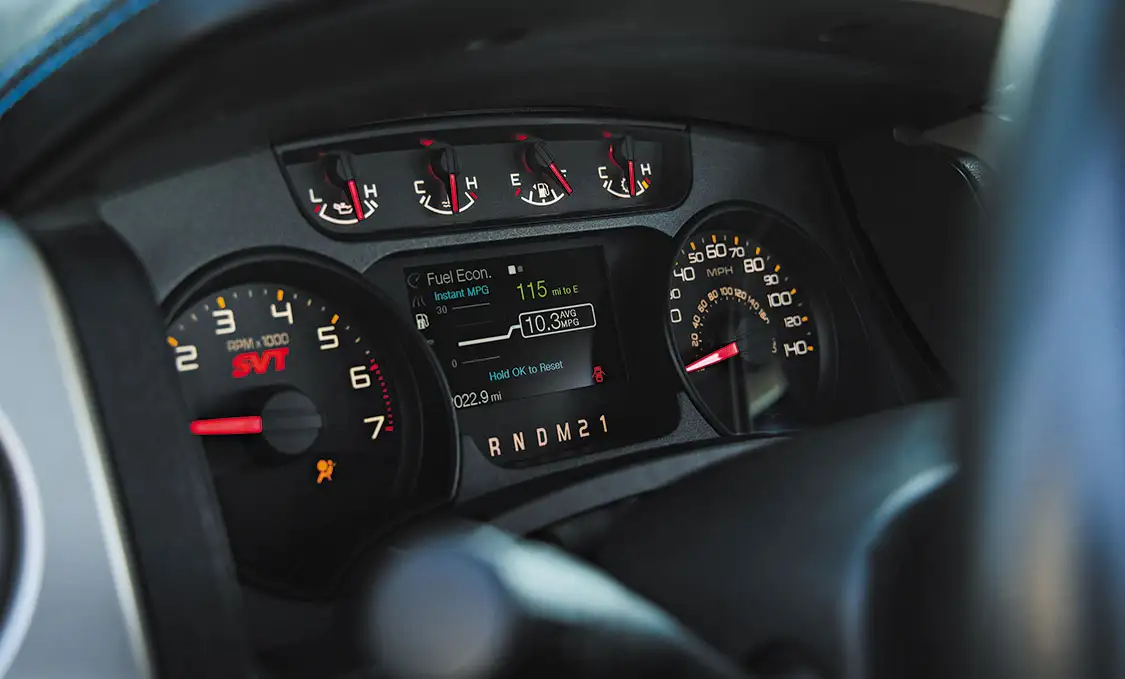
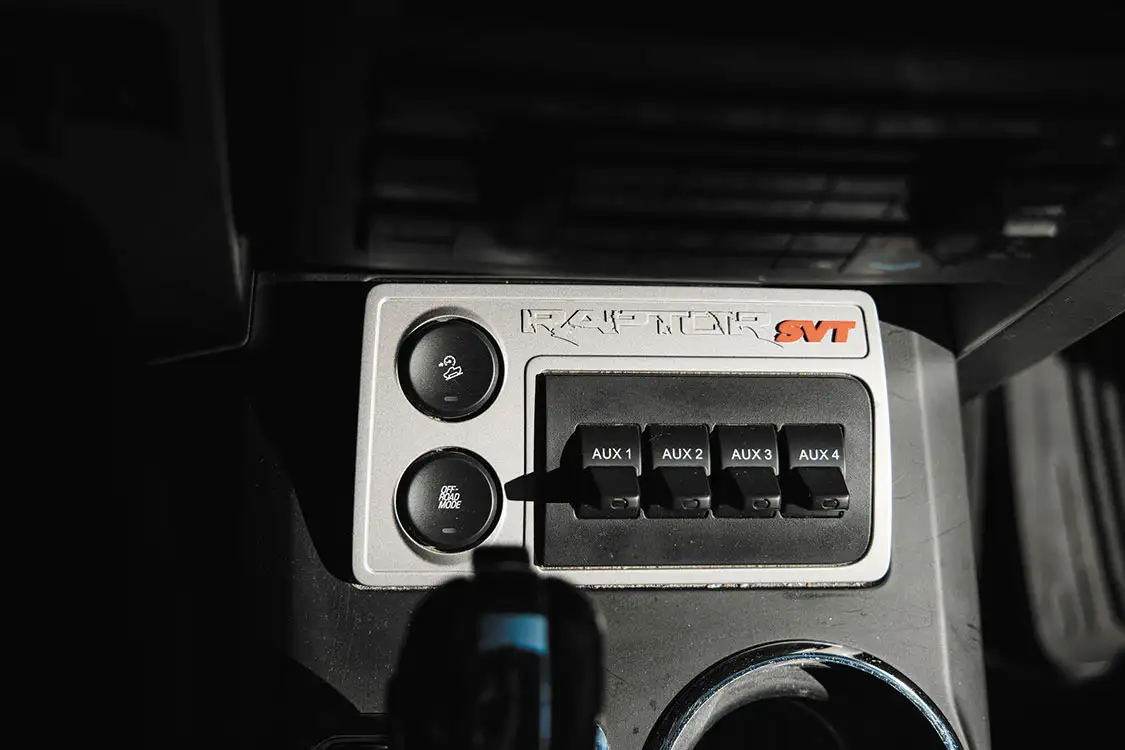
In the last few years, an influx of builders have acted on this same exact dream and fabricated some incredible builds—but nothing quite like what we’ve seen from Sweet Brothers Restomods out of Upton, Wyoming.
Dan Hart of Sweet Brothers has championed the concept of combining old and new, but his approach that has made all the difference in creating a style of truck is radically different from the rest. While it is common practice to swap a newer motor into an older truck or to incorporate some other later-model parts into a classic build, Dan has gone a few steps further while building the trucks he always dreamed of.
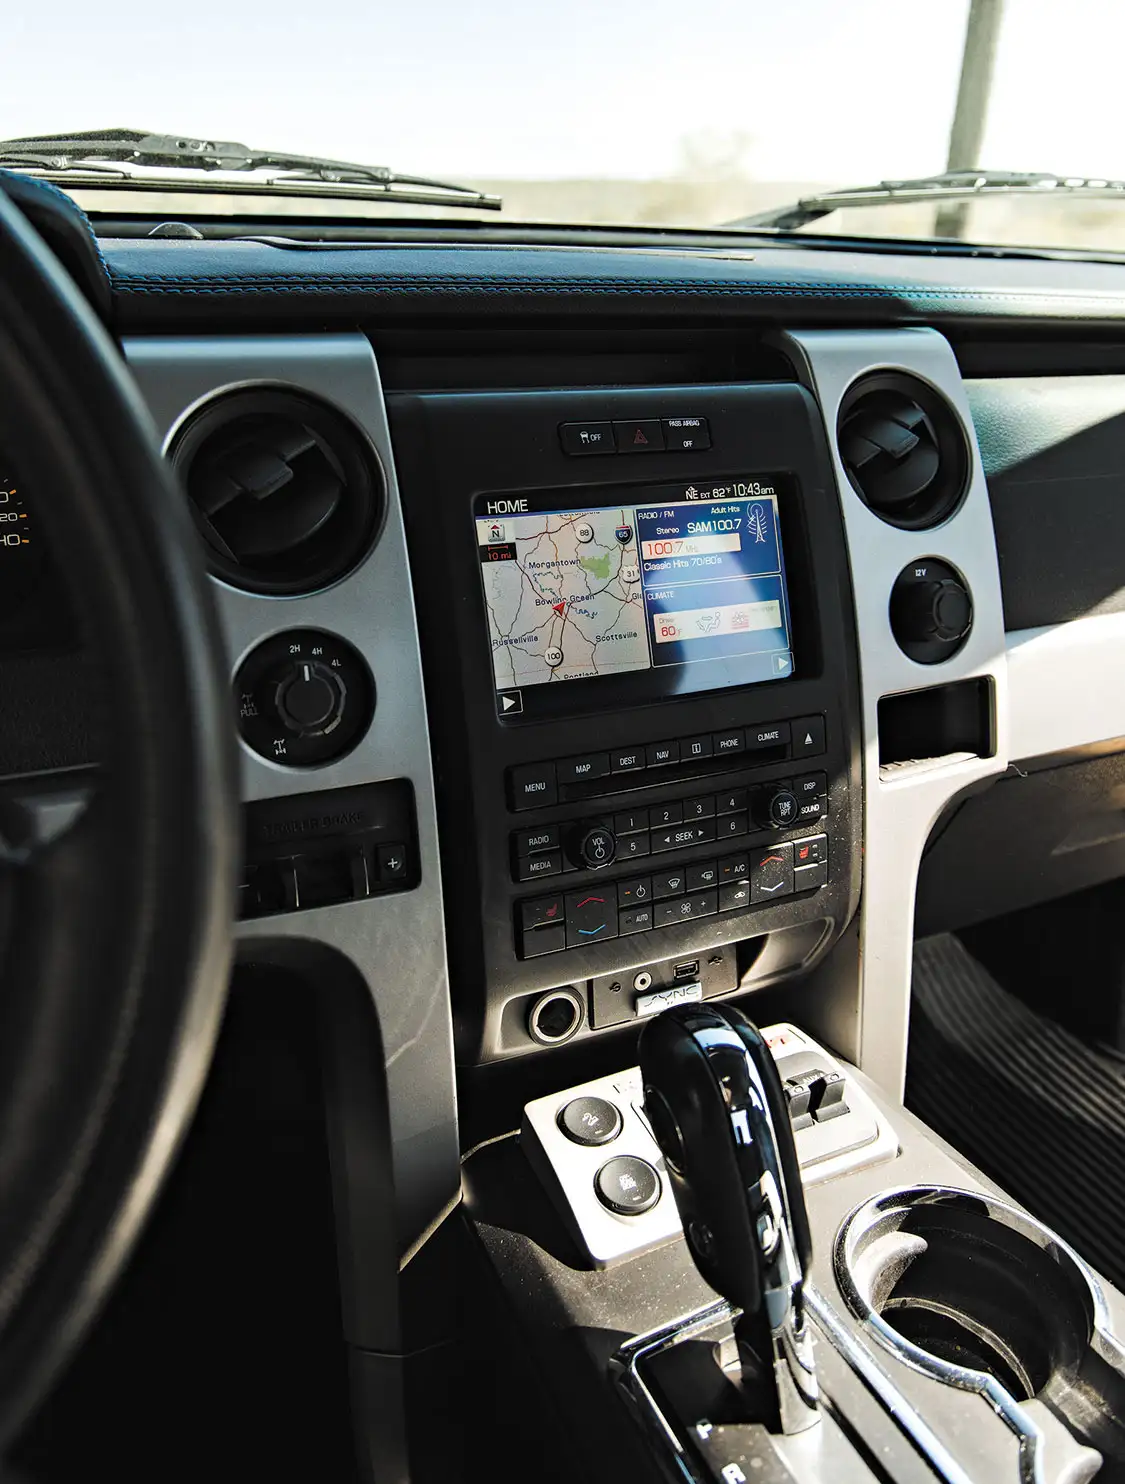
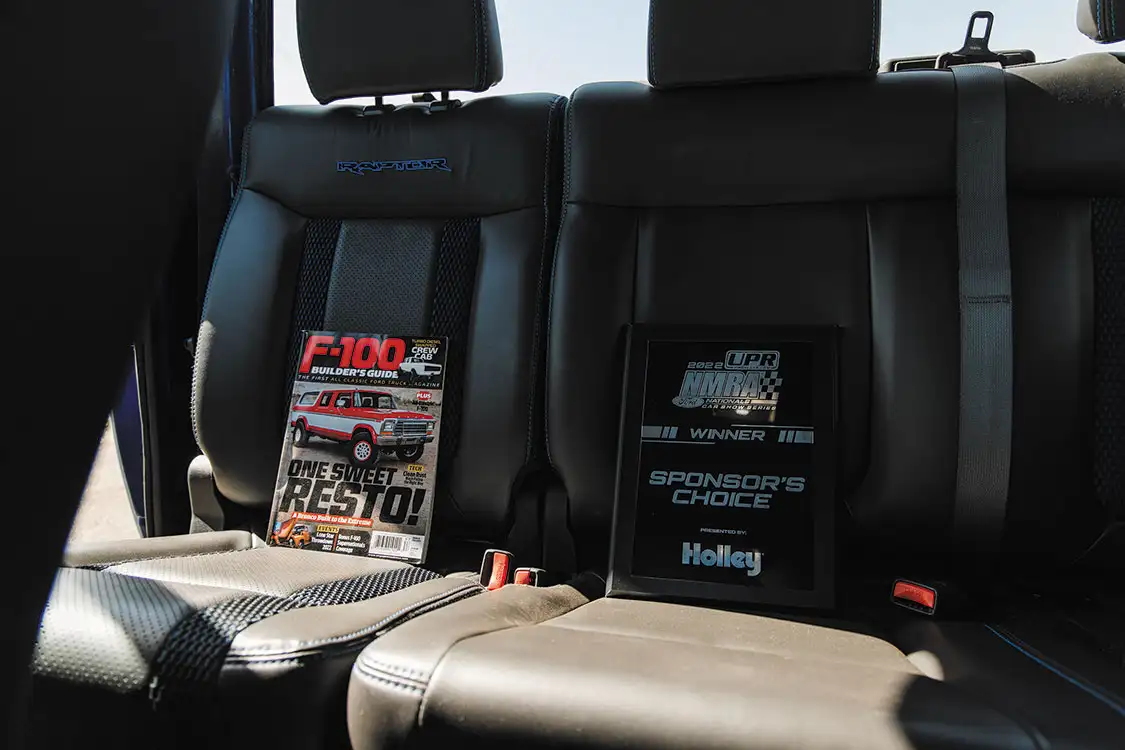
What he envisioned is marrying the façade of a classic Ford pickup with the prowess of a Raptor, which is an amazing pairing. Simply swapping in a Raptor powerplant under the hood would leave the new/old mixture somewhere along the lines of an 80/20 figure. Dan was looking to level the playing field to at least half and half.
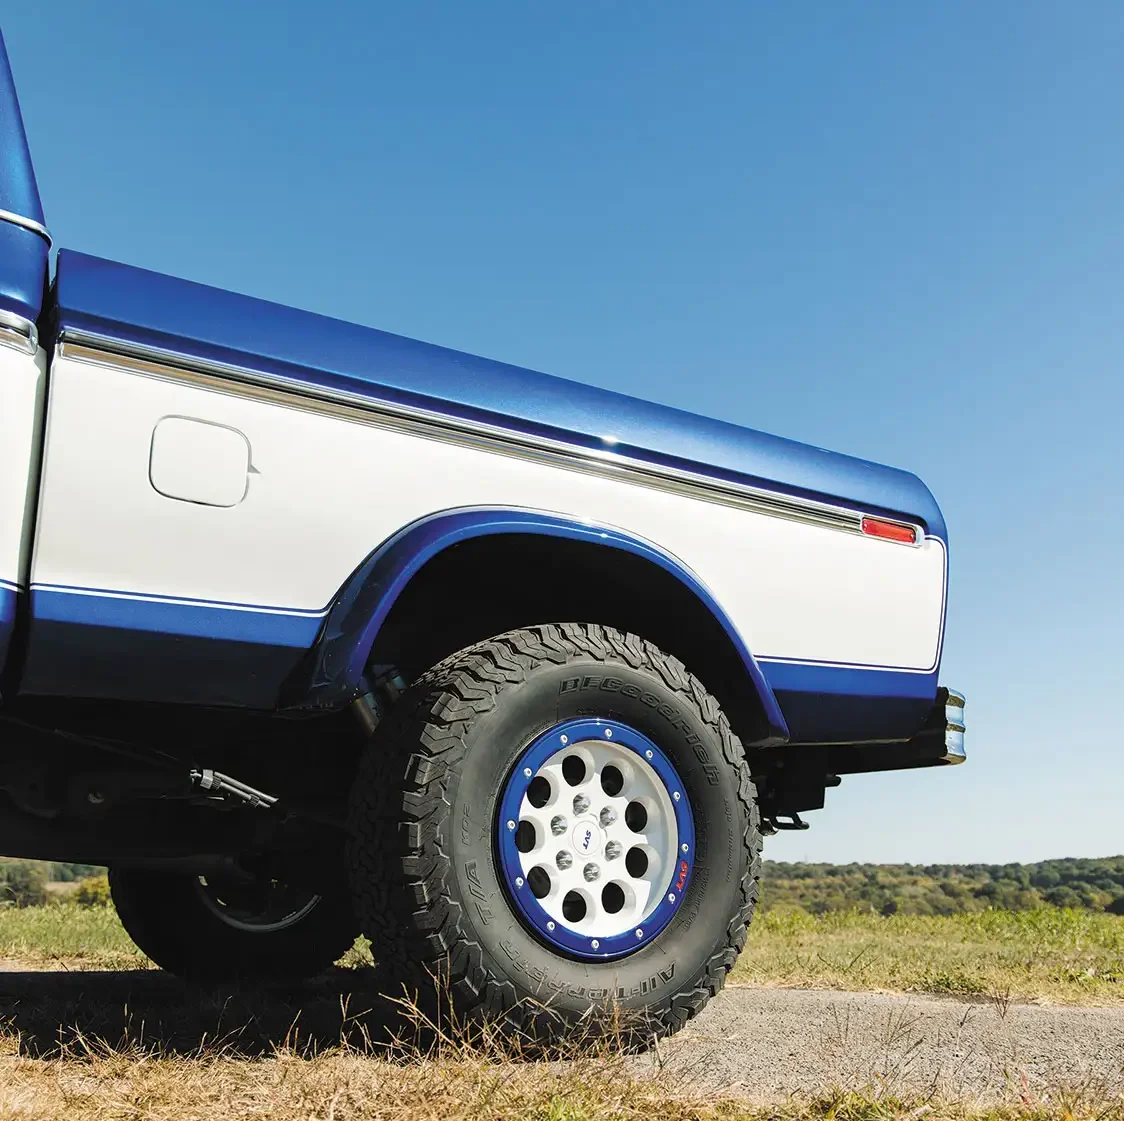
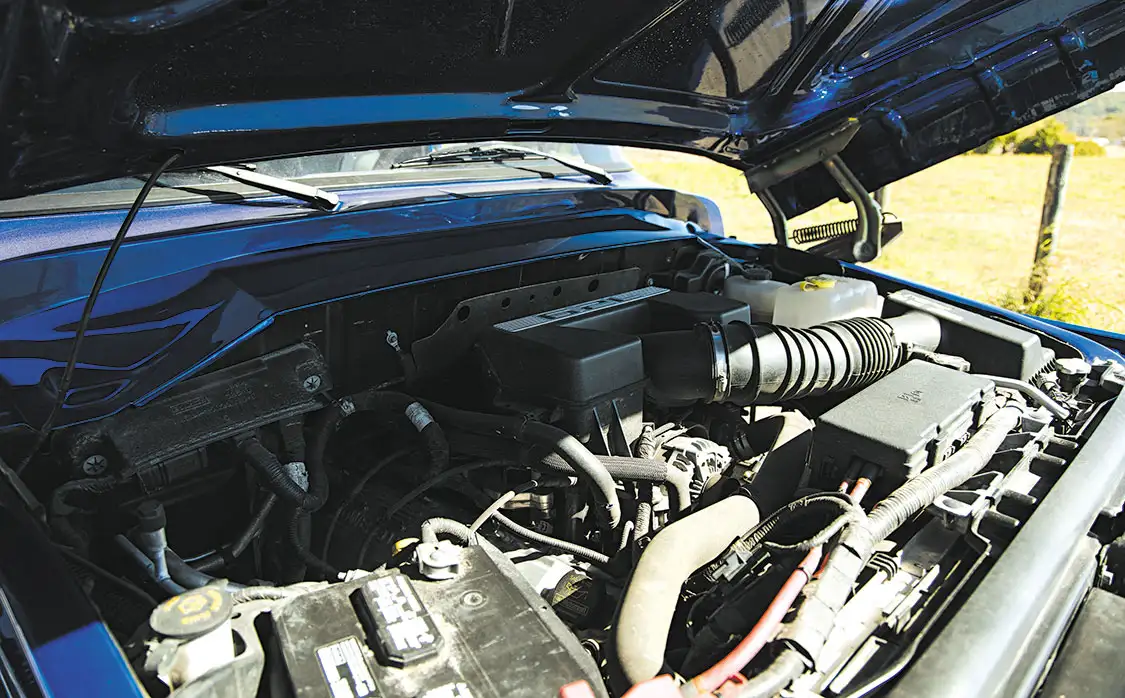
The truck you see here is equal parts 1979 F-150 and 2012 Raptor, although it may look more like an updated classic at first glance. Granted, most of the Raptor components are underneath truck or inside of the cab. Either way, Dan has figured out a way to accomplish what he set out to do only with better results than he probably initially imagined possible.
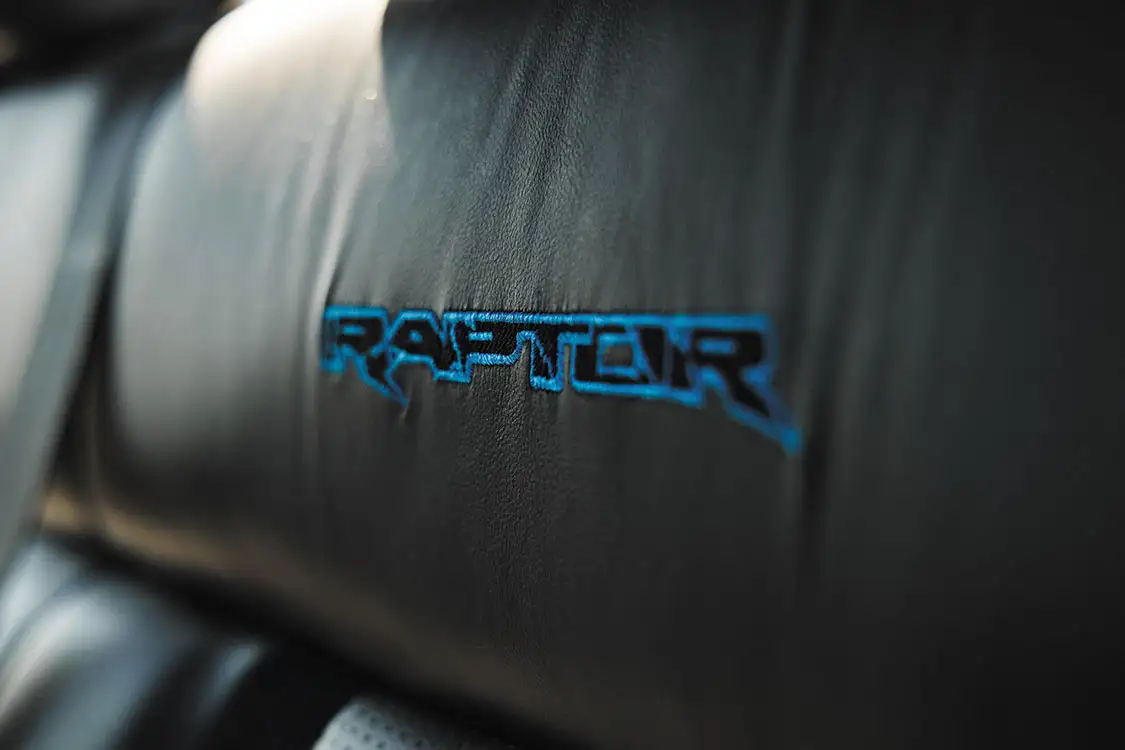
The frame is 100% Raptor (including the wheels) with the only exception is that it has been lengthened to 151 inches to properly fit underneath the ’79 crew cab body. The 6.2L engine and 6-speed transmission are both stock 2012 Raptor equipment—exactly how Ford offered them to the consumer. Before long, Dan had accomplished the first feat on his agenda by fusing a rolling chassis together, but there was much more work to do to make the transformation complete.
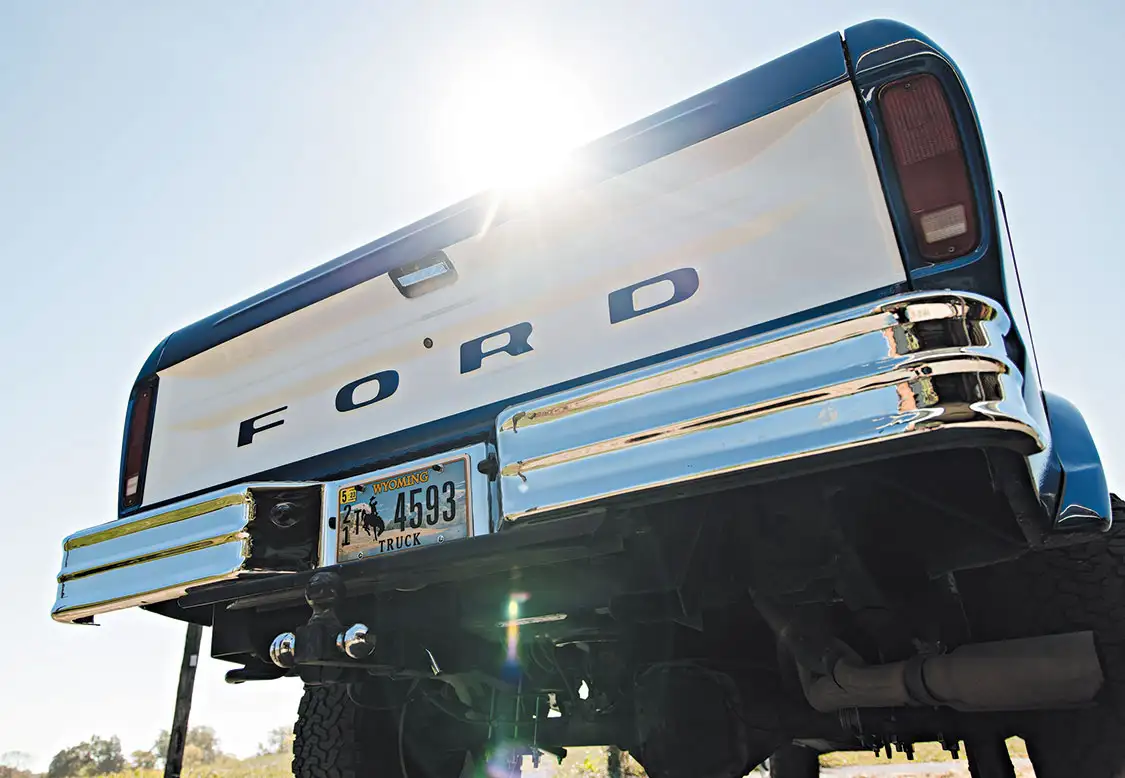
The next order of business was to spend some time on the classic side of the fence with the ’79’s exterior. Cool Customs Body and Paint in Torrington, Wyoming, worked out the necessary kinks from the body before the Sweet Brothers team stepped in to incorporate more factory Raptor touches into the truck’s surface. A keyless entry pad has been installed into the driver door, as has a factory-equipped rear back-up camera into the tailgate.
Raptor fender flares blend in surprisingly well with Ford’s 44-year-old design, but Dan passed on even trying to make Raptor power side mirrors make any sense—good call there. Once the blue and white PPG paint was applied, it’s tough to imagine a cooler OEM-style landscape for a beefy truck like this.
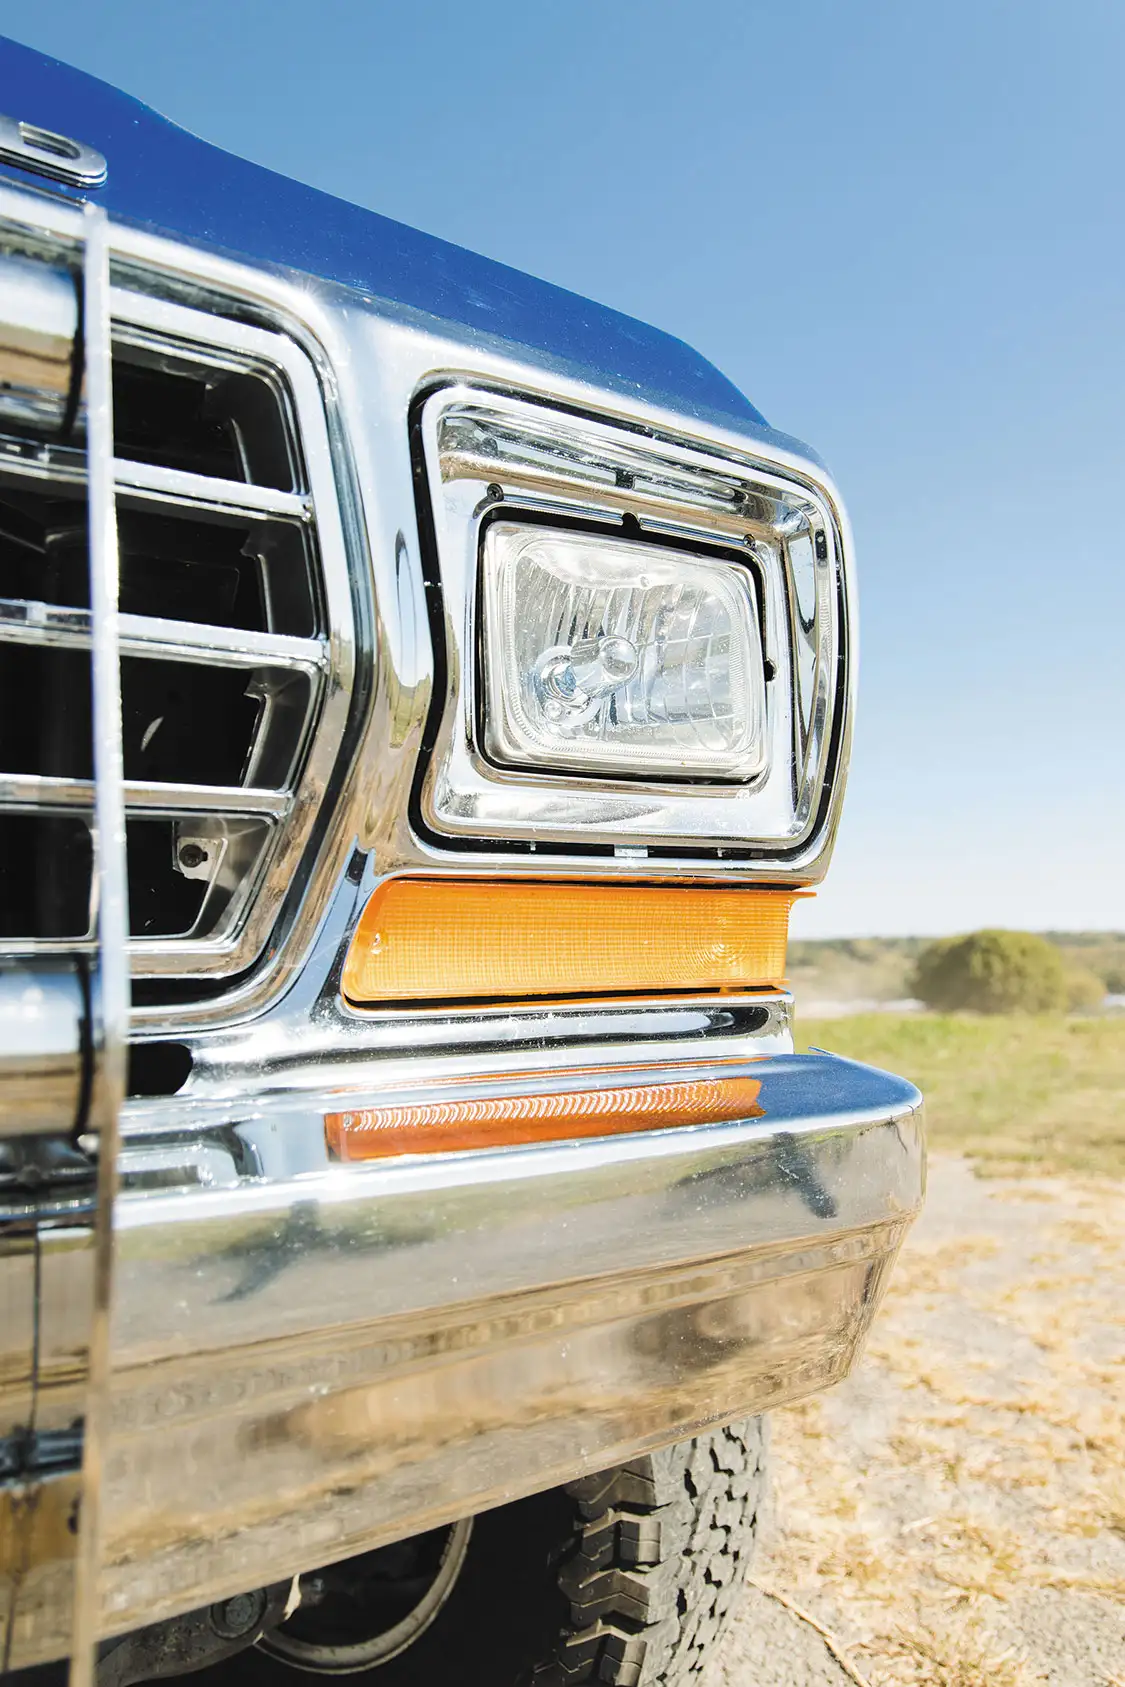
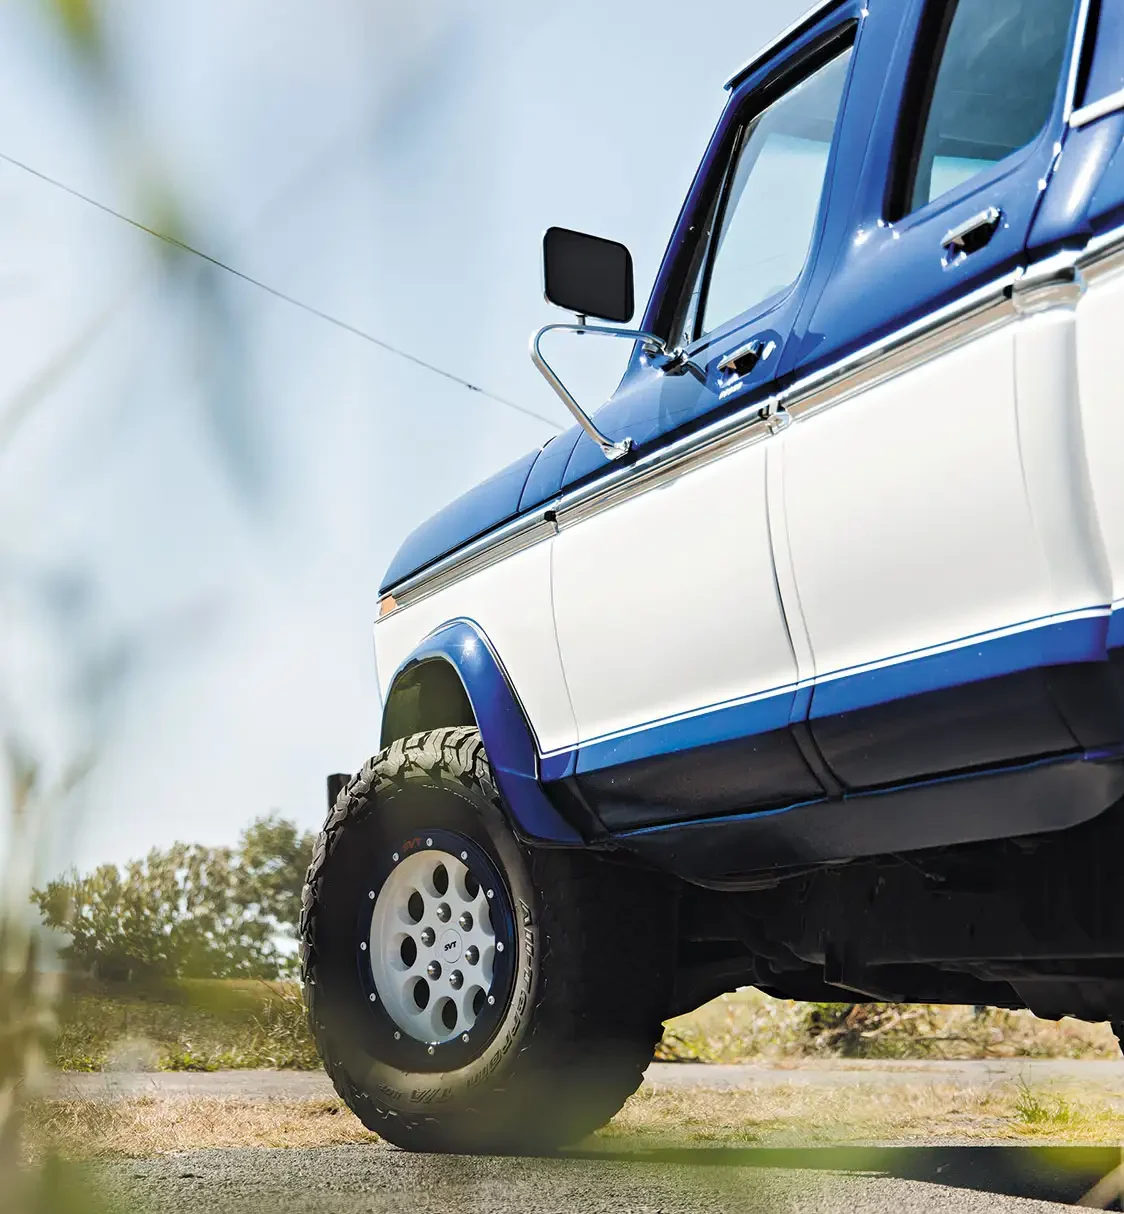
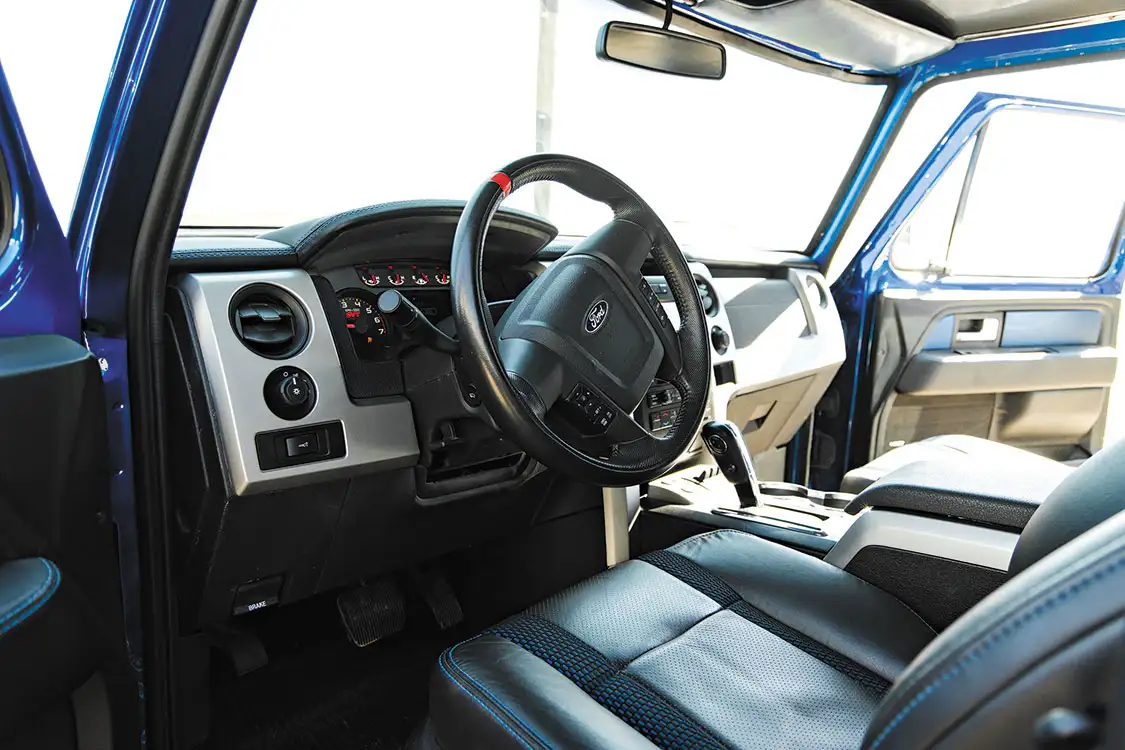
As amazing as the truck was starting to take shape, the real kicker of this particular build is the incorporation of the full Raptor interior inside of the cab. The term “full” is not used lightly here as not only have the seats have been included into this project, but everything from the dash, gauges, center console, flooring, door panels, headliner, and even the door latches that trigger the cab lights.
Even that annoying dinging sound reminding you to put your seatbelt on still functions, which is actually pretty cool to experience inside of a truck of this vintage. Road noise usually associated with older trucks has been neutralized here thanks to the Sweet Brothers’ team tireless effort to trick the driver’s brain into thinking they are driving a late-model pickup.
While this is not the first Raptor conversion that Dan Hart and Sweet Brothers’ Restomods have completed (they have also have another ’79 F-150 and a killer ’79 Ford Bronco that has graced our cover before), it sure won’t be their last. The guys have enjoyed the experience building these things while receiving the trophies and accolades that have followed the debut of each of their creations but will eventually offer them up for purchase with even more on the way!
Now, the price tags attached to them will be substantial, but brand new Raptors aren’t exactly cheap to begin with. What would you rather have—a new truck all around, or a totally finished classic Ford pickup or SUV with the inner workings and spirit of a Raptor at the core of the truck? For some, this will be tough decision to weigh out, but for others there will be zero hesitation to choose the latter.
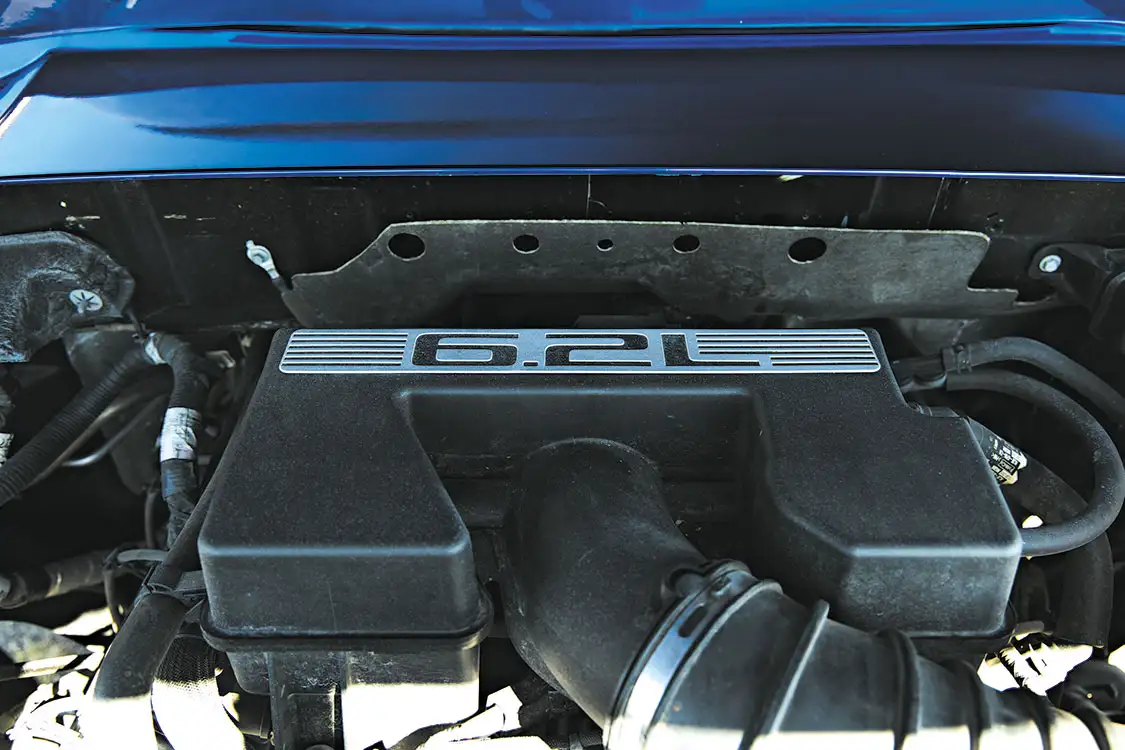
With the popularity of these builds by Sweet Brothers Restomods spiking dramatically, it’s a sure bet that demand for some type of waiting list for potential future orders may begin to form. The guys may even look to bring these trucks to the auction block as they are completed—it’s hard to say for sure. Either way, it would be wise to reach out to Sweet Brothers directly to express your interest or follow them online through their social channels for updates. The dream of getting behind the wheel of a perfectly modernized classic performance truck could become a reality much sooner than expected.
TRUCK SPECS
Owner
Dan Hart/Sweet Brothers Restomods
1979 Ford F-150
Upton, WY
Engine/Powertrain
Chassis/Suspension
Shop: Sweet Brothers Restomods, Upton, WY
Wheels, Tires & Brakes
Exterior & Paint
Interior & Sound
Shop: Roy Keith Classics, Hot Springs, SD
Conductive Classics out of Boise, Idaho, first took the plunge into the EV world with its last build: a 1958 Chevy Apache that the company cleverly dubbed the E-Pache. That truck had a very straightforward concept, as its patina-clad exterior was left in place to highlight that a “barn find”-style truck could be completely transformed into an electric vehicle with the right orchestration of parts and design.
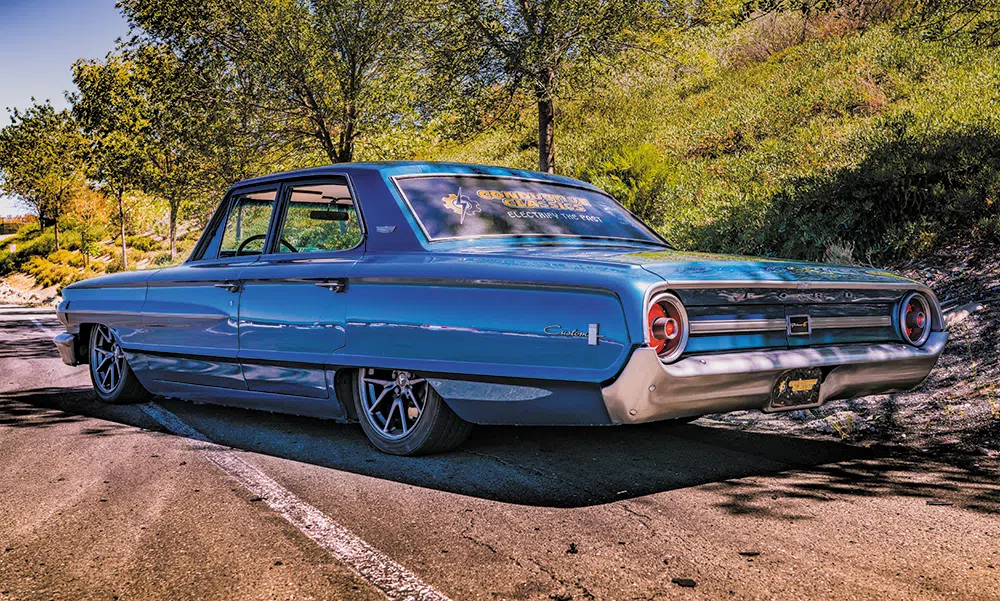
Well, the E-Pache was well received to say the least. The marriage of a classic vehicle with modern, high-voltage power has proven to spark a new revolution since the release of its first electric build, and Shane Rolph and Mike Sallee of Conductive Classics were just itching to begin work on their follow up EV-conversion vehicle.
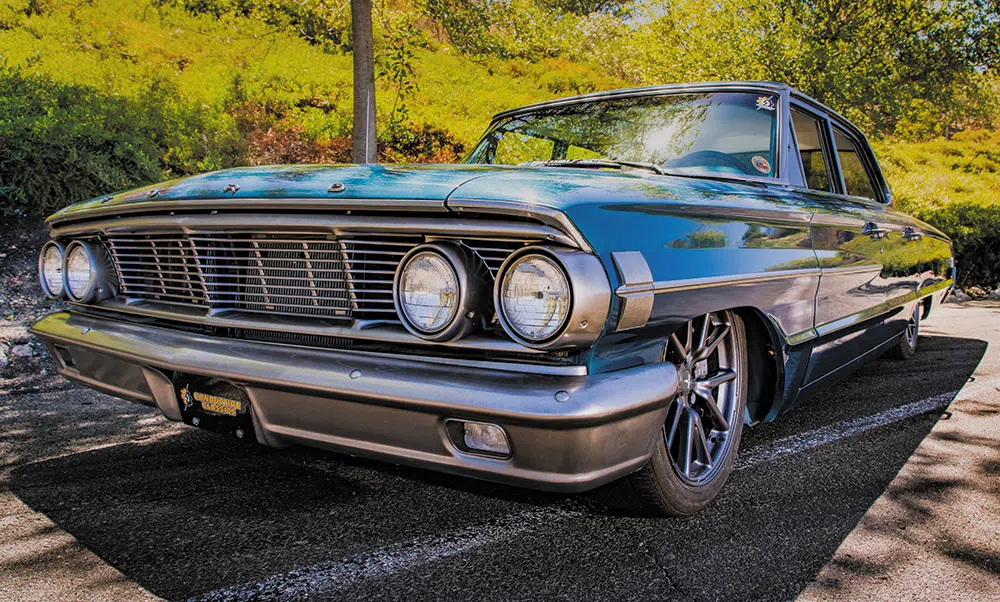
To keep things classic, the original blue paint code for 1964 was used…
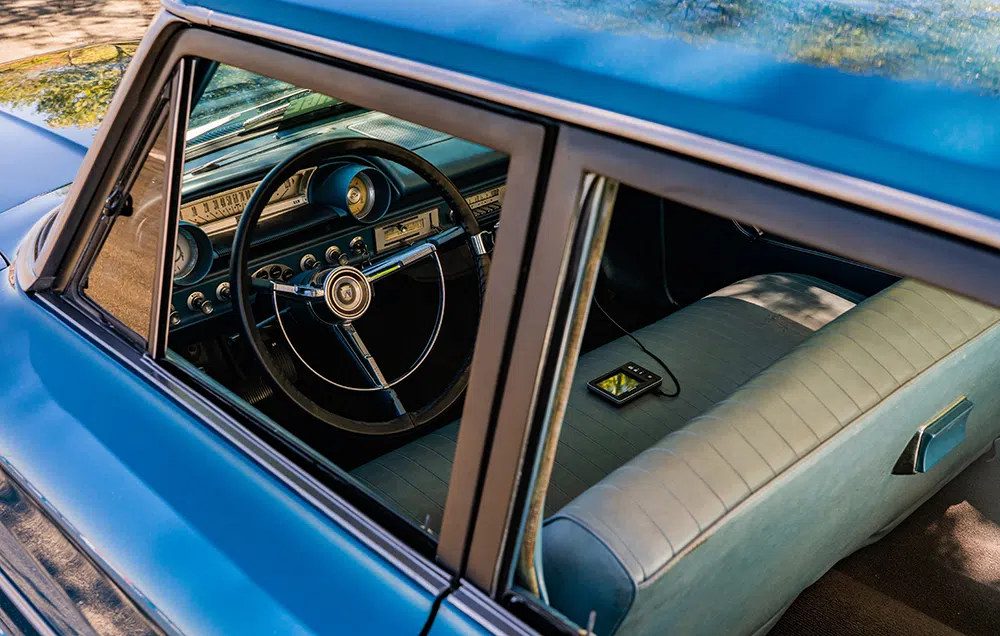
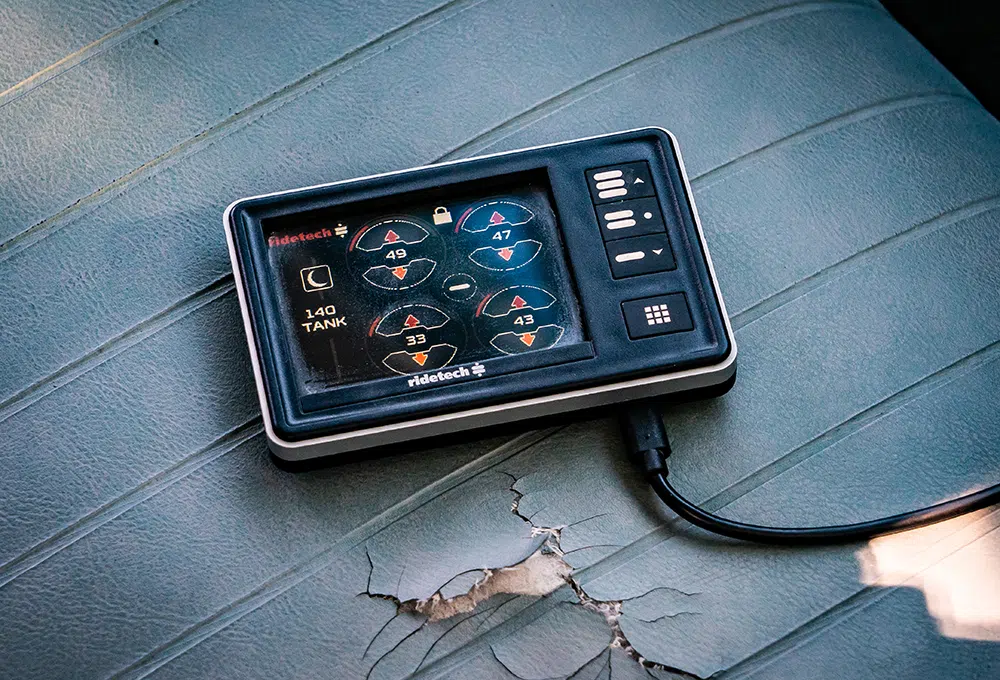
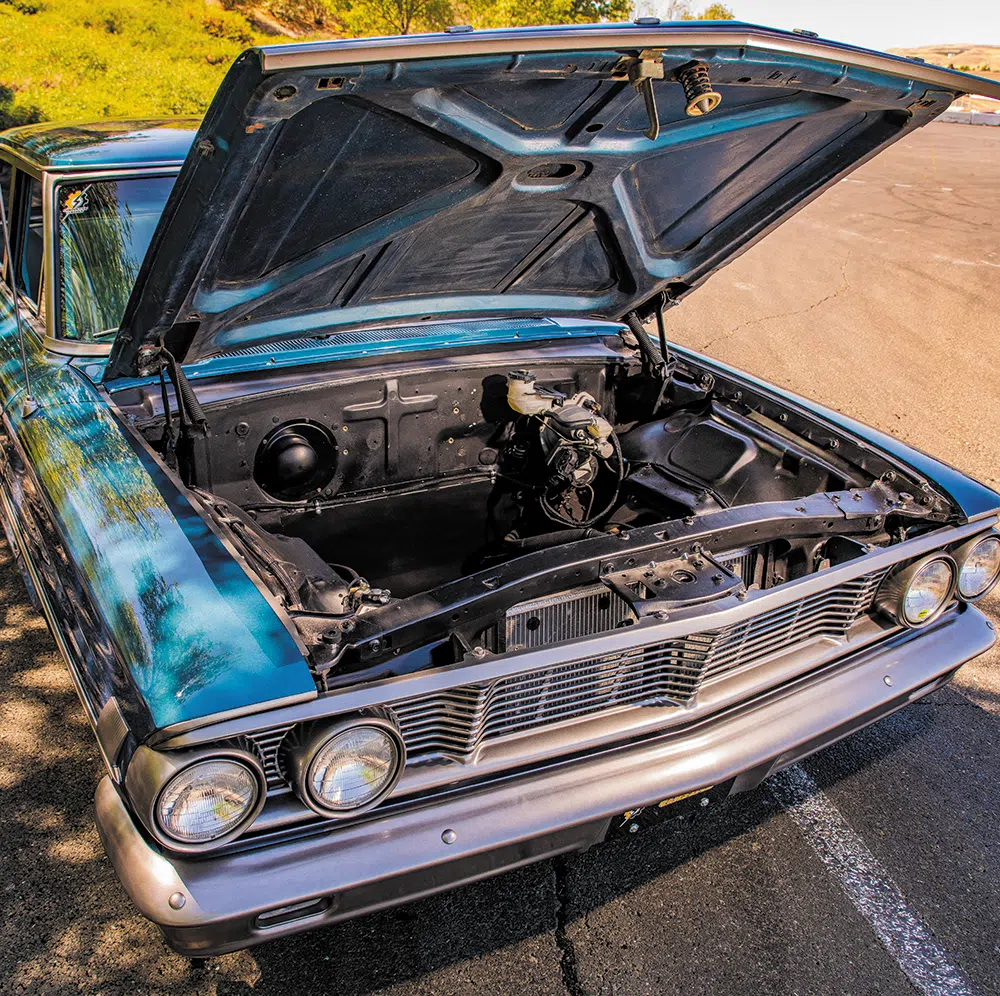
The guys didn’t choose another pickup truck to electrify, but they did choose an equally awesome car—a 1964 Ford Galaxie that is now better known as the Galax-E. (The names the guys at Conductive give their EV vehicles are arguably just as cool as the vehicles themselves.) For this build, Shane and Mike were looking to pick up right where they left off with the E-Pache. More power and better range were two of the foremost characteristics they were looking to add to the Galax-E. The entire car was set to receive a much more complex design that would further push the car past what they accomplished with the Apache.
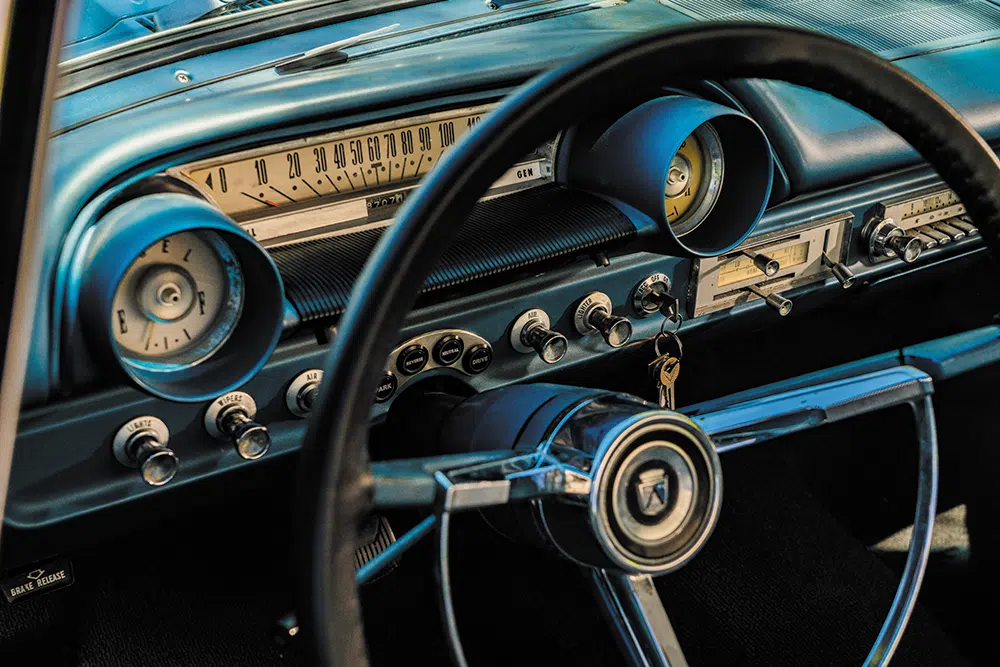
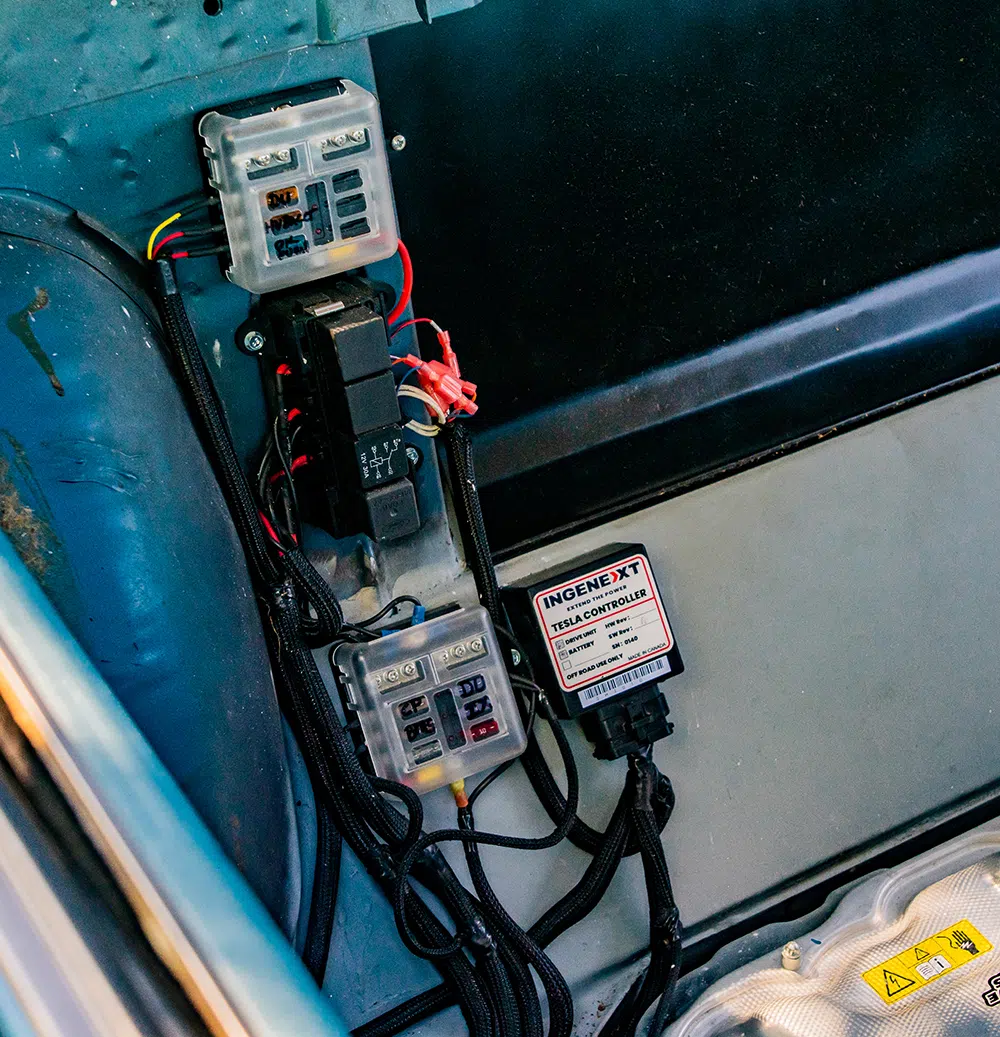
While a great deal of EV conversions out there incorporate Tesla motors to power the vehicle, Conductive planned to string many more Tesla components cohesively this time around. Along with the powerful Model 3 rear motor, Shane and Mike also utilized a full 2018 Tesla Model 3 subframe as well as the full battery pack and braking components. Right off the bat, this was a big improvement from what the guys used on the Apache, and they instantly gained the power and longer range they were looking for.
As far as the car’s control software, Ingenext was selected as Shane, along with lots of other EV builders out there, are having a hard time tracking down motor control systems for the Model 3.
“We struggled a bit but got things working,” Shane says. “We’ve been able to work out most of the bugs and are still working on getting rid of a few more, but it’ll all turn out well in the end.”
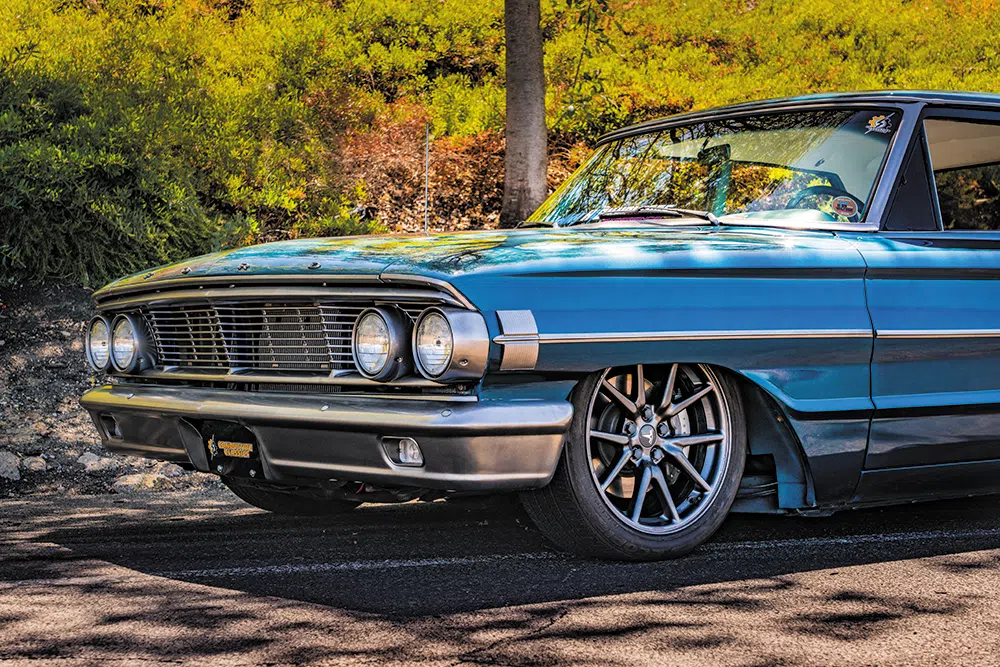
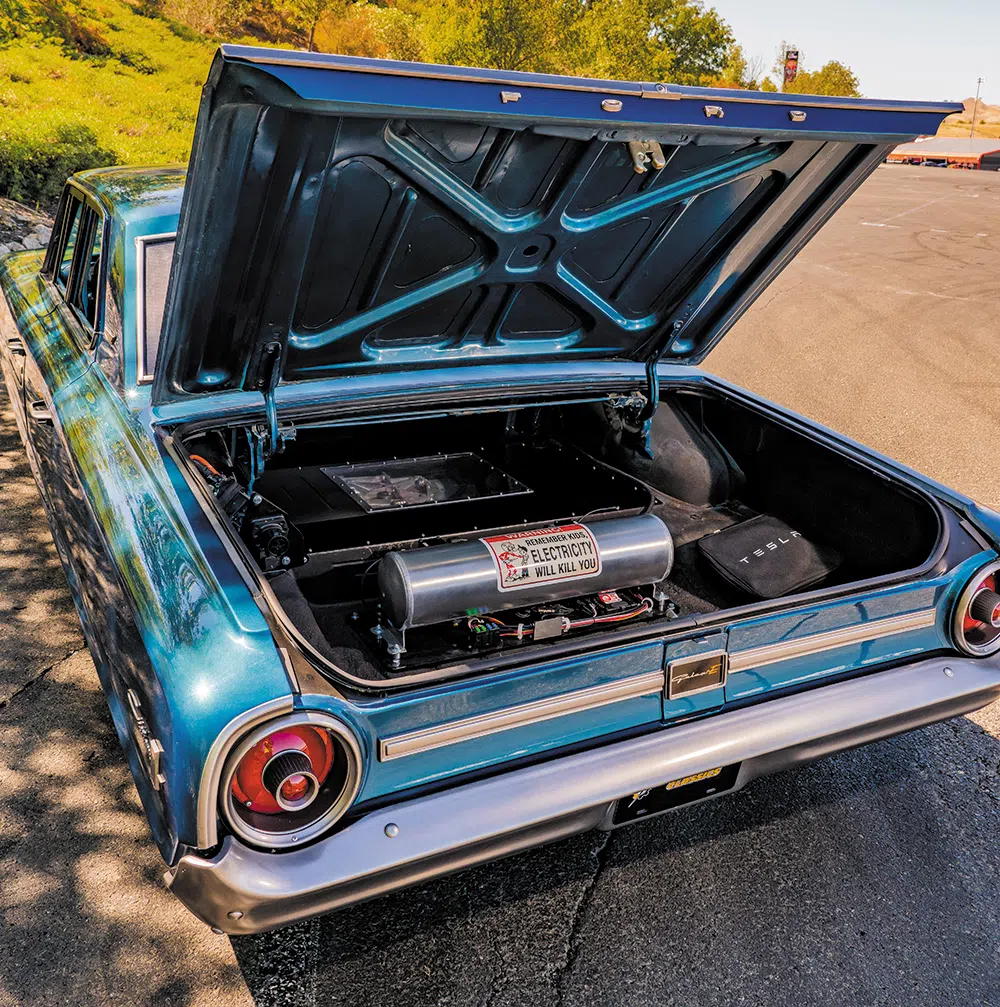
To get the Galax-E to sit at a much more aggressive stance, air-ride components from RideTech were installed onto the modified chassis. The Shockwave units at each corner and RideTech’s own air management system help keep the car sitting right with both style and comfort in mind. Surprisingly, the factory Tesla Model 3 wheels and tires even look right at home on the 59-year-old Ford.
Next, the Conductive crew handed the car over to Next Level Customs to have some body and paintwork done—something that hadn’t been done in depth with the Apache. To keep things classic, the original blue paint code for 1964 was used, and everything that was chrome plated was painted to match the gunmetal hue of the Tesla wheels.
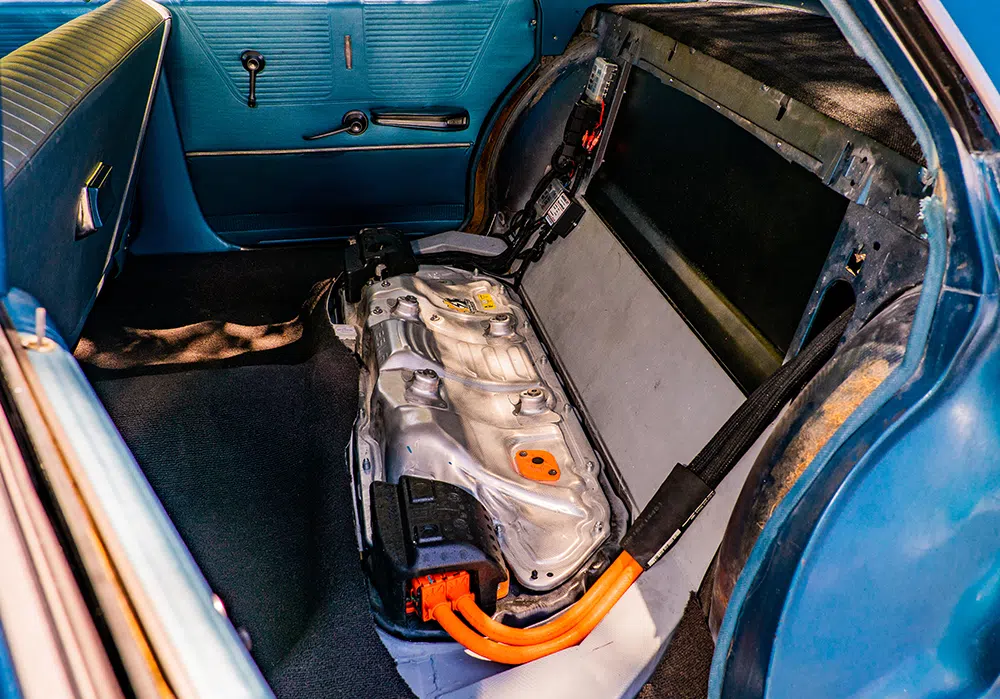
The look and feel of the exterior is cool and clean and isn’t exactly indicative of the car being fully electric powered, which is a key factor of what makes these classic vehicle conversions so damn cool in the first place.
Some improvements have been made inside the car, but for the most part it was simply cleaned up and given attention where needed. A full A/C system will be coming up soon, and quite possibly a stereo system, too, as the original AM radio firing through on one, single, working speaker doesn’t exactly make for exciting cruising music.
“We are overall very happy with the outcome of this project,” Shane says proudly. “We tried to get sponsorships from several companies throughout the build, but we had zero takers. Not wanting to let that stop us from doing what we truly wanted to build, we took whatever discounts we could get on the parts we needed and built the car in-house.”
Whatever extras that weren’t included into the build thus far will surely be added along the way when time and funding present themselves.
With no sponsorship backing to mention, Conductive Classics still received an invitation to show the Galax-E at SEMA 2022.
“We’d like to thank the crew at Throttle Works and our Conductive Classics staff for chipping in the time and keeping regular shop operations going on while I spent way too much time focusing on this car,” Shane says.
While we are sure that Shane and Mike get bombarded with emails and questions at the many EV-centric events they have shown the car—including Holley’s High Voltage show, the Tour De Force road rally, and the State of Charge expo—we just had to get Shane’s take on what is likely the most popular inquiry.
“We do get asked frequently for our advice on how others can go about building an EV conversion of their own, and my answer never changes,” he says. “As long as you don’t think it’s going to be cheap, easy, or quick, then you won’t be disappointed along the way. We have been building custom cars through our other company for many years, and EVs were something fresh and new that reignited the passion for us. Of course, there are plenty of haters out there—until they go for a ride with us.”
OWNER
MOTOR
CHASSIS/SUSPENSION
WHEELS, TIRES & BRAKES
BODY/PAINT
INTERIOR
Investing time and money on building a custom vehicle can be somewhat of a slippery slope. Depending on the vehicle and its condition, that investment can be doomed from the start—financially speaking, anyway. Practicality also comes into play as a make or break factor at the end of the day. As long as there is a good time and sense of accomplishment at the center of the project, however, there can still be a great deal of success to be had with it. There is a balance to be met, and that balance is different for each and every one of us—especially if family life can benefit greatly from putting together a custom tailored ride.
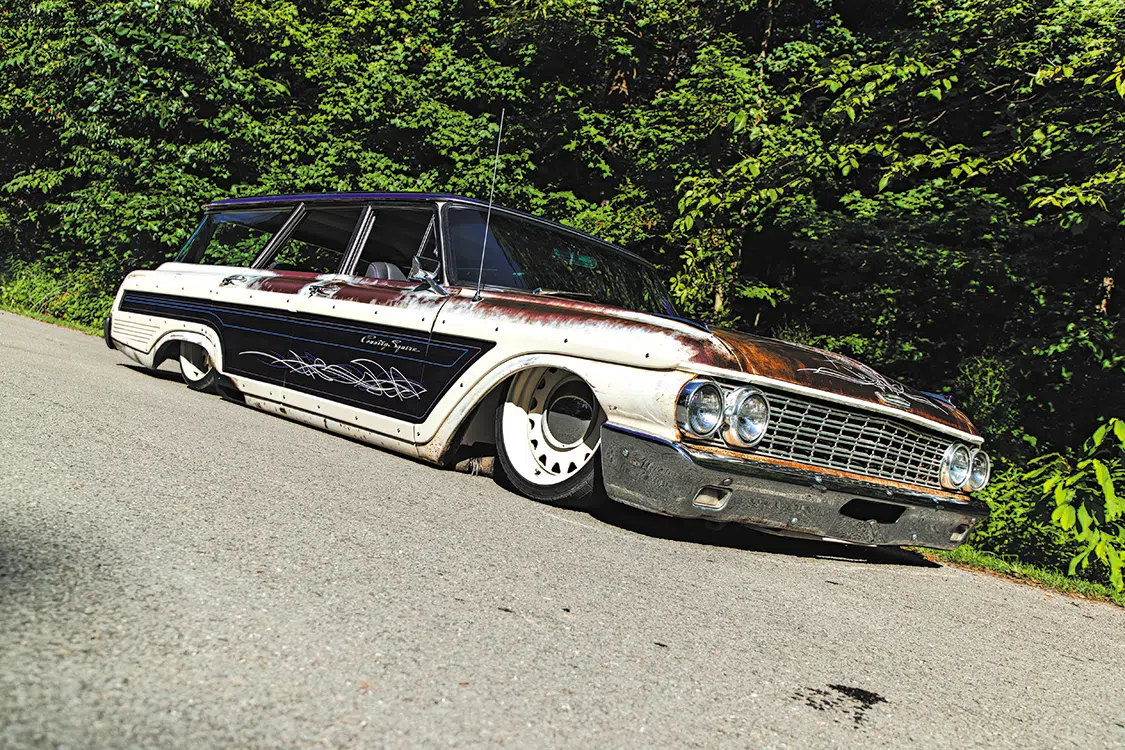
Recently, we were lucky enough to catch up with Kodie Paxton, and her husband William “BJ” Boden from Temperance, Michigan. Both are definitely not newcomers to custom automotive culture, as they own and operate their own shop called Acme Gas and Oil. BJ has been in the scene a long time now, and he has a couple absolute killer builds (both Fords) to his credit. One is a slammed and show-worthy ’84 Bronco II that is hard to forget once you’ve seen it. The other is also low, a cool-as-hell ’85 Ranger that also boasts custom paint, a full interior and a whole lot more.
While both of BJ’s previous builds share a similar mid-1980’s vintage along with heavy street truck styling cues, there is one glaring difference that sets them starkly apart—the Cummins 4BT turbo-powered engine underneath the Ranger’s hood. While the Bronco’s 1949 Ford Flathead V8 is an amazing piece of machinery in its own right, the Ranger’s power plant does pique our interest a tad bit more. This does happen to be a diesel-centric publication, after all.
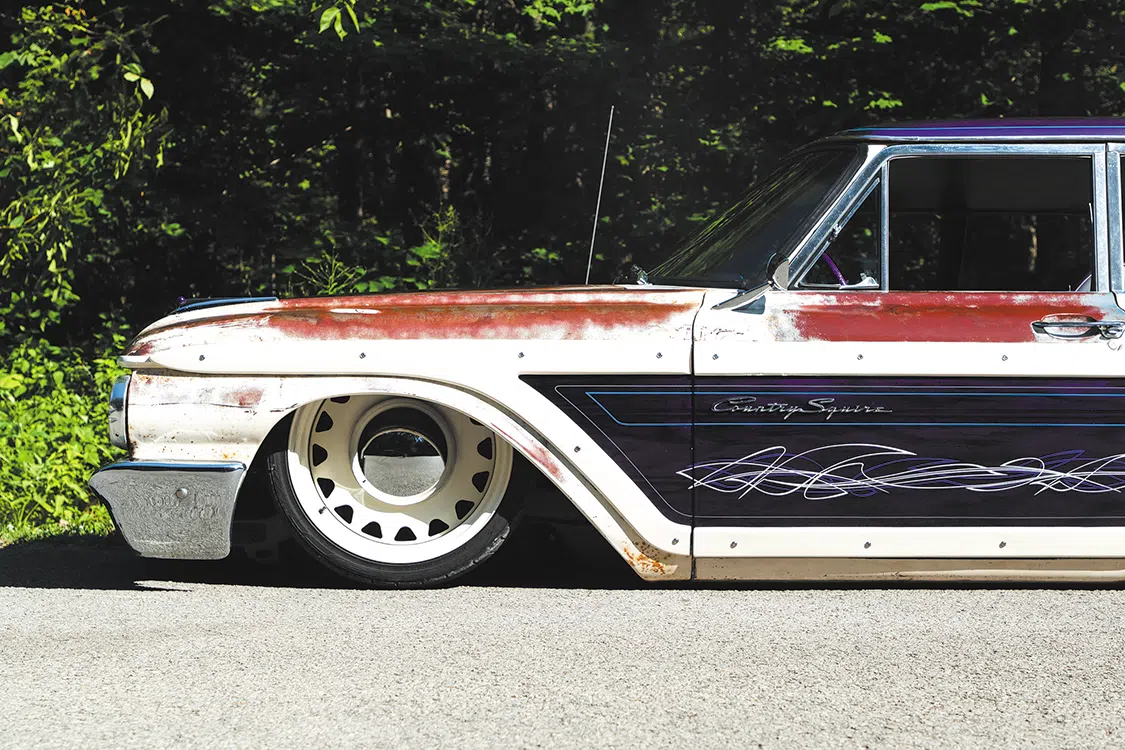
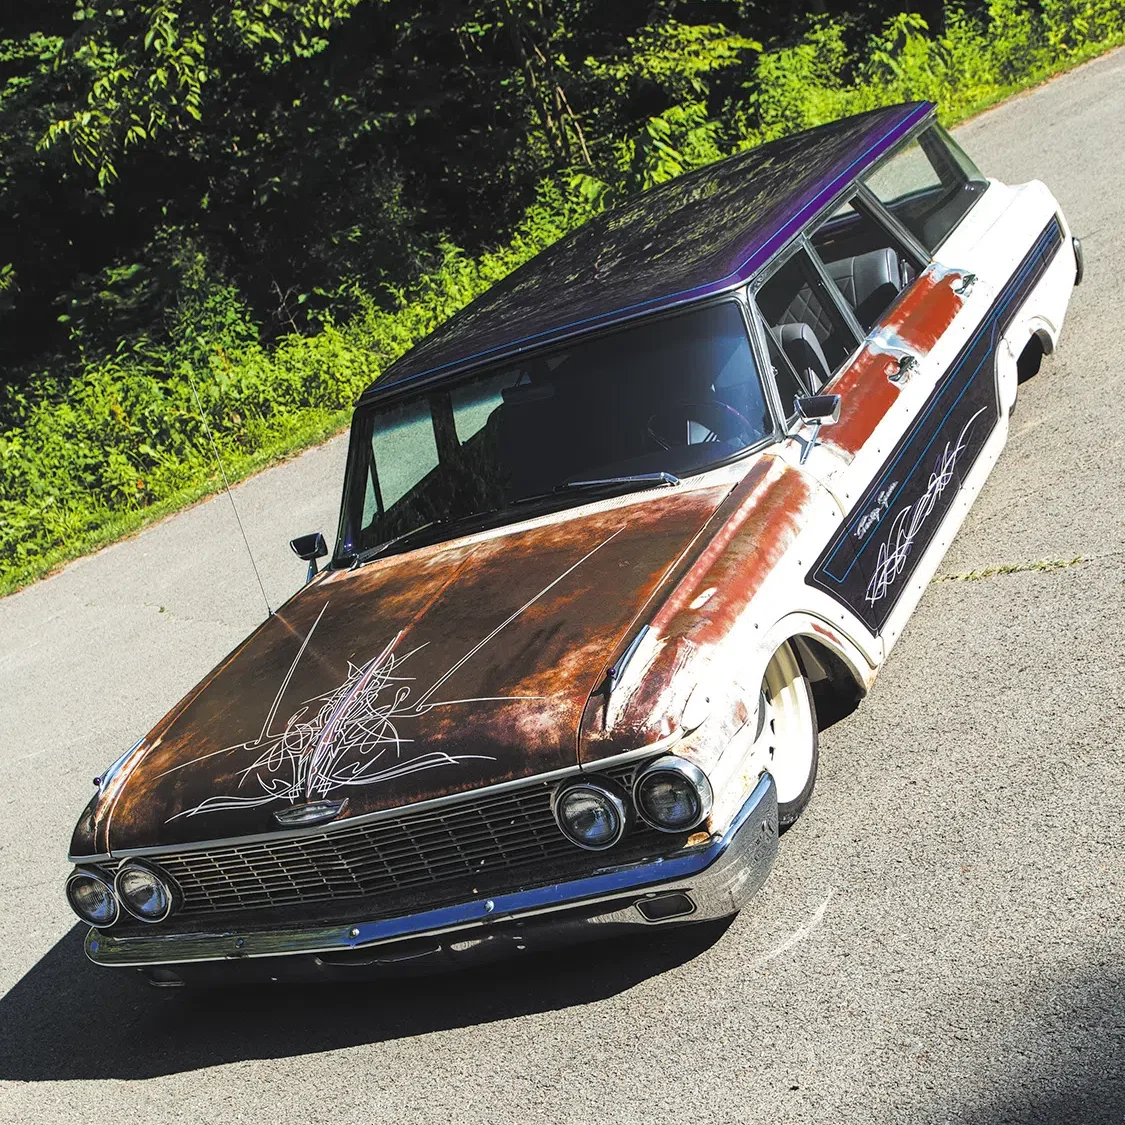
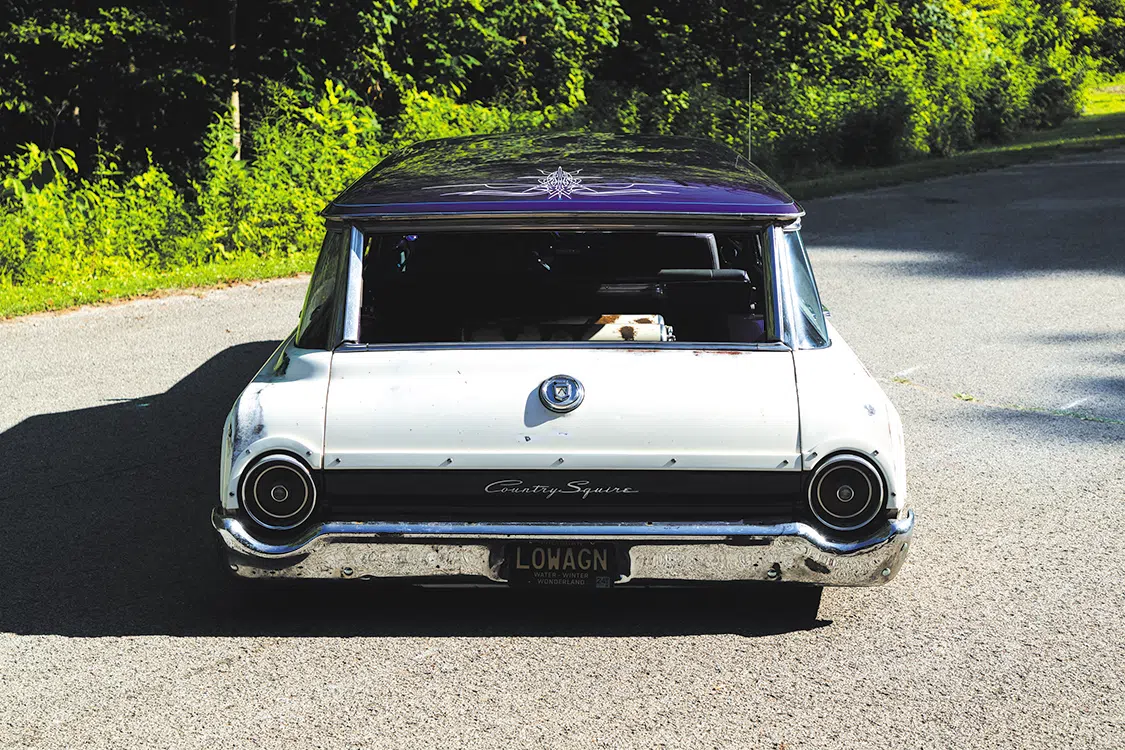
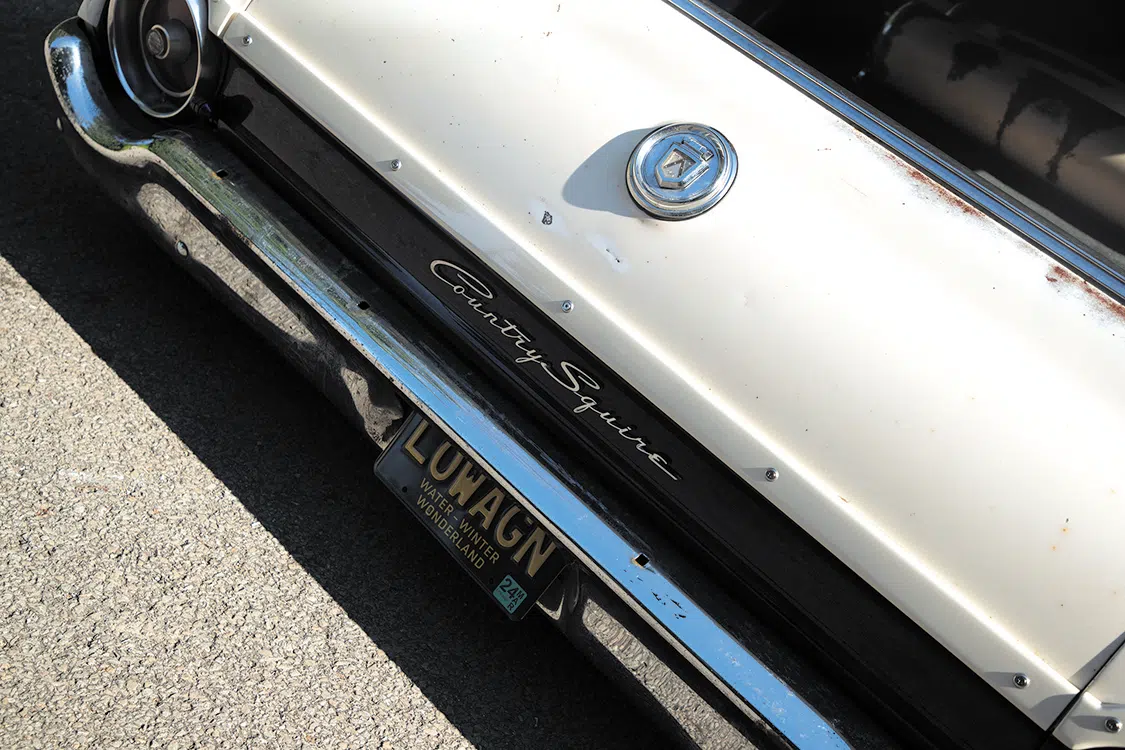
Another similarity the Bronco and Ranger share is Kodie’s love for both of them. When the time came for the two to take on yet another project vehicle, they placed their growing family at the heart of the build and found something that they can all enjoy and fit inside comfortably at the same time. The vehicle they chose is a step away from their previous two, but it’s just as cool. BJ picked up a 1962 Ford Galaxie Country Squire wagon as a surprise for Kodie, and boy, she was surprised to see it for the first time parked in their shop. The plan was to give the car the full treatment, which included running with another truly stellar engine specimen, which has become somewhat of a requirement for any of BJ’s builds.
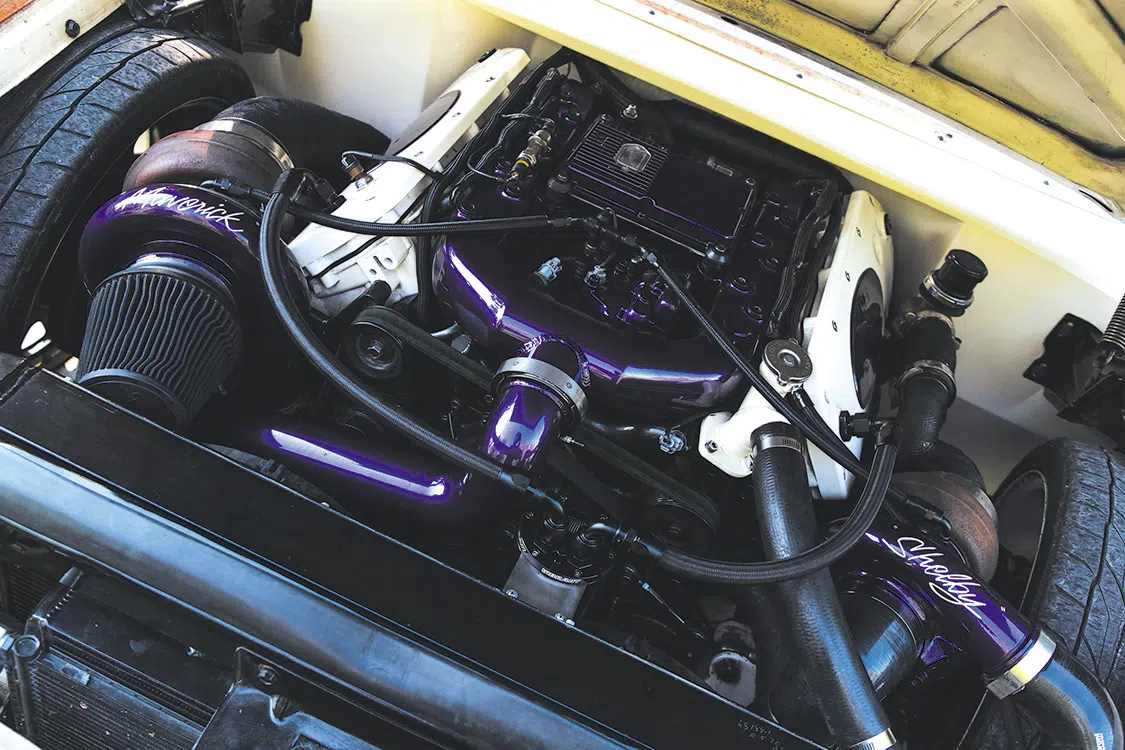
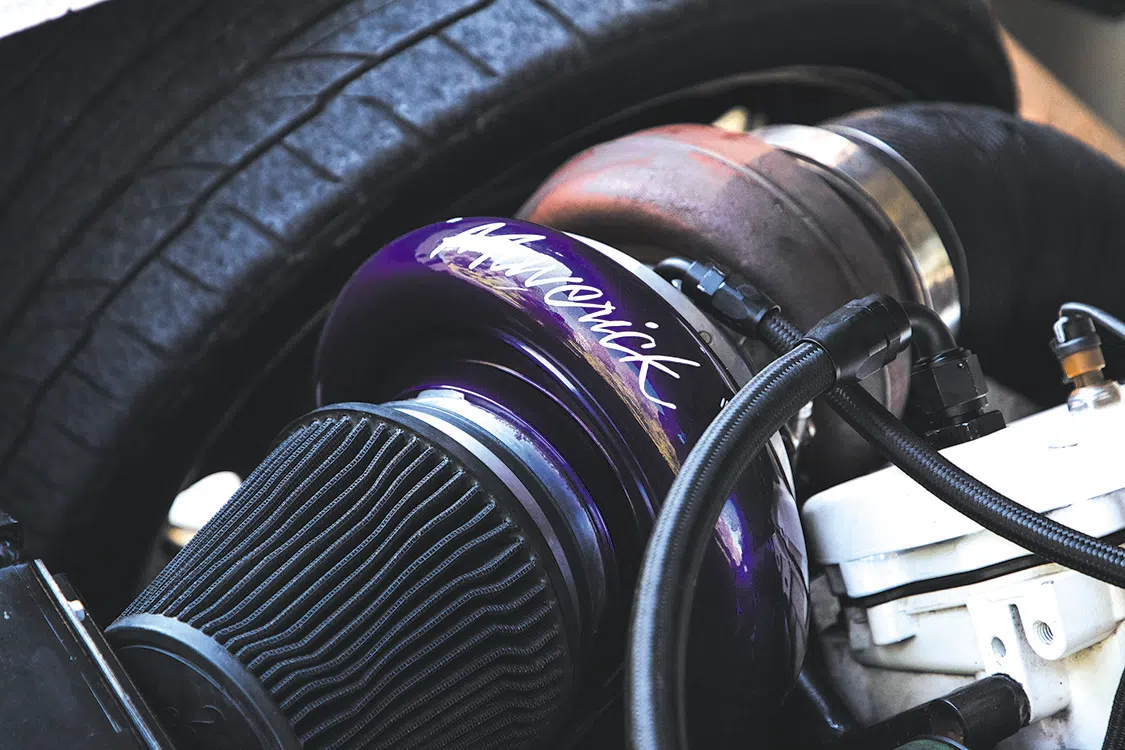
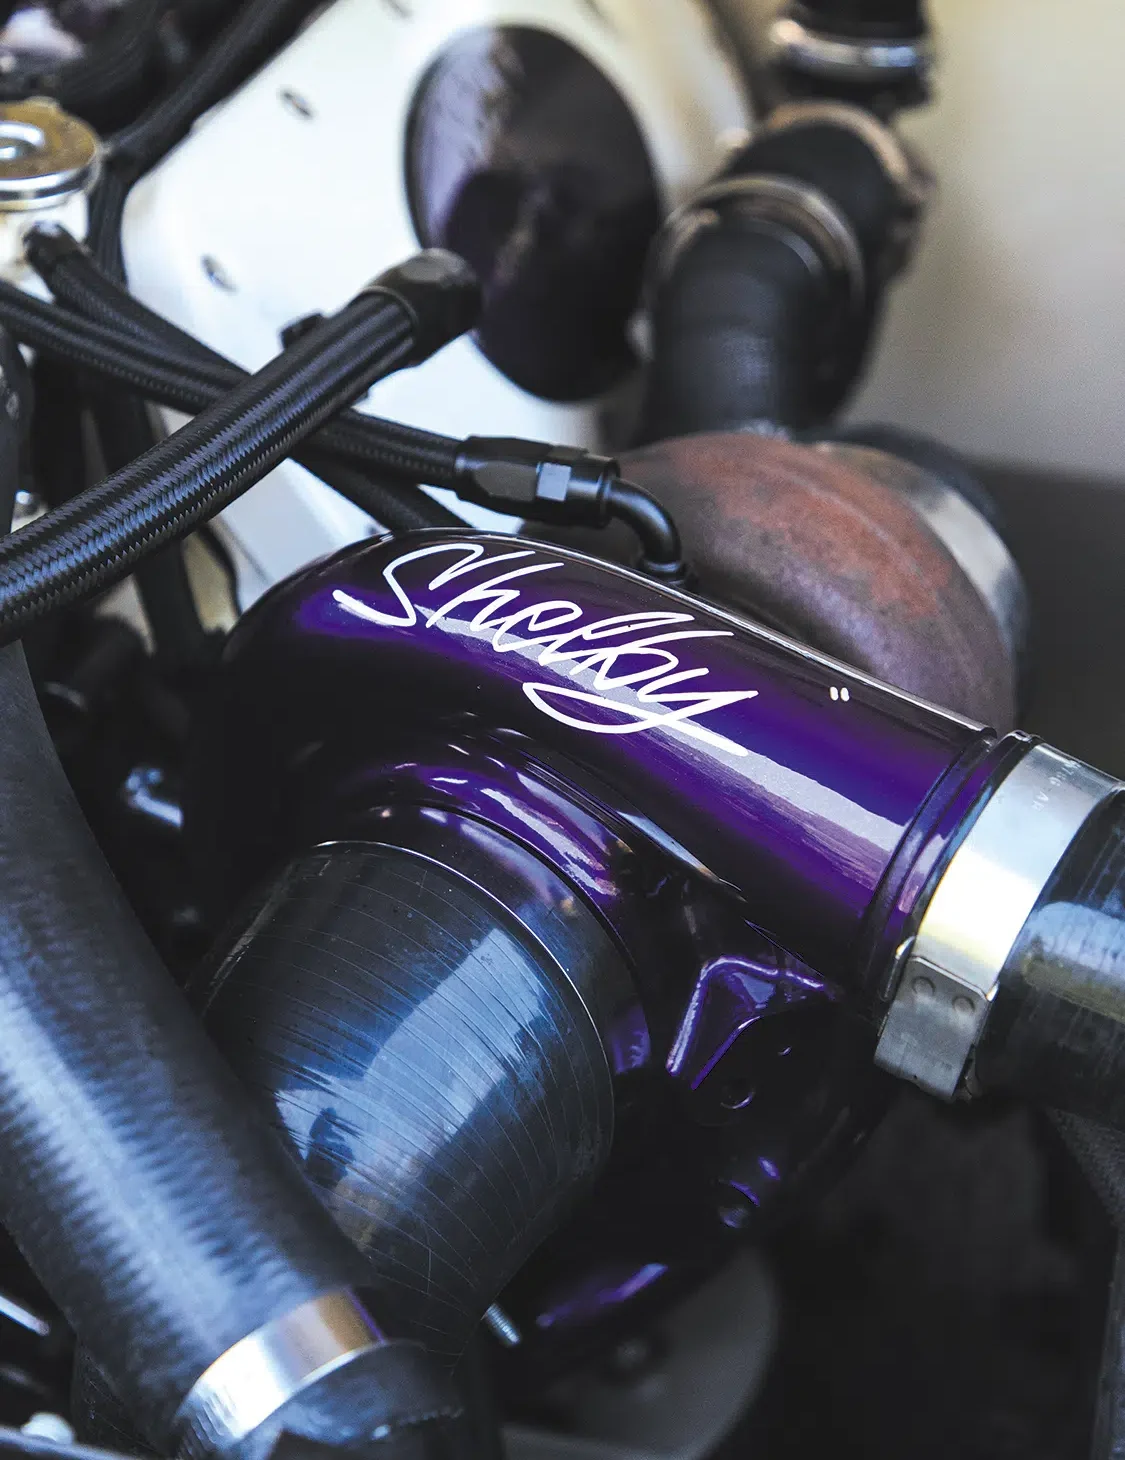
With some help from Kill Devil Diesel (KDD) in Poplar Branch, North Carolina, BJ was able to lock down a 2006 6.0L Ford Powerstroke that was fully loaded with KDD’s own machine work and components. A ton of other performance parts, including two very special additions, were also added to the lineup.
Now, before we get too far ahead of ourselves, Kodie and BJ wanted to make sure that we get one thing clear. The two Borg Warner turbochargers featured on the Powerstroke are in fact a compound turbo setup and not a twin turbo configuration. The difference is notable, as the first turbo in line feeds the other with boosted air in a compound layout instead of the two turbos operating independently in a twin scenario. Mistaking the two, or just assuming that two turbochargers naturally translates to twin turbos is an honest oversight for those not in tune with it all, but a little bit of explanation does go a long way.
A fully built 1997 Dodge NV4500 transmission from SuperStick was ordered and put into place to take full advantage of the 900hp at the rear wheels as well as the 1700 ft-lbs of torque that the Powerstroke produces. That substantial amount of power would soon be a blast to experience once the rest of the wagon project evolved.
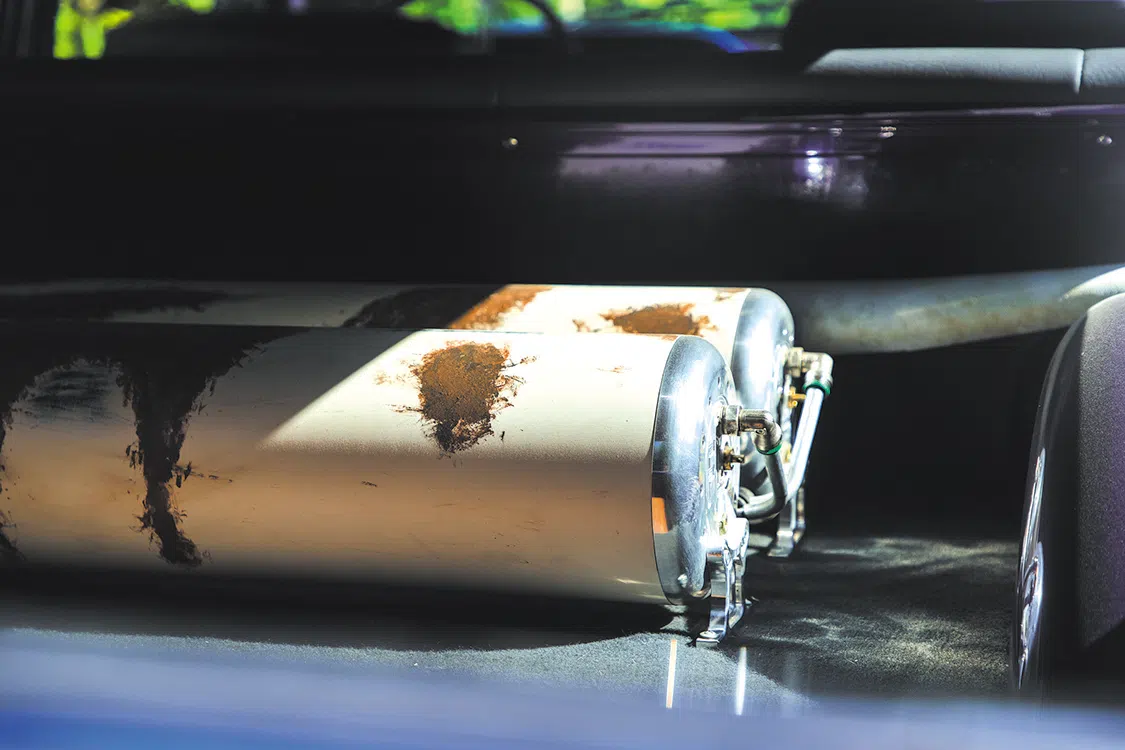
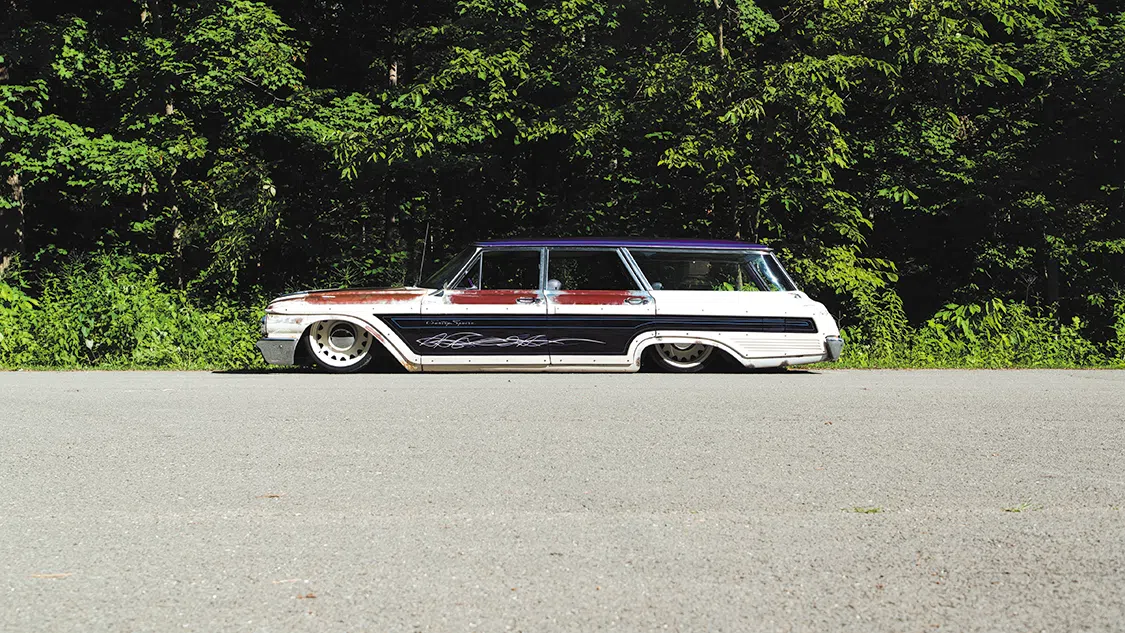
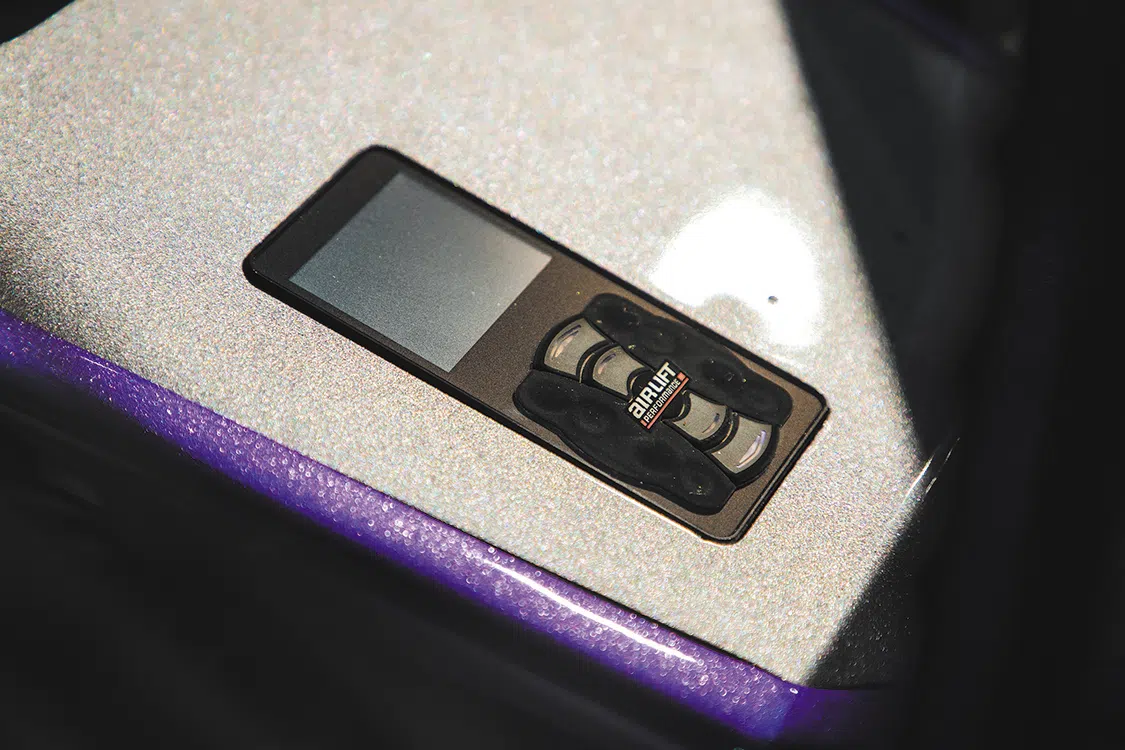
The next phase of the build would be one of the most transformative for the Country Squire. With the expertise that BJ has with custom chassis systems, a full one-off frame was put together for the wagon using 2×3 and 2×4 square tubing throughout. Since BJ’s forte with severely lowered suspension setups is well proven and documented in his previous builds, he was fully motivated to follow suit with this project. A combination of Air Lift air bags, a 3H air management system, and dual Viair 444C compressors were plumbed to create a fully adjustable ride height. QA1 adjustable shocks have been put into place to promote ideal ride quality, and a hand-built IRS system was created to round off the custom chassis highlights. It’s a shame that this chassis is hidden underneath the car, because it really is a work of purpose-built automotive art.
To set off the wagon’s newfound low-slung chassis just right, Kodie and BJ selected a one-off set of 20×9 and 20×11 Detroit Steel Ambassador wheels that were wrapped in Nitto NT555 G2 performance rubber. To bring the car to a controlled halt, PowerStop front and Wilwood rear braking components were bolted up and finished off with steel braided lines.
Natural patina is a sacred thing among the classic vehicle crowd. It’s almost like embracing the ‘wisdom’ that gray hair brings. When the wagon found its way to Kodie and BJ, it had quite a bit of rust along the top portions of the doors and the entire hood that they weren’t interested in painting over. These worn portions were encapsulated in layers of clear coat to preserve the patina look while ensuring it doesn’t turn into any real damage to the metal down the road.
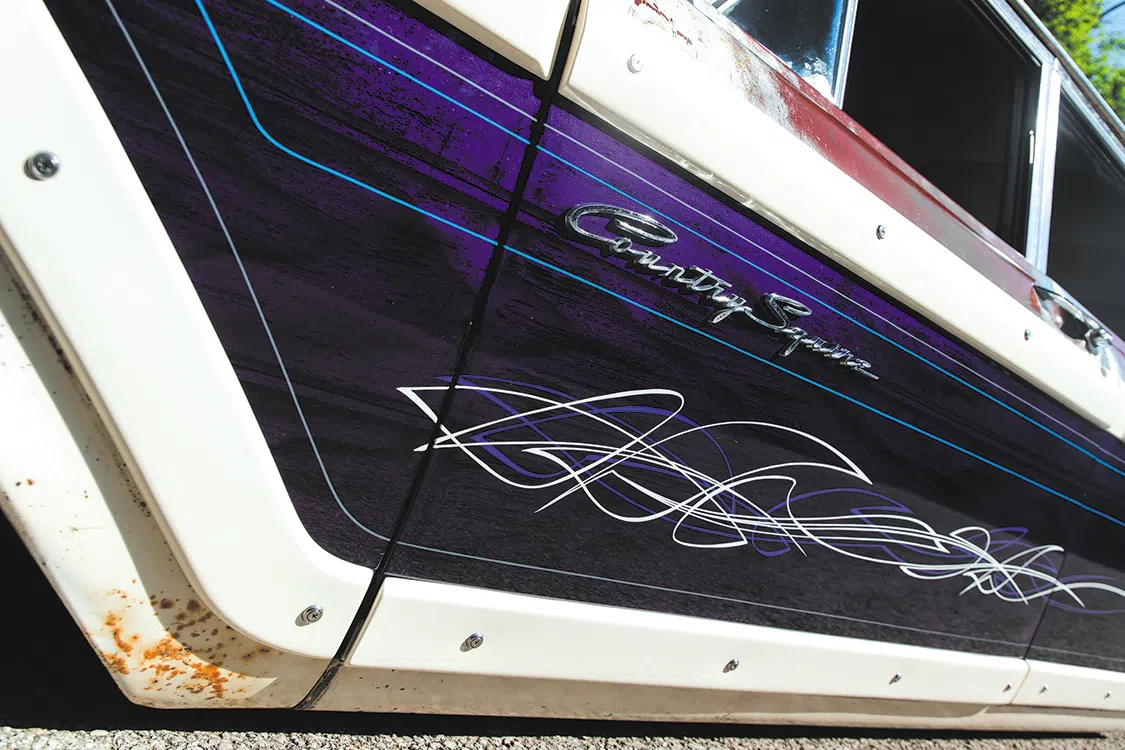
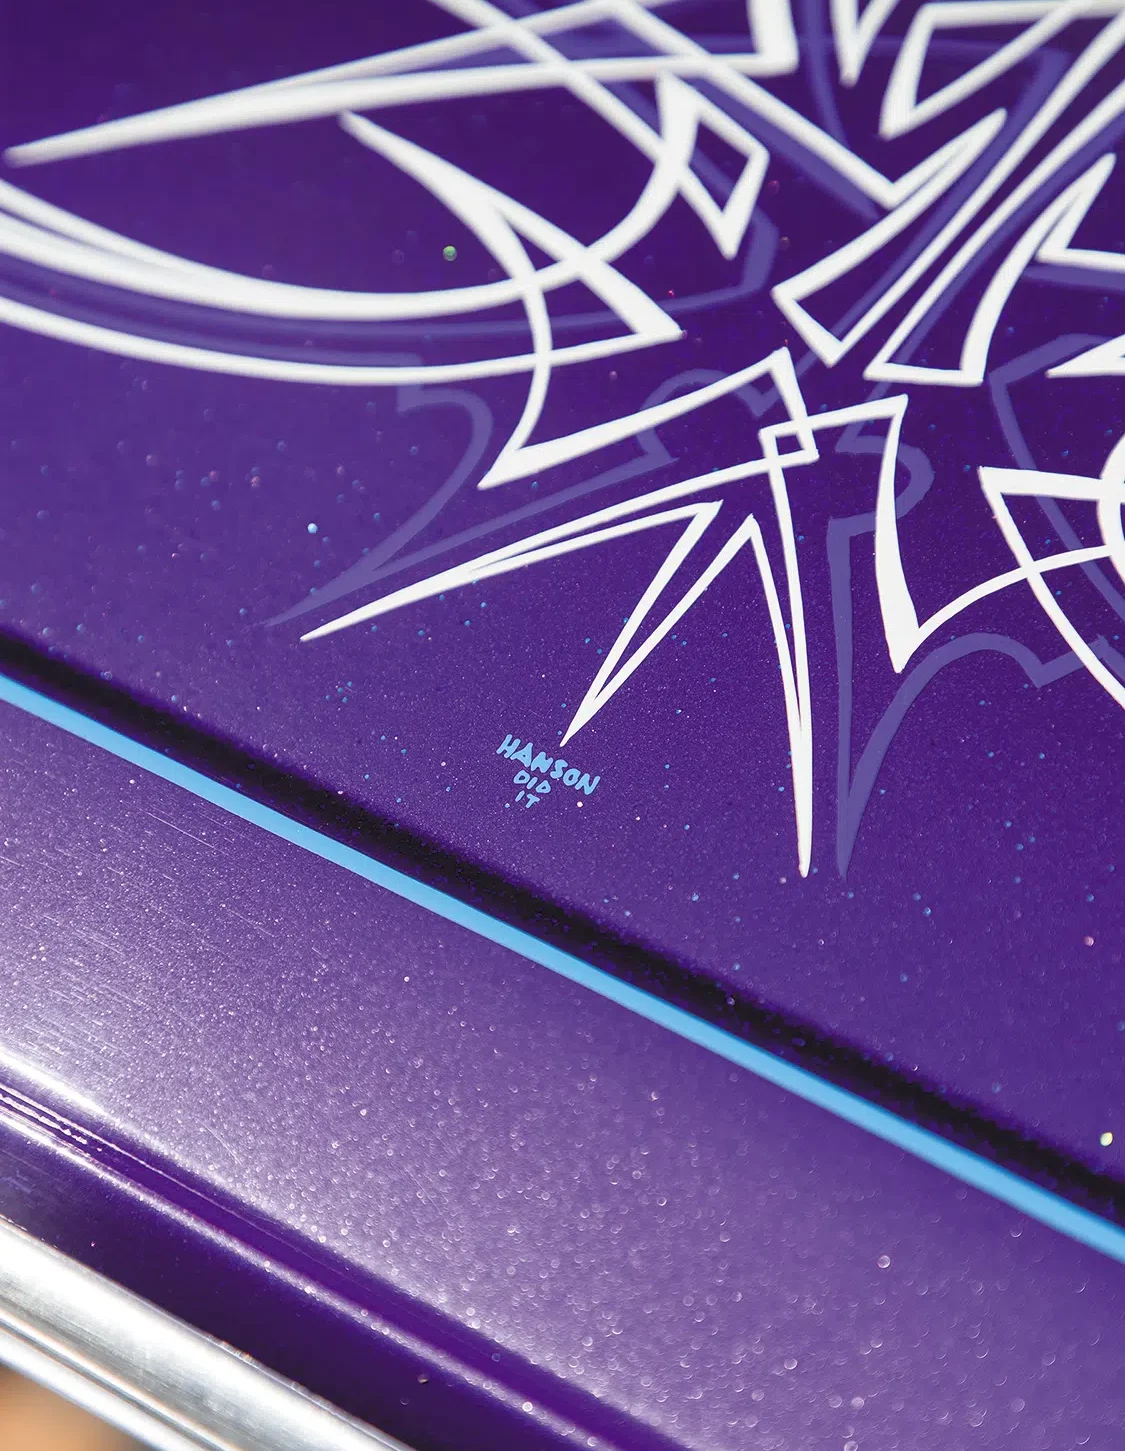
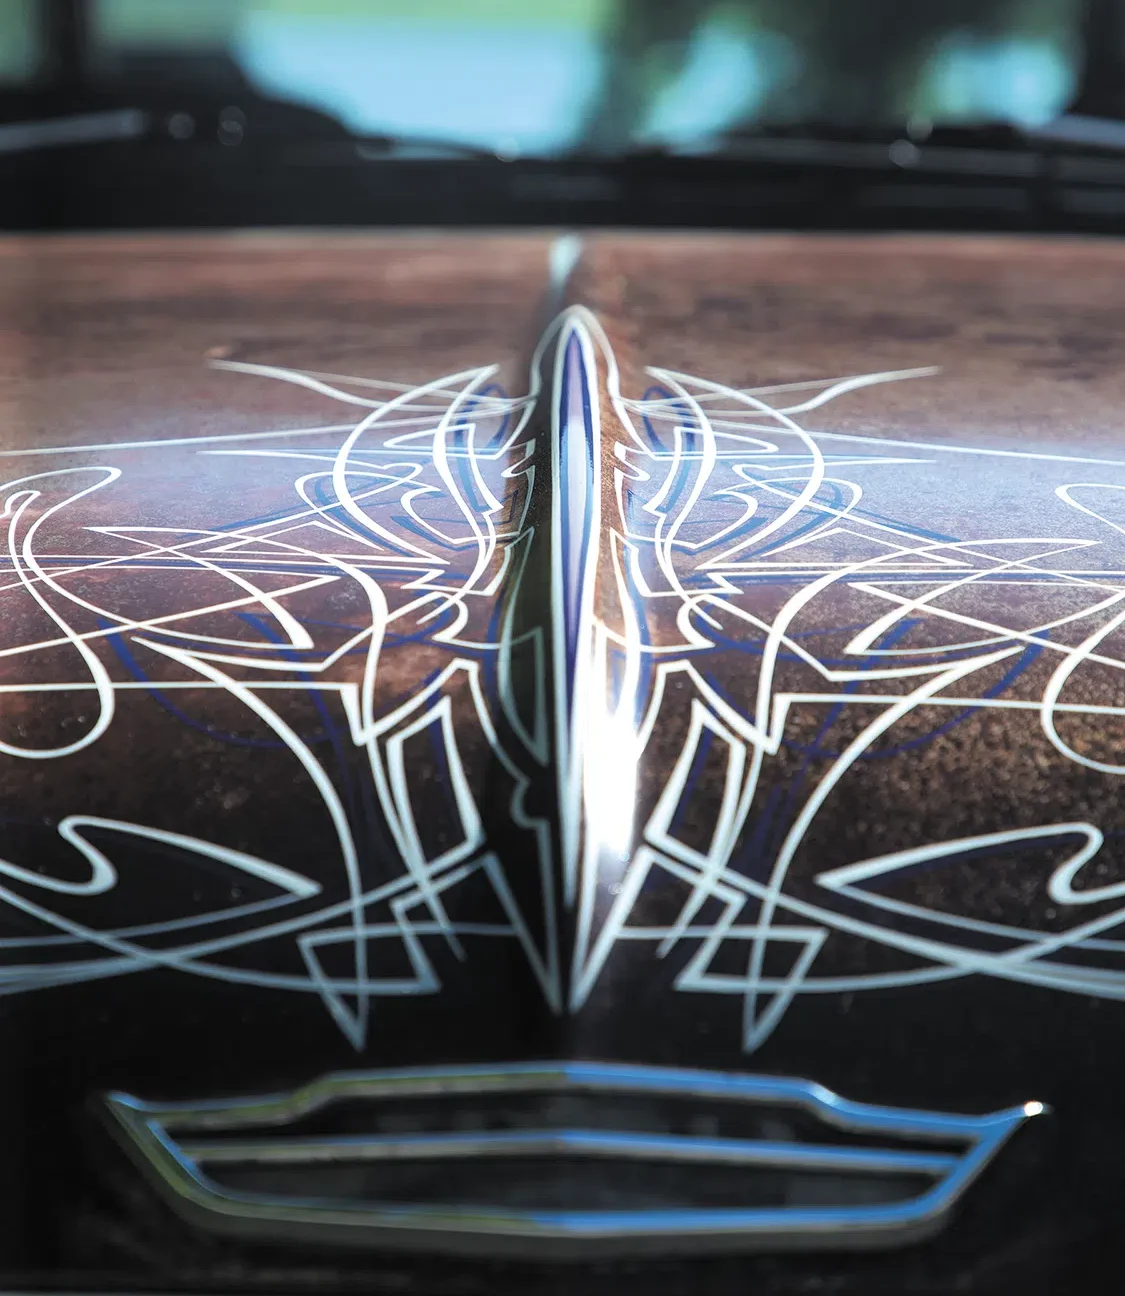
Custom paint was still as important in this build as saving the patina was, so Detroit Chris “The Mad Professor,” Mike Kluczynski, and James Rivers helped out by applying the custom candy paint that BJ mixed to the roof and along both sides of the car. Shannon Best at Best Built Customs applied airbrushed wood grain graphics to the sides, and Todd Hanson at Hanson Graphix then stepped in to pinstripe the hell out of the wagon to add some old school flavor.
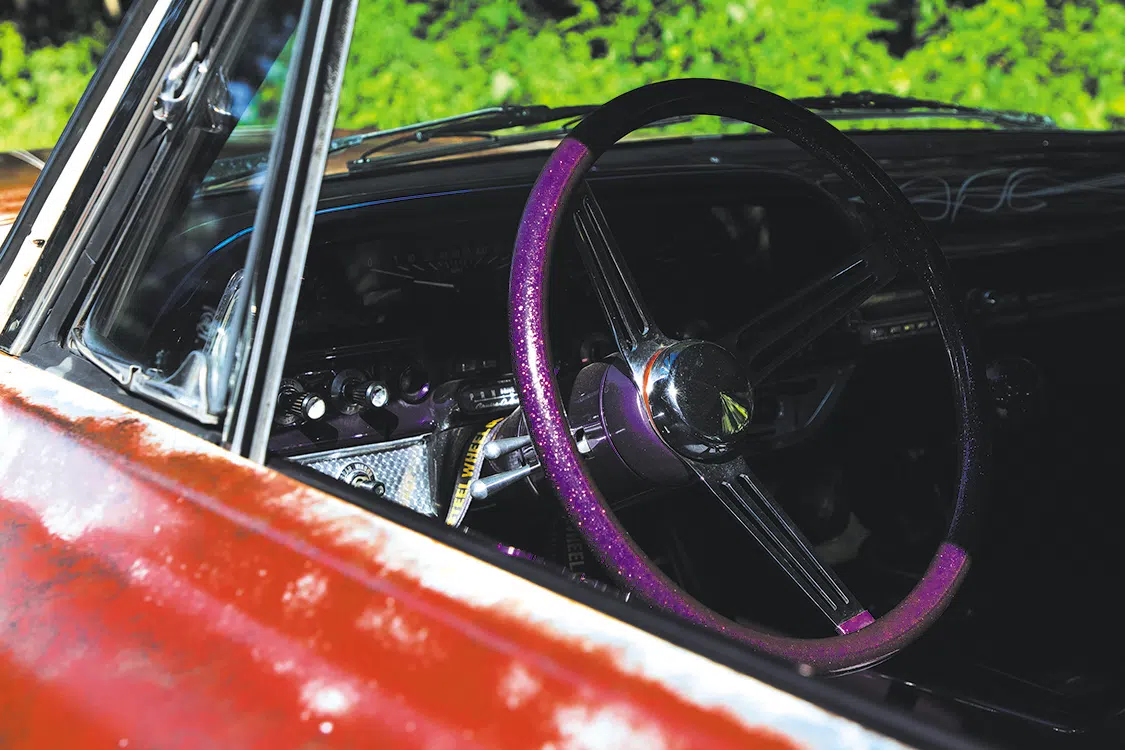
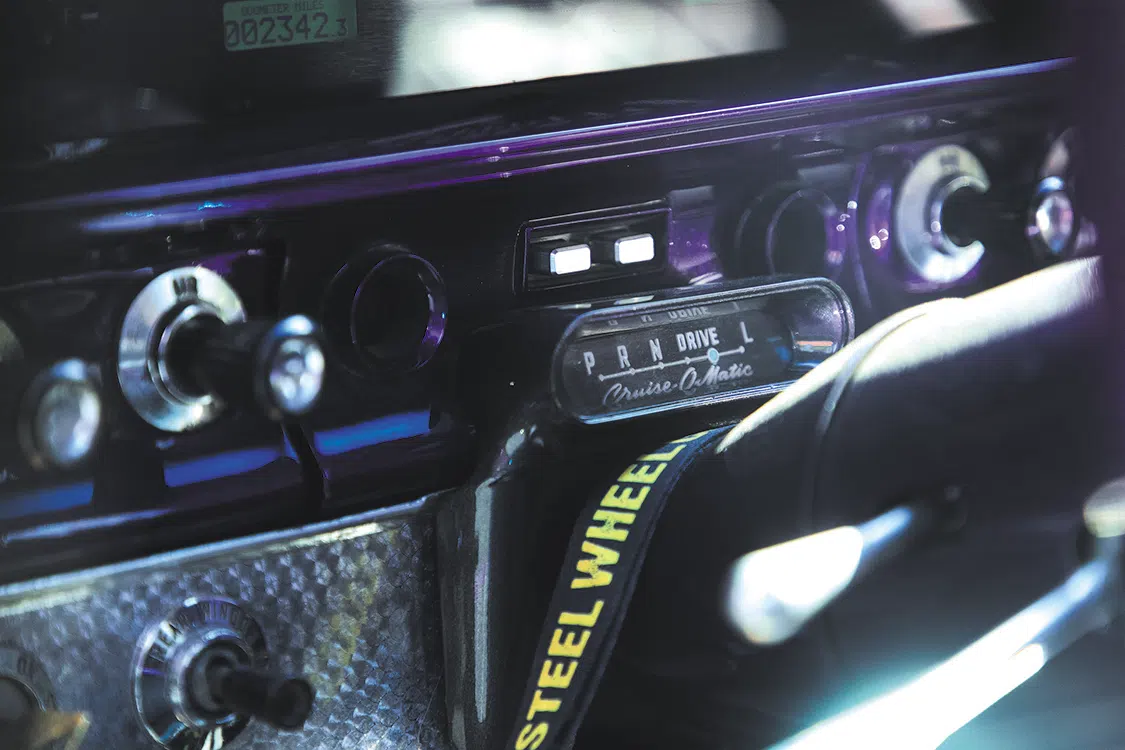
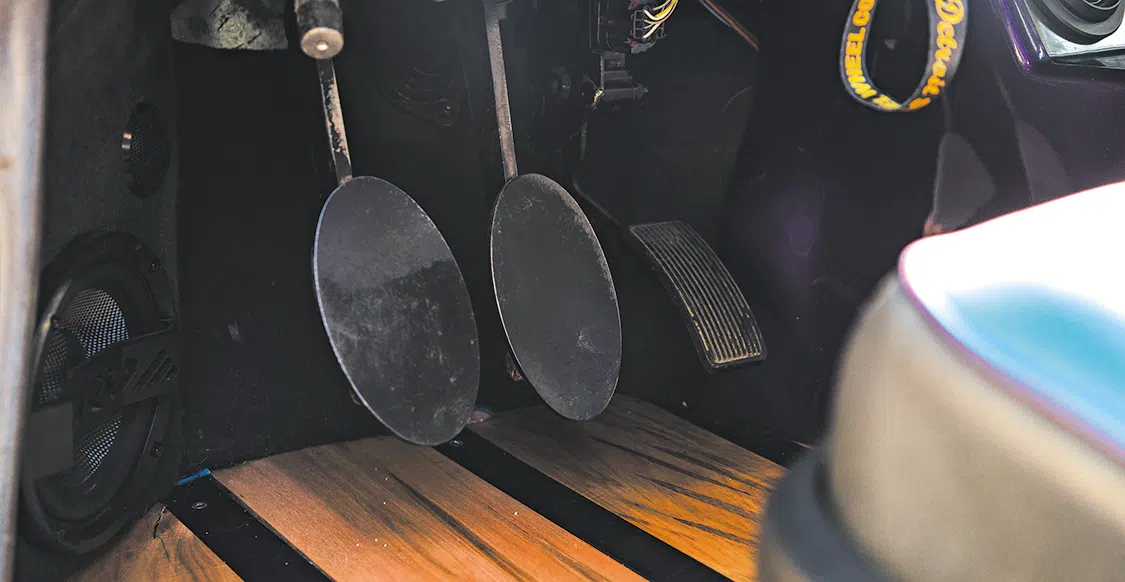
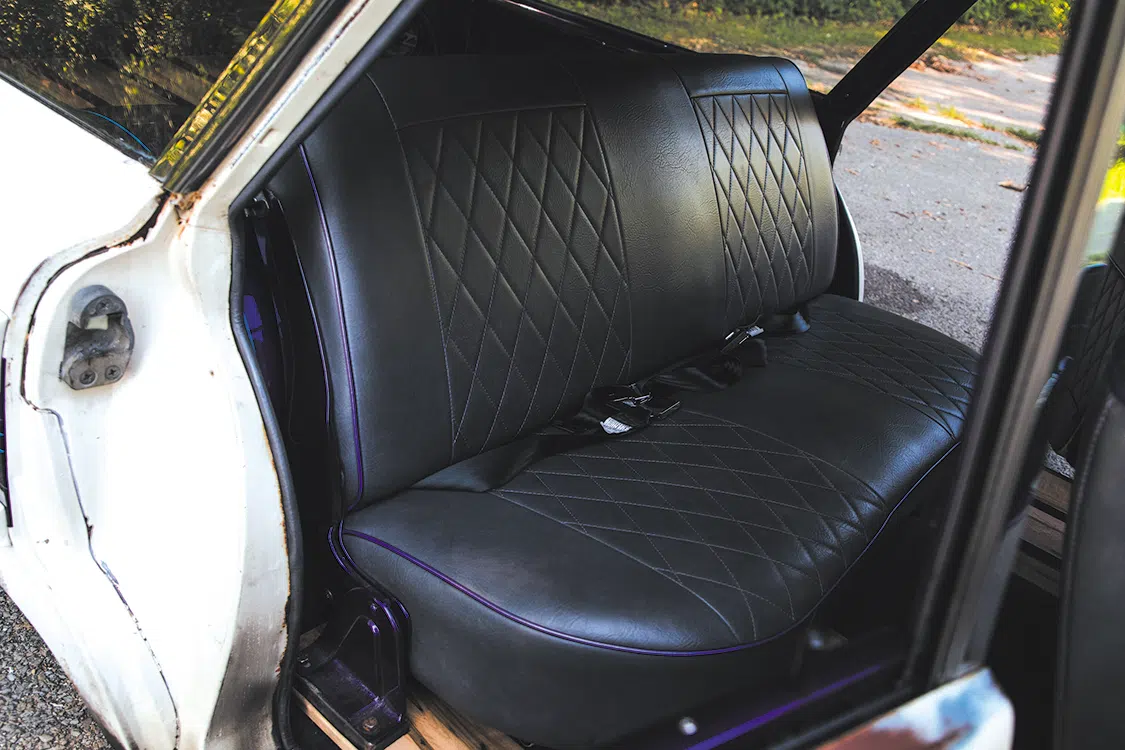
Don Steinman joined the project by fabricating a custom floor pan in order to lay down wood flooring inside of the wagon—definitely a cool alternative to rolling out replacement carpet. Pete’s Auto Upholstery and Trim in Taylor, MI reupholstered a set of 2006 Lincoln MKZ bucket seats, along with a factory rear bench, center console and door panels too. The dash was painted and pinstriped to match the wagon’s exterior, a fresh set of Dakota Digital gauges were wired in, and a Mooneyes steering wheel was mounted to fully upgrade the entire command center.
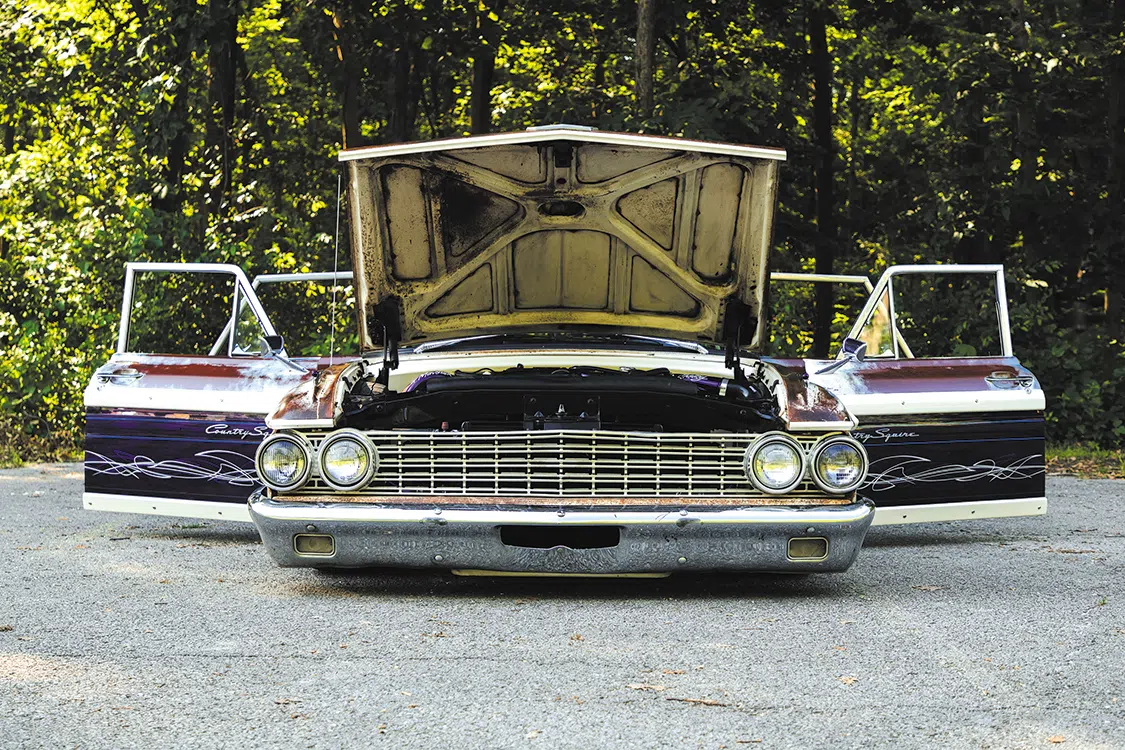
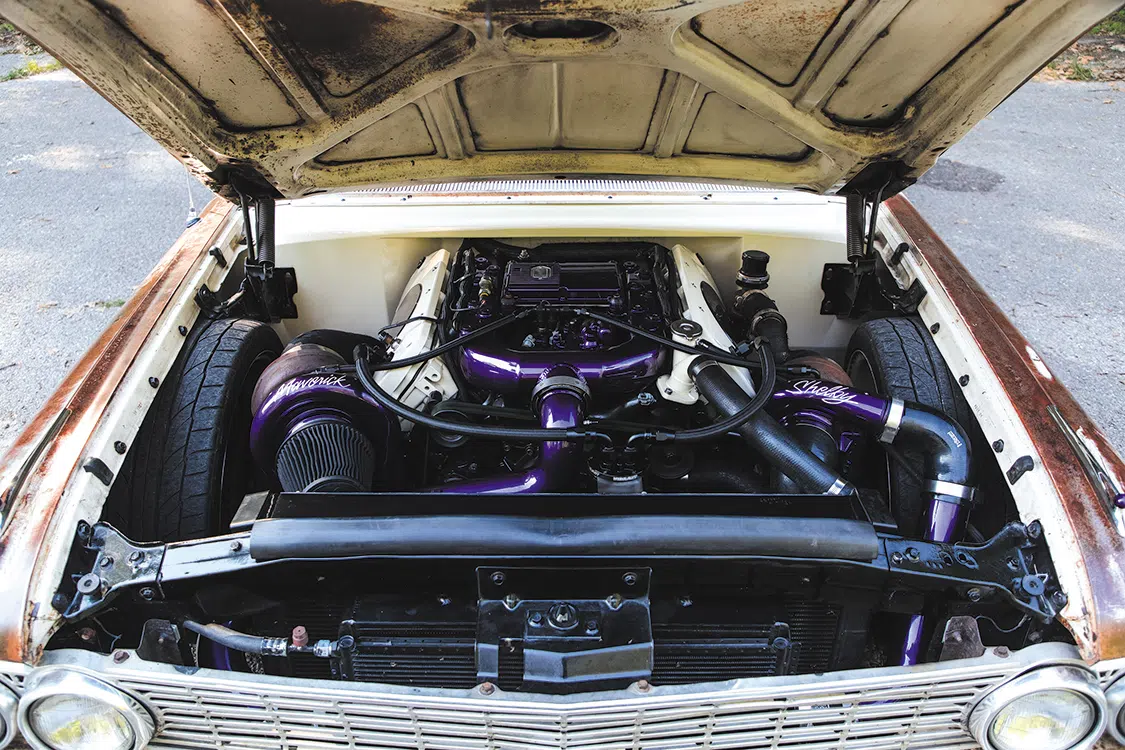
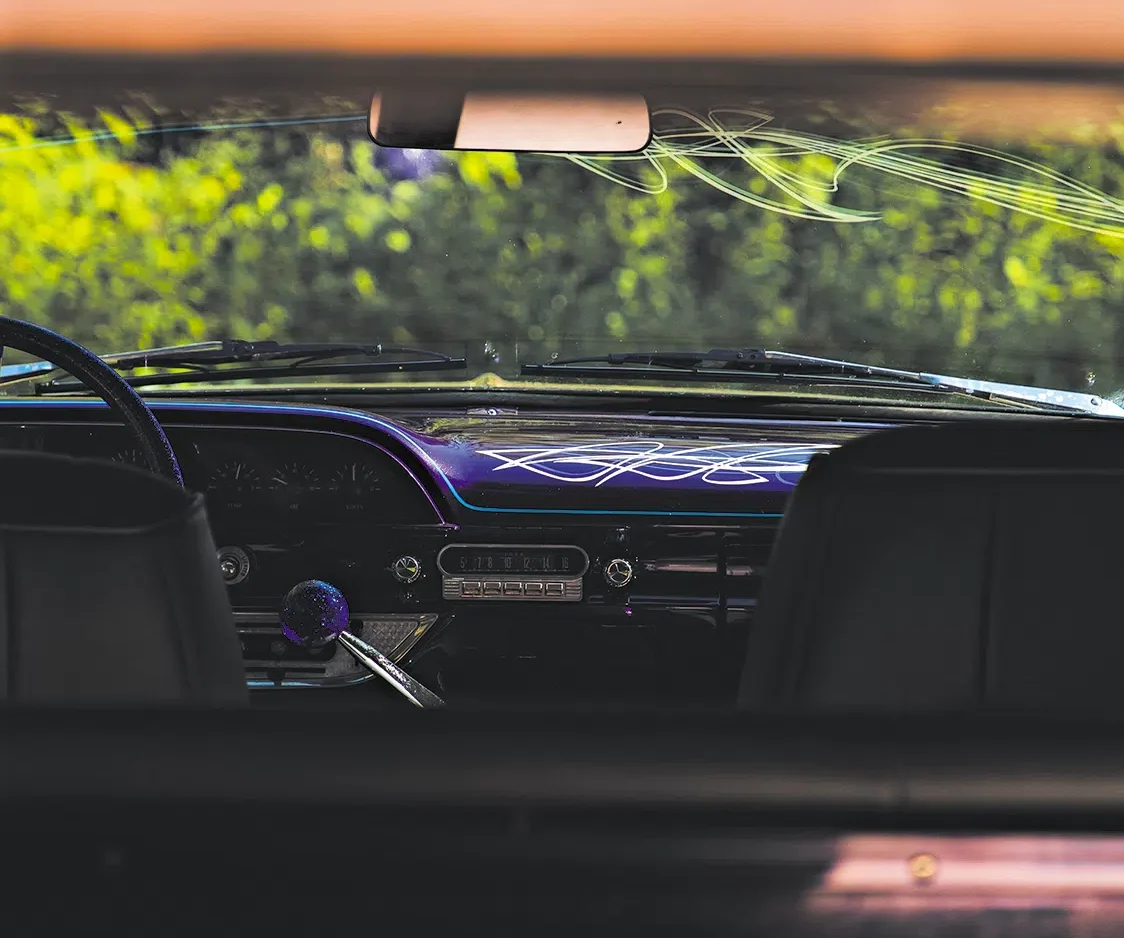
Kodie and BJ started ripping into the wagon at the start of 2019 and finished it up at the tail end of 2021—not bad considering the struggle of getting parts in hand during this prime time portion of the pandemic lockdown. Every penny and minute spent whipping the car into shape has been well worth the effort, since the Galaxie is now a means for creating unforgettable memories together with their children. A wagon by nature has always been thought of as a vessel for promoting wholesome family values since their release decades ago. This is what motivated BJ to grab one for his wife and kids, but of course he couldn’t imagine doing it any differently than how it came out.
Owner
Kodie Paxton
Temperance, MI
Engine & Drivetrain
Chassis & Suspension
Wheels, Tires & Brakes
Body & Paint
Interior & Stereo